


15
Switch Bracket
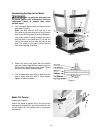
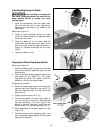
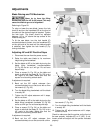
Referring to Figure 11:
1. Insert two M6x12 pan head screws (A) through
the back of the switch bracket mounting holes
(B). Place M6 washers (C) and square nuts (D)
on the threaded ends of the screws.
2. Mount the switchbox (C) onto the rail (F) such
that the square nuts (A) slide into the
groove (E) on the lower back side of the rail.
Tighten screws with a cross point screwdriver.
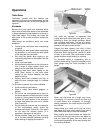
Extension Wing Adjustment
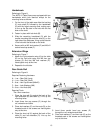
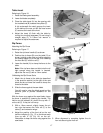
Referring to Figure 12:
1. Level the left extension wing (B) to the saw
table (C) by using a straight edge (A). Start by
tightening the three screws (12mm wrench
required) under the extension wing (B) that
secures it to the table (C). Tighten these just
enough to hold the wing in place but loose
enough to change the wing height by tapping
on it.
2. Use the straight edge (A) to level the inside
edge of the extension wing (B) to the table (C).
Tighten the three screws that hold the wings
(B) to the table (C).
3. Next bring the straight edge out to the highest
point on the outside edge of the wing at the
front (A) of the saw. You may have to grab the
outside edge of the extension wing and pull up
or push down to level. Once the highest point
at the front of the saw is located and leveled,
tighten the hardware holding the extension
wing to the front rail.
4. Move the straight edge (D) to the rear of the
same extension wing and repeat this process.
5. Repeat steps 1 – 4 for the right extension wing.
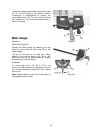
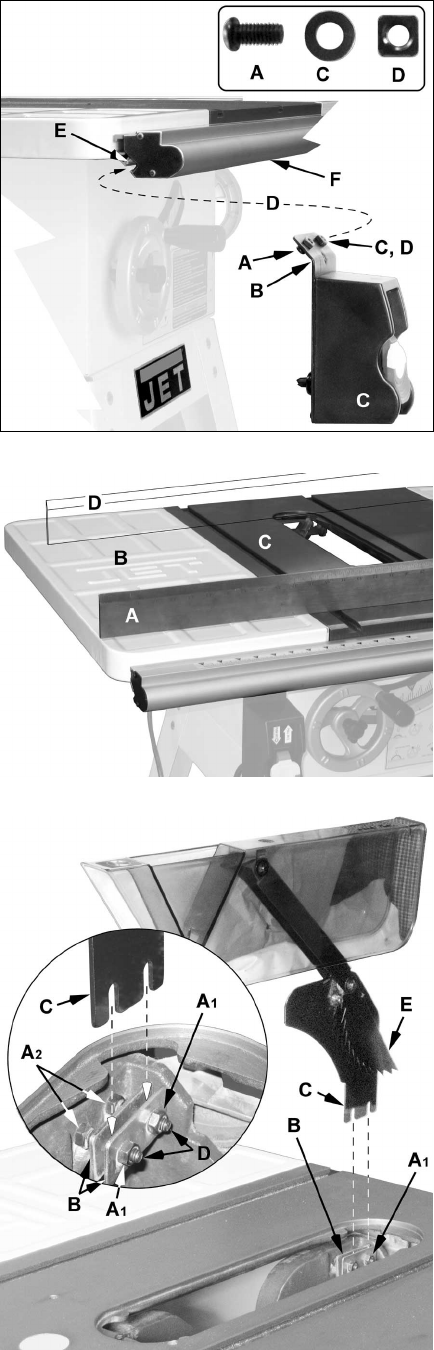
Blade Guard and Splitter
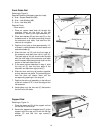
Referring to Figure 13:
1. Through the saw table opening on top, locate
two hex nuts (A
1
) that secure two retaining
plates (B) and loosen with a 10mm wrench.
2. Slide the tab of the blade guard splitter (C)
between the two retaining plates (B) and onto
the threaded mounting studs (D).
Note: The anti-kickback pawls (E) should be
held back when performing this step.
3. Tighten the hex nuts (A
1
) enough to hold the
tab (C) in place but loose enough to allow for
adjustment. You will need to install the blade
before the final adjustment.
Figure 11
Figure 12
Figure 13