


9
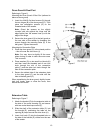
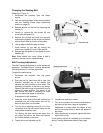
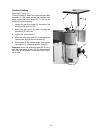
Referring to Figure 3:
4. The sanding platen (A) is presently in the
horizontal position. Pull lock handle (B) forward
to unlock the platen assembly.
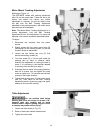
5. Tilt sanding platen to the vertical position (C),
which will look like D in Fig. 4; then push the
lock handle (B) to lock the platen assembly in
place.
Note: Do not turn the lock handle. Turning or
rotating the lock handle will change the tension
of the locking assembly. This may cause the
locking assembly not to work, making it
necessary for adjustment before using the
machine.
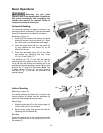
Sanding Belt Installation
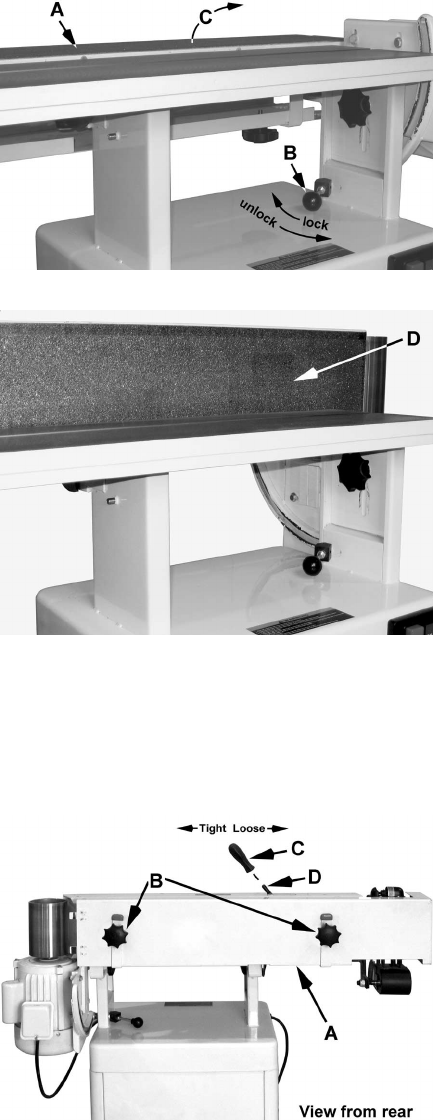
Referring to Figure 5:
1. From the rear of the sander, remove the belt
guard (A) by unscrewing two lock knobs (B).
Take out the sanding belt and removable fence
from behind the belt guard.
2. Place the handle (C) on belt tensioning
lever (D). Remove the tension from the
mechanism by moving the handle (C) to the
Loose position.
3. Place belt on both rollers so that the edge of
the belt is even with the edge of the rollers.
Note: Make sure that direction arrow on belt
matches the direction indicator on the top of
the platten.
4. Tighten the belt by moving the tension arm
handle (C) to the Tight position. Rotate the belt
by hand in the direction indicated by the arrow
on top of the platten. If the belt tracking needs
adjustment, see Belt Tracking Adjustment on
page 13.
Figure 3
Figure 4
Figure 5