


– 16 –
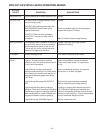
SYMPTOM CHECK
No LED’s light when the power switch is turned on. 1. Check the input power to be sure it is on.
2. Check the power line fuses and machine
connection.
3. Replace line switch.
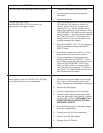
TORCH WILL NOT LIGHT 1. Low air pressure results in a "no start" condition.
The “MACHINE ON” LED is lit, but there is no "Air Pressure" LED must be lit when air is
response when the trigger is pulled. flowing. Set the machine in purge mode.
The air will turn on. Set the regulator on the
back of the machine for 60 psi minimum. If the
"AIR PRESSURE" LED does not light, raise the
pressure slightly. If the inlet pressure is greater
than 75 psi and the LED is not lit when air is
flowing, there is a leak or the air filters in the
regulator assembly are clogged.
2. Check the "SAFETY" LED. If it is lit, check the
torch consumables and press the "SAFETY
RESET" button.
3. Check the air supply to the machine. If the air
does not flow, the machine will not start.
4. Check the operation of the air solenoid by
switching the machine to "PURGE". The air
should begin to flow and if the pressure is suffi
cient, the "AIR PRESSURE" LED will light.
Return to "RUN" mode. If air does not flow,
check the solenoid by applying 115 VAC to its
input leads. If it is bad, replace the solenoid, or
else replace the control board.
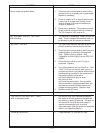
The air begins to flow, the “OUTPUT ON” LED lights 1. Check the torch consumables to be sure they
for a brief period, but no arc is established. are in tight, not dirty or greasy, and in good
shape. Replace the consumables if necessary.
2. Check that CR2 engages.
3. Check for high frequency at the spark gap.
4. Check the high frequency spark gap located
inside the right panel of the machine. It should
be set at .060” (1.52mm)
DISCONNECT ALL
POWER BEFORE ADJUSTING THE HIGH
FREQUENCY CIRCUIT.
5. Blow off the components in the upper compart-
ment with compressed air.
6. Check pilot to 391 for 2 ohm resistance.
7. Check 2 ohm 300 watt resistor.
8. Replace Control PC Board.