


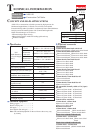
P 5/ 10
Repair
[3] ASSEMBLING/ DISASSEMBLING
[3]-2. Driver, Cylinder stay, Valve seat
[3]-3. Magazine section
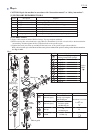
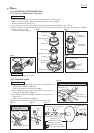
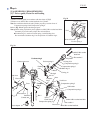
(1) Remove Top cap complete in accordance with mentioned in previous page.
(2) Remove O ring 6 (Refer to Fig. 3) in advance to prevent missing. (Fig. 6)
Remove Gasket from Housing set.
(3) Tap Housing set from Top cap complete setting side. Parts illustrated in Fig. 7 can be removed.
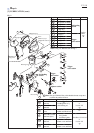
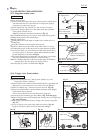
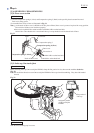
(4) Insert Slotted screwdriver between the protrusion of Cylinder and Cylinder stay, then lever up Cylinder stay. (Fig. 8)
(5) Remove Valve seat with
Slotted screwdriver. (Fig. 9)
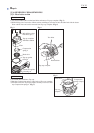
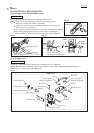
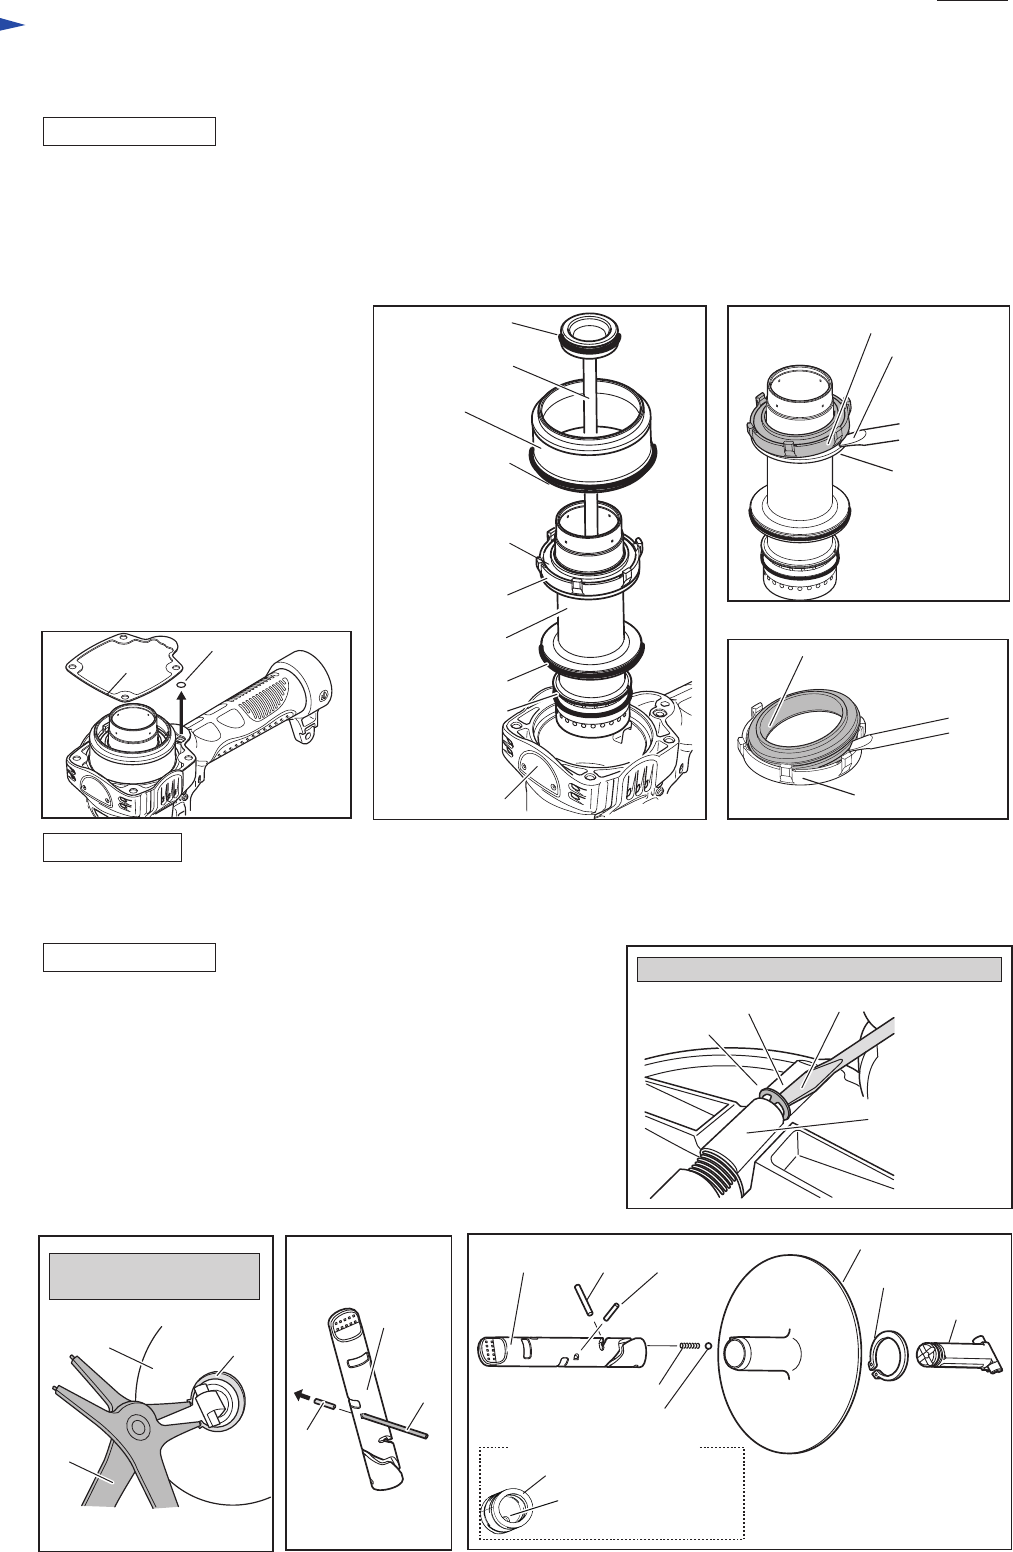
(1) Remove Stop ring E-3 from Pin 4 on the reverse of Magazine ass’y
using Slotted screwdriver. (Fig. 10)
Pin 4 can be pulled out as illustrated in Fig. 2.
(2) Remove Retaining ring S-25 from Adjust shaft in the reverse of
Change plate using 1R291. (Fig. 11)
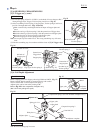
(3) In a manner as illustrated in Fig. 12, push Pins 2.5 and 3 out of
Adjust sleeve.
Adjust sleeve can be removed. (Fig. 13)
Note: Do not miss Steel ball 3.5 that drops off in the above step.
Take the disassembling step in reverse.
Viewed from the reverse of Magazine ass’y
DISASSEMBLING
Fig. 6
Fig. 10
Viewed from the reverse
of Change plate
Fig. 11 Fig. 12 Fig. 13
Fig. 7 Fig. 8
Fig. 9
DISASSEMBLING
ASSEMBLING
Housing set
O ring 26
O ring 67
O ring 53
Valve seat
Cylinder stay
Cylinder
Head valve guide
Slotted
screwdriver
Cylinder stay
Cylinder stay
Protrusion
of Cylinder
O ring 6
Gasket
O ring 39
Slotted screwdriver
Valve seat
Stop ring E-3
Pin 4
1R291
hinge portion
of Magazine cap
Change plate
Retaining
ring S-25
1R267
Pin 2.5
Adjust
sleeve
Pin 3
Compression spring 2
Steel ball 3.5
Pin 2.5
Pin 3
Adjust shaft
Adjust sleeve
Change plate
Driver
Adjust sleeve viewed
from the round end
Hole for receiving
Compression spring 2