


P 9/ 10
Repair
[3] ASSEMBLING/ DISASSEMBLING
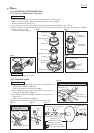
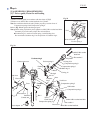
[3]-7. Driver guide, Piston for nail loading
(1) Remove Driver guide in accordance with the clause of [3]-3.
(2) Remove two M5x35 Hex socket head bolts for Cylinder.
Note: Be careful that their bolts and Cylinder pop out by reaction force of
Compression spring 6 and Compression spring 9.
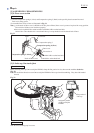
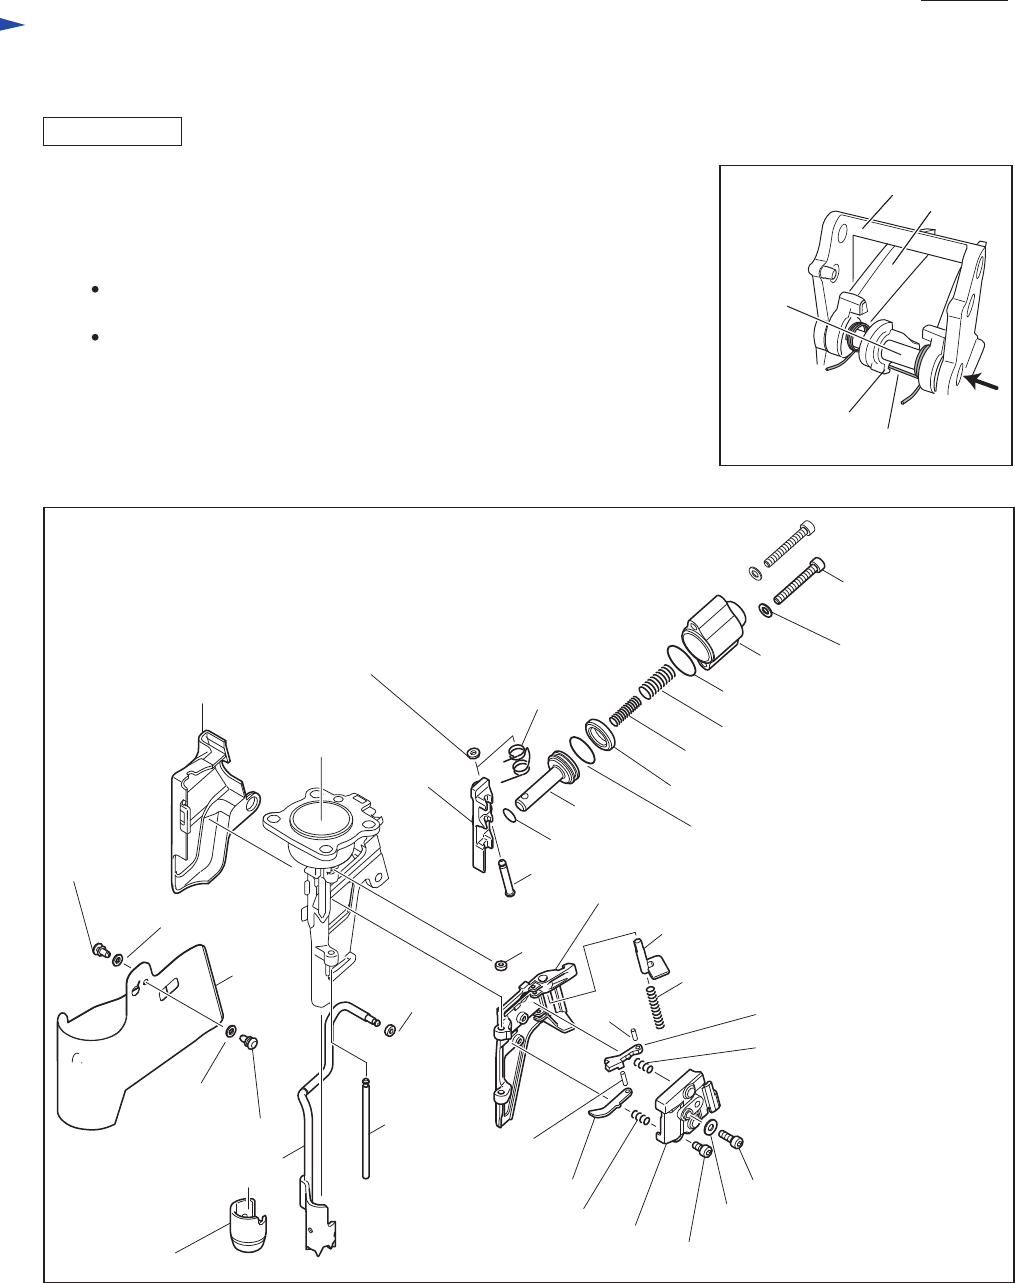
Refer to Fig. 29 and replace the damaged parts.
Note: When setting Cylinder in place, tighten two M5x35 Hex socket head bolts
alternately to provide same torques. Do not lean Piston.
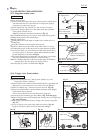
Urethane ring 4 is used on Torsion spring 4 with Feeding claw.
Do not mistake Urethane ring 3 for the position of Urethane ring 4.
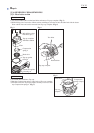
Trigger base
Trigger
Hook of Lever
Pin 3
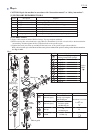
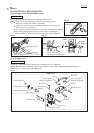
Fig. 29
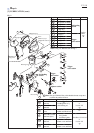
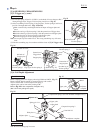
Fig. 30
REPLACING
Torsion spring 4
O ring 9
Piston
O ring 14
Rubber ring 13
Lock lever
Compression spring 6
Compression spring 9
O ring 22.4
Cylinder
Flat washer 5
M5x35 Hex socket
head bolt
Door
Compression spring 5
Compression spring 4
Nail holder
Pin 2.5
Pin 2.5
Check claw
Compression spring 5
Door cover
M4x8 Hex socket head boltNose adapter
Contact arm
Flat washer 4
M4x14 Hex socket head bolt
Urethane ring 4
Urethane
ring 3
Urethane
ring 3
Feeding
claw
Pin 4.5
Torsion spring 9
Contact arm cover
Cover
Flat washer 4
Flat washer 4
Push rivet
Push rivet
Pin 4