


OM-221 694 Page 21
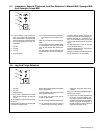
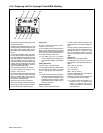
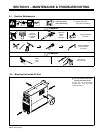
4-11. Preparing Unit For MIG Welding
To select MIG welding process, proceed as
follows:
Follow safety precautions according to
Section 1.
Prepare unit according Section 3.
Using a cable with a proper adapter, con-
nect gun to the MIG gun connector.
Connect work clamp cable to the WORK
connector.
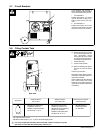
If using a water-cooled gun, connect input
coolant hose to blue quick connect fitting
and return coolant hose to red quick con-
nect fitting.
Check coolant level after attaching torch
coolant hoses and running cooler. Be sure
coolant appears in upper half of indicator.
Add coolant if necessary (see Section 3-8).
If a remote control is desired, connect it to
the Remote Control receptacle.
Connect gas hose to gas connector on rear
of unit.
Turn unit On.
Allow time for unit to complete its start up
cycle.
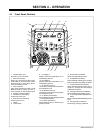
Set MIG welding process using P3 push
button.
Purge air from gun gas hose using P8 push
button (see Section 4-8).
5
6
2 3
1
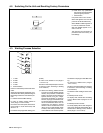
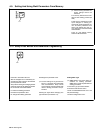
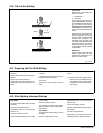
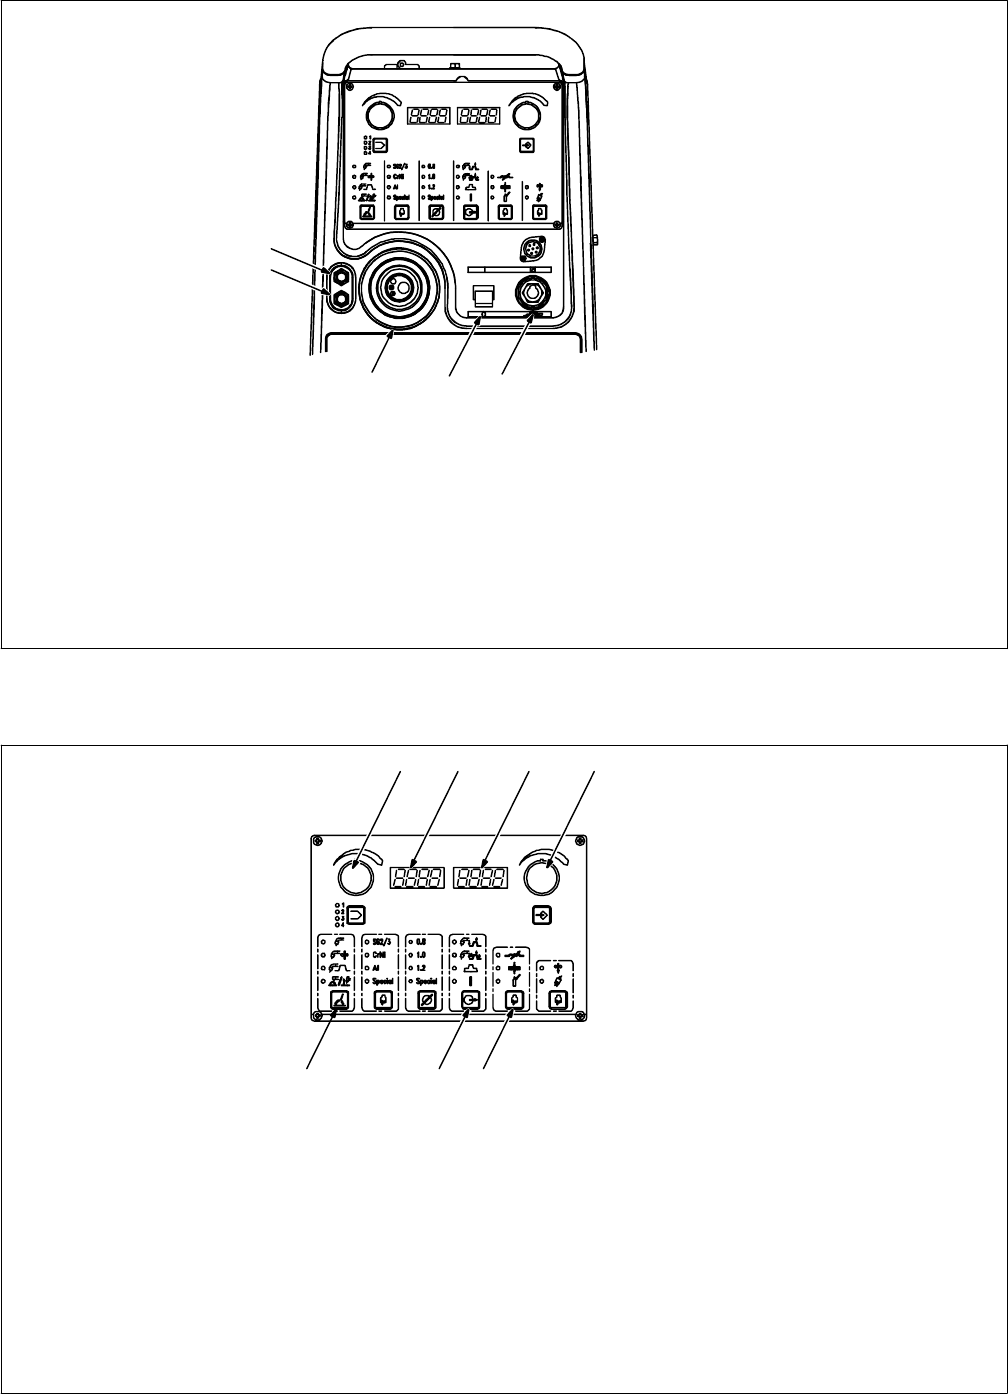
4-12. Selecting Manual MIG Welding
Set Manual MIG welding process using P3 push button.
In Manual MIG mode, the operator may need to adjust main welding
parameters for specific arc characteristics. Wire feed speed and arc
voltage will appear on D1 and D2.
D1 value is default voltage setting of 18.5 V (range is 10.0 V to 50.0
V).
Use E1 to change voltage.
D2 value is default wire feed speed setting of 5.0 m/min (range is 1.0
m/min to 20.0 m/min).
Use E2 to change wire feed speed.
Select trigger mode using P6 push button (see Section 4-6).
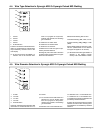
Setting Inductance
Press P7 until L17 LED illuminates.
L17 ON selects Inductance. Default setting is 100% (range is 1% to
200%). D1 and D2 return to main display after several seconds.
. Higher inductance setting produces a softer weld puddle and
less spatter, but arc starts may be more difficult. Lower induc-
tance setting produces a stiffer weld puddle and more spatter,
but arc starts may be easier.
P3 P6 P7
E1 D1 D2 E2