


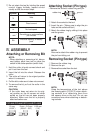
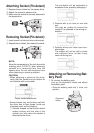
-
13
-
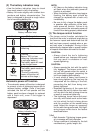
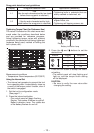
Snug point detection level guidelines
Display Snug point detection level Applications (reference)
L1
Low
(Use for work characterized by low loads
before the snug point is reached.)
•
Tightening bolts in materials that are
easily cracked or deformed, etc.
L
2
High
(Use for work characterized by high
loads before the snug point is reached.)
•
Tightening bolts in materials with mis-
aligned holes, etc.
•
Tightening self-tapping screws, etc.
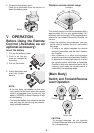
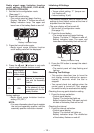
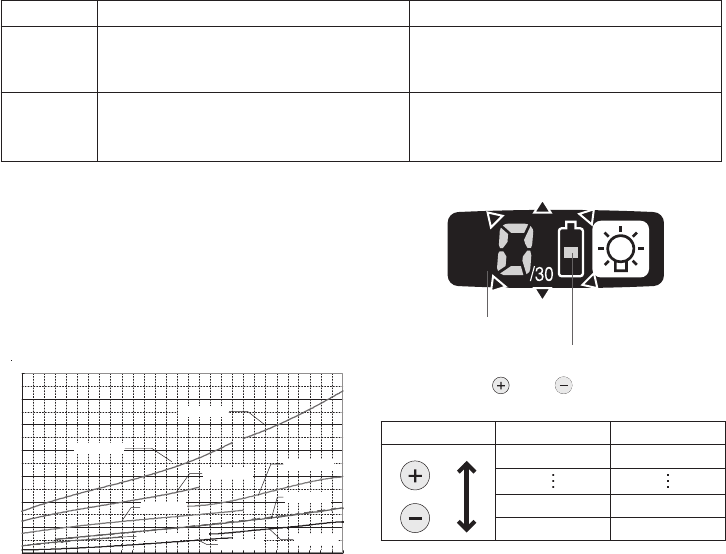
Display
Battery indication lamp
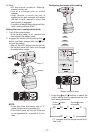
3. Press the and buttons to set the
desired time.
Buttons Display Seconds
30 3
1 0.1
0 Off
4.
Press the OK button to accept the select-
ed setting.
•
The control panel will stop flashing and
light up, and the torque clutch setting
will be displayed.
CAUTION:
•
Be sure to verify the new value after
changing the setting.
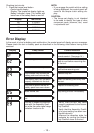
Tightening Torque Chart (for Reference Use)
The values illustrated on this chart were mea-
sured under the conditions described below
and are provided for reference purposes.
Actual tightening torque varies with ambient
conditions (the particular bolt being tightened,
hardware being used, method of holding the
bolt in place, etc.).
0
20
40
60
80
100
120
140
1 2 3 4 5 6 7 8 9 10 11 12 13 14 15 16 17 18 19 20 2 1 22 23 24 25 26 27 28 29 30
N
m
EYFLA4(M6)
EYFLA6(M8)
EYFLA4(M8)
EYFLA5(M8)
EYFLA6(M10)
EYFMA1(M10)
EYFMA1(M12)
EYFMA1(M14)
EYFLA5(M6)
Measurement conditions
• Temperature: Room temperature (20°C/68°F)
Using the Interval Set
•
The interval set operates to prevent the tool
from operating after it automatically stops as
a result of the torque control function, even if
the switch is engaged.
1.
Set the tool to configuration mode.
(See page 11.)
2. Press the interval set button.
• The control panel will begin flashing.
Display: The number 0 ashes on and off.
Battery indication lamp: The middle bar
of the battery ashes on and off.