4 C4603M-A (5/09)
CONFIGURING CABLE SETUPS
If you are connecting directly to each NSM through a laptop, follow the instructions below to connect to Ethernet port 2. If you are connecting to
the NSM5200s through a central PC, use the Endura Utilities to find the DHCP address assigned to each NSM5200, and then enter that address
in an Internet Explorer session on a PC connected to the Endura network.
Configure your cable setups using either a crossover cable or a straight through cable. Use either setup to configure the network settings for the
Pool Manager and for each Pool Member.
CROSSOVER CABLE
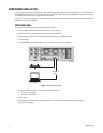
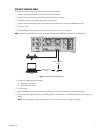
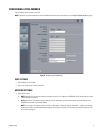
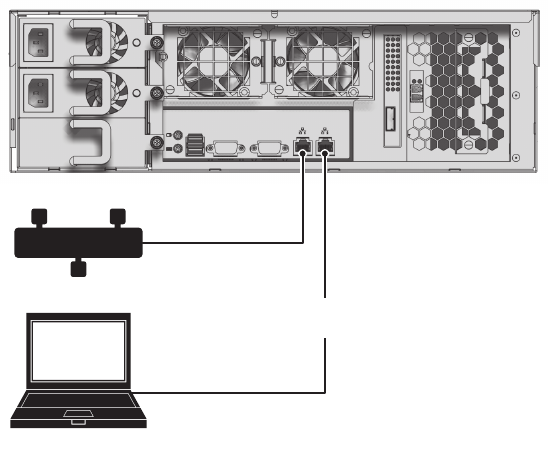
To configure your network settings using a crossover cable (refer to Figure 1):
1. Connect a standard network cable from Ethernet port 1 to the Endura network.
2. Connect one end of the crossover cable to the network connector on the laptop.
3. Connect the other end of the crossover cable to Ethernet port 2 located on the NSM5200 rear panel.
4. Turn on your laptop.
5. Start the NSM5200. It will take approximately 10 to 15 minutes for the unit to turn on completely.
Figure 1. Crossover Cable Setup
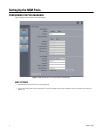
6. Configure the network settings on the laptop using the following information..
• IP address: 172.31.255.253
• Subnet Mask: 255.255.255.0
7. Click Ok or Apply.
8. Open a Web browser, and then type the following IP address: 172.31.255.254. The Web browser login dialog box appears
(refer to Figure 3 on page 6).
CROSSOVER
CABLE
LAPTOP
NSM5200
ENDURA NETWORK