


C4603M-A (5/09) 7
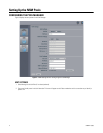
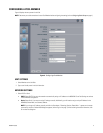
NETWORK SETTINGS
1. Select DHCP or Static
• DHCP: Select DHCP if you want the network to automatically assign an IP address to the NSM5200. Go to Pool Settings to continue
with the Pool Member configuration.
• Static: Select Static if you want to assign IP settings manually. Additionally, you will need to assign a unique IP Address for the
NSM5200, Subnet Mask, and Gateway Address.
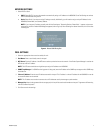
NOTE: If you change an IP address manually and click the Save button, “Restarting Services, Please Wait...” appears on the screen
momentarily, and then a Reboot NSM dialog box appears (refer to Figure 4). After reviewing the reboot information, click OK to close
the dialog box.
Figure 4. Reboot NSM Dialog Box
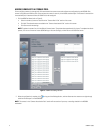
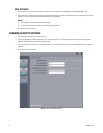
POOL SETTINGS
1. Select the appropriate time zone to be used by this unit.
2. Pool Name: Enter a user-friendly name for the pool.
3. NTP Server: Type the IP address of the NTP server used to synchronize time on the network. If the Endura System Manager is used as the
NTP server, enter its IP address.
NOTE: The NTP server should be running before you assign its IP address to an NSM5200.
4. SNMP Trap Manager: If an SNMP monitoring system is being used, enter the IP address of the SNMP trap manager to which SNMP traps
should be sent.
5. Failover IP Address: Enter the static IP address reserved for the pool. This IP address is a virtual IP address for the NSM5200. It must be
an unused IP address on the network.
NOTE: This IP address must not be the same as the unit IP addresses used by the manager or pool members.
6. Manager Key: Note the key generated for the storage pool; this key will be used to add members to the pool. To generate a different key,
click the Generate Key button.
7. Click Save to retain the settings.