


17
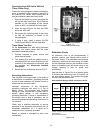
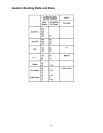
The chart on page 19 lists the various grits and
materials used and lists the grit symbols. It is
generally better to start with a slightly coarser
abrasive than would seem practical because it
will give faster material removal, generate less
heat, and will sand more freely. As it dulls, it will
tend to act like a finer abrasive.
Too often, the user will expect one belt or disc to
take care of all situations; however, the
materials to be sanded, the desired finish and
the amount of material to be removed all have
an effect on the selection grade of grit, abrasive
material and construction. Contact suppliers of
abrasive belts and discs for recommendations
on the work to be done.
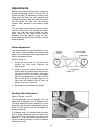
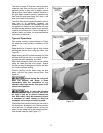
Types of Operations
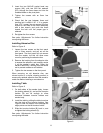
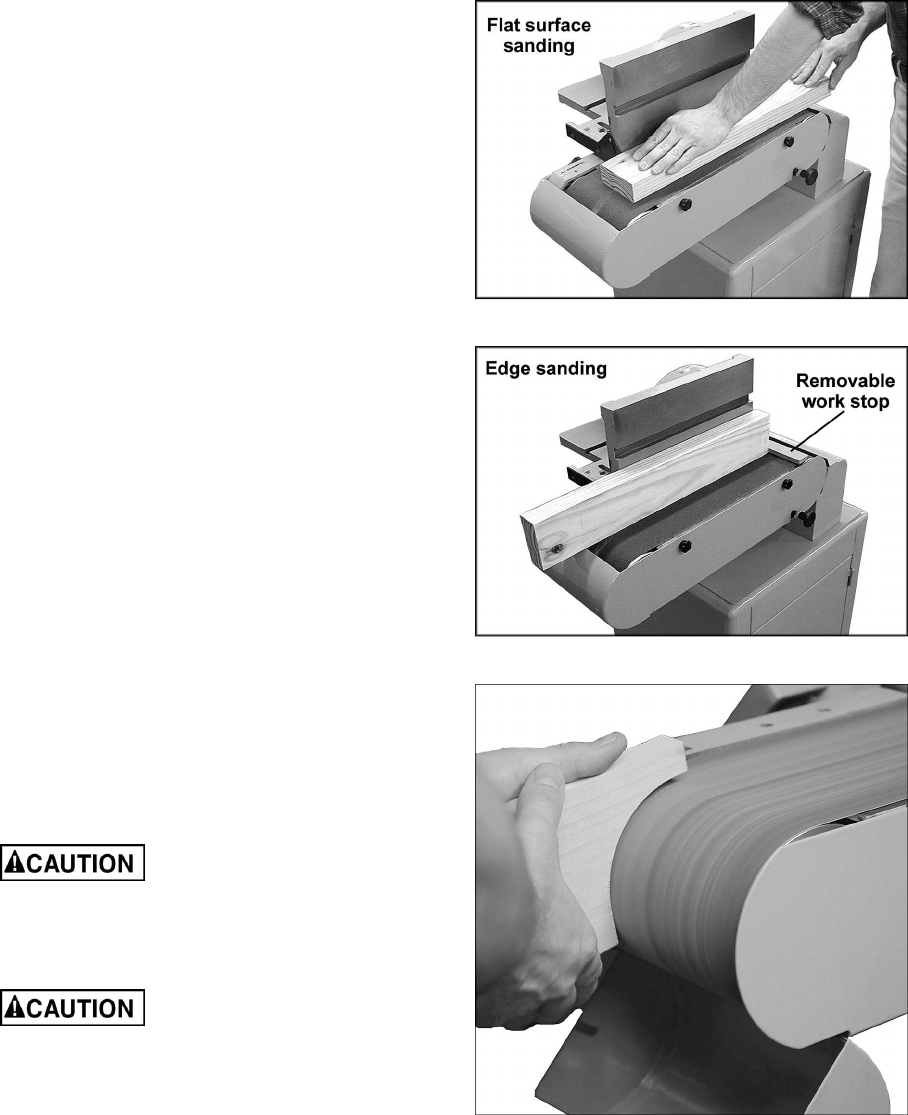
Flat surface sanding is demonstrated in Figure
22, where the major surface is sanded in a flat
plane.
Edge sanding is a common type of long surface
sanding that can be done using the fence. See
Figure 23.
Edge sanding and flat surface sanding can also
be done with the belt arm in a vertical position,
by using the fence assembly as a table.
Miters and compound miter cuts can be sanded
using the table and the miter gauge. Special
fixtures can also be designed to use on the table
for circular and form sanding.
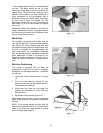
Contour sanding can be done using the idler
pulley with the end guard swung down. See
figure 24.
Always swing the end guard
back into position and fasten it down
immediately after the completion of any
operation that required the end guard to be
moved out of position.
Keep in mind that abrasive
sanding develops heat, so burns can occur
on wood if you try to remove material too
fast. With metal, it may be necessary to have
a container of water nearby to keep the
workpiece cool enough to hold it by hand.
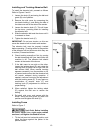
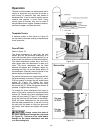
Flat surface and contour sanding can be done in
the horizontal, 45-degree, and vertical position
of the belt arm. To change position, pull out the
index pin and swing arm to the desired position,
then release index pin (see Figure 17).
Figure 22
Figure 23
Figure 24