


14
NOTE: If the blade binds in the workpiece, or
the workpiece shifts during the cut, stop the
motor, back the workpiece out of the saw,
reposition workpiece, restart motor, and then
begin the cut again.
Do not place hands, clothing
or body parts under carriage or in cutting path
of blade. Do not look directly down line of cut
as dust and debris are generated during this
operation.
7. As the workpiece passes through the saw,
move to the other side and complete the cut
by pulling the workpiece past the blade.
Support the upper piece to prevent it from
pinching the blade or the kerf protector, or
falling away from the machine.
8. When cut is finished, turn off motor and wait
for blade to come to a complete stop. Remove
workpieces.
9. Rotate turntable back to vertical position and
return it to the top of the guides. Lock the
carriage.
Adjustments
The 511 Panel Saw is preset at the factory, so no
adjustments should be necessary at first.
However, certain alignments should be checked,
and as the saw gets more use adjustments may be
needed.
Changing the Blade
1. Disconnect saw from power source and
observe appropriate lockout procedures to
prevent machine from being accidentally
powered.
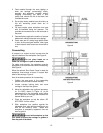
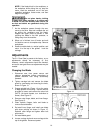
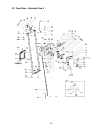
2. Tighten carriage lock and remove the blade
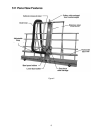
guard by unscrewing and removing the knob,
shown in Figure 13.
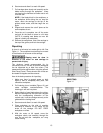
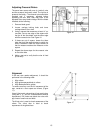
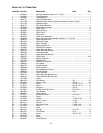
3. Engage spindle lock (Figure 14) on the motor
to keep spindle from turning. Use the wrench
provided to loosen and remove the arbor bolt
(NOTE: left hand threads, turn clockwise to
loosen). See Figure 15.
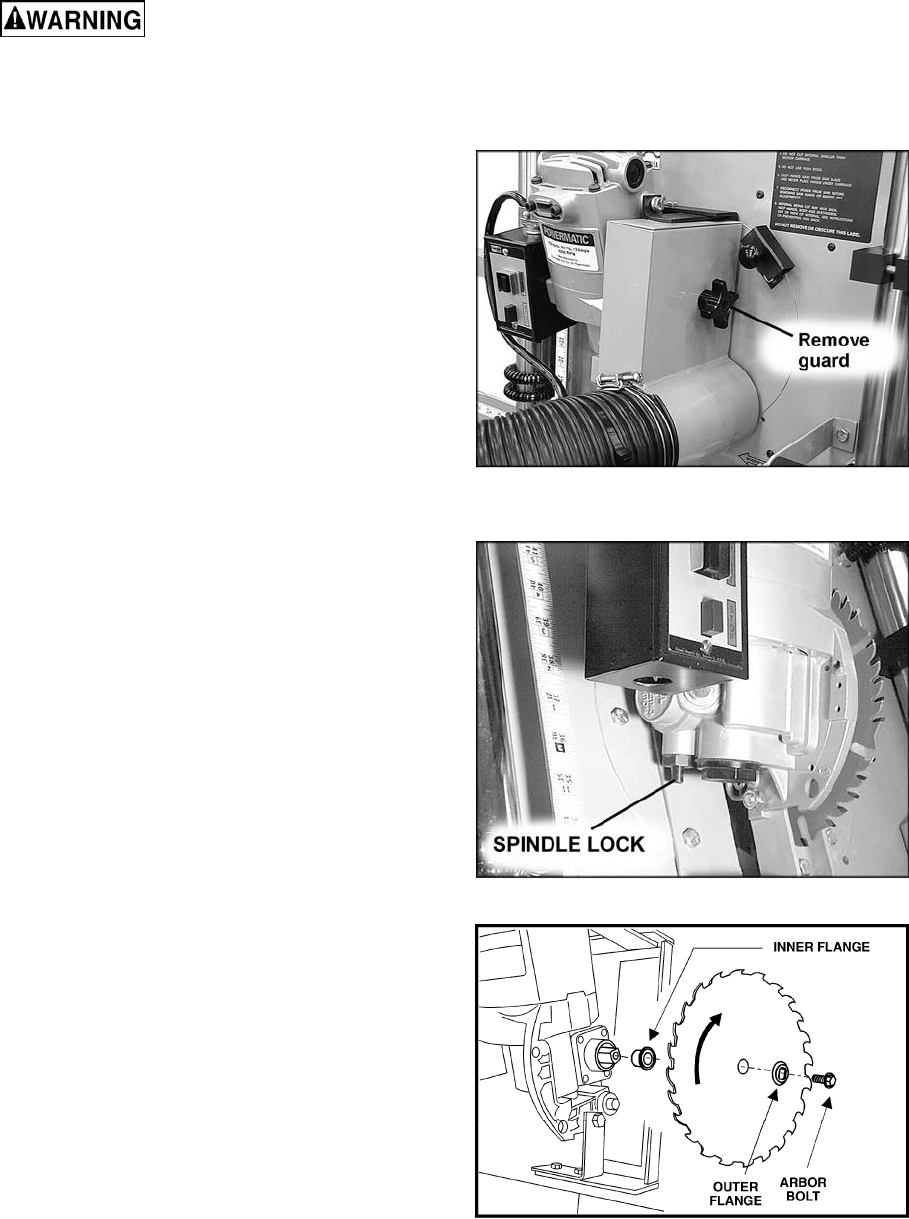
4. Remove outer flange, blade, and inner flange.
See Figure 15.
5. Clean spindle, flanges, bolts and blade to
remove dust and debris.
6. Re-install inner flange, and install new blade
with arrow pointing as shown in Figure 15.
Reinstall outer flange and tighten arbor bolt
with wrench.
7. Re-install blade guard.
8. Loosen carriage lock and move carriage to the
top of the guides. Reconnect power.
Figure 13
Figure 14
Figure 15