


15
Adjustments
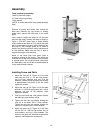
Table Tilt
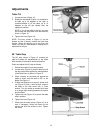
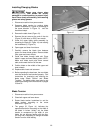
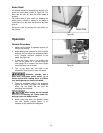
1. Loosen the lever (Figure 10).
2. Rotate the handwheel (Figure 10) clockwise to
tilt table up to 45 degrees to the right, or
counterclockwise to tilt the table up to 10
degrees to the left (as viewed from the
operator’s position).
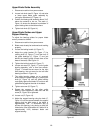
NOTE: If you tilt the table to the left, you must
first remove the stop screw from the machine,
shown in Figure 12.
3. Tighten the lever (Figure 10).
NOTE: The lever, shown in Figure 10, can be
pivoted so that it doesn’t contact the band saw
surface. Simply lift straight out on the lever and
rotate it on the pin, then release it making sure it
seats itself on the pin.
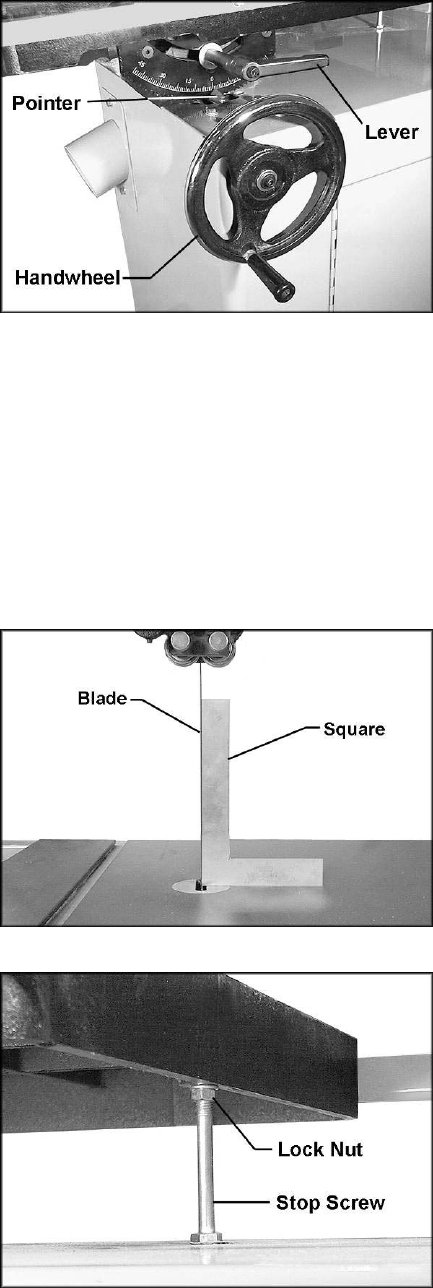
90° Table Stop
The 90° stop, shown in Figure 12, ensures the
table will always be perpendicular to the blade
after the table is returned to horizontal position.
Check and adjust this 90° stop as follows:
1. Disconnect machine from power source.
2. Loosen lever (Figure 10) and tilt table left until
the stop screw rests against the metal platform
of the Band Saw, as shown in Figure 12.
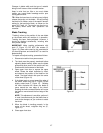
3. Place a square on the table and against the
blade to check that the table is 90° to the
blade. See Figure 11.
4. If table and blade are not square, loosen lock
nut (Figure 12) with a 14mm wrench, and turn
the head of the stop screw with a 17mm
wrench. Turn the screw as needed until there
is no longer light showing between the square
and the blade.
5. Tighten lock nut (Figure 12) to secure the table
stop in position.
6. Tighten the lever (Figure 10).
7. Check that the scale pointer (Figure 10) is at
zero. If necessary, loosen the screw on the
pointer and shift the pointer to zero. Tighten
the screw.
Figure 10
Figure 11
Figure 12