


11
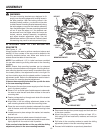
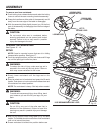
NOTE: Continue to hold the saw and bracket assembly
with one hand until both levers are securely locked.
Check position and adjust, if necessary, to make sure the
weight of the saw is evenly balanced over the edges.
Ensure the saw is fully seated and locked in position, then
securely tighten the four nuts holding the saw to the saw
mounting brackets.
WARNING:
The saw mounting brackets are designed to fit
snugly over the table edges with locking levers in
the open position. With the locking levers in the
lowered (locked) position, you should not be able
to slide the saw mounting bracket assembly along
the table edges or remove the bracket assembly
from the table edges. If the saw mounting brackets
will not fit over the edges, or if the brackets can
be removed from the edges when the levers are
locked, remove bracket assembly immediately
and adjust bracket adjustment screw. See the
Maintenance section of this manual. Failure to heed
this warning may result in serious personal injury.
15
20
25
30
35
40
45
10
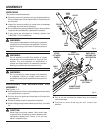
ASSEMBLY
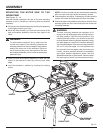
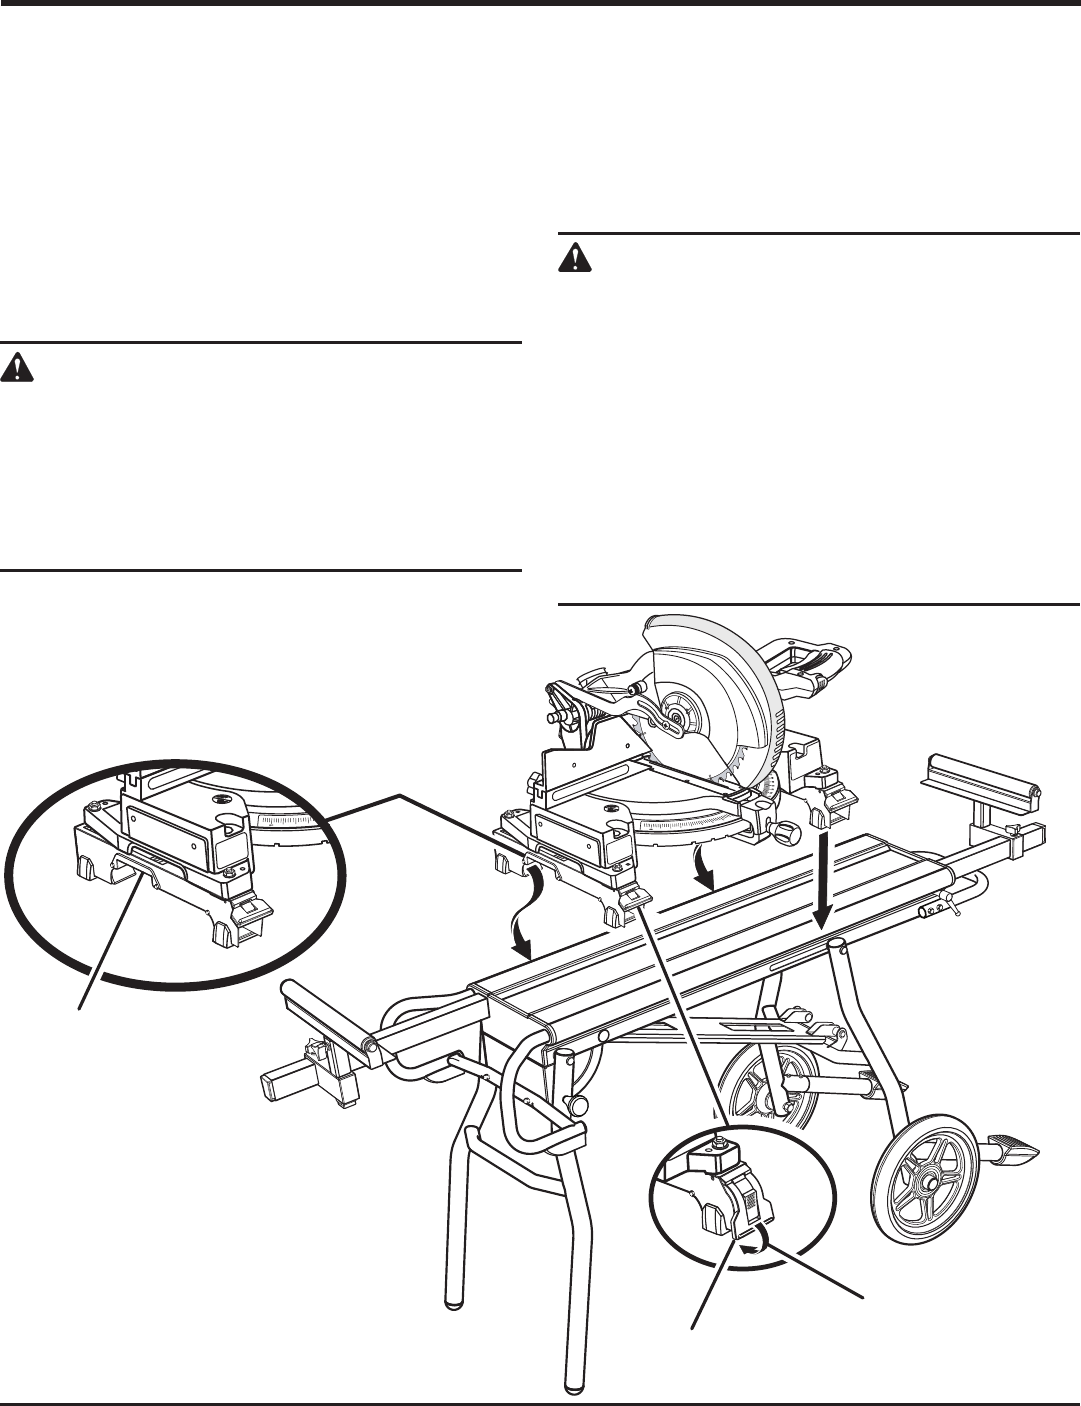
MOUNTING THE MITER SAW TO THE
WORKSTAND
See Figures 13 - 14.
Use the handles located at the rear of the saw mounting
brackets to aid in installing or removing saw and bracket
assembly.
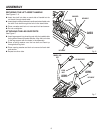
�Lift the saw and bracket assembly, allowing the assembly
to tilt slightly toward your body.
While still tilted toward you, hook the front clamp of the
saw and bracket assembly onto the front edge of the
table.
WARNING:
To avoid serious personal injury, make sure the
curved front edge of the mounting brackets are
securely seated over the front edge of table before
seating the other end of the brackets. Failure to
do so could cause you to lose control of the saw
and bracket assembly, which could cause serious
personal injury.
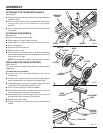
Lower the saw and bracket assembly to allow the rear
clamp of the bracket to seat fully over the rear table
edge.
Lock the brackets in position by lowering the locking
levers.
PUSH DOWN AND
BACK TO LOCK
LOCKING LEVER
HANDLES
Fig. 13
30
35
40
45