


18
Alignments and Adjustments
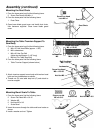
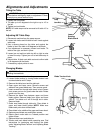
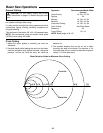
Tilting the Table
WARNING: Unplug the machine from the power
source before making any repair or adjustment. Failure
to comply may cause serious injury.
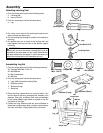
1. Loosen two lock knobs.
2. Tilt table up to 45 degrees to the right or up to 10° to
the left.
3. Tighten two lock knobs.
NOTE: 90° table stop must be removed to tilt table 10° to
the left.
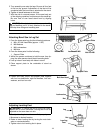
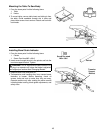
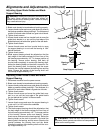
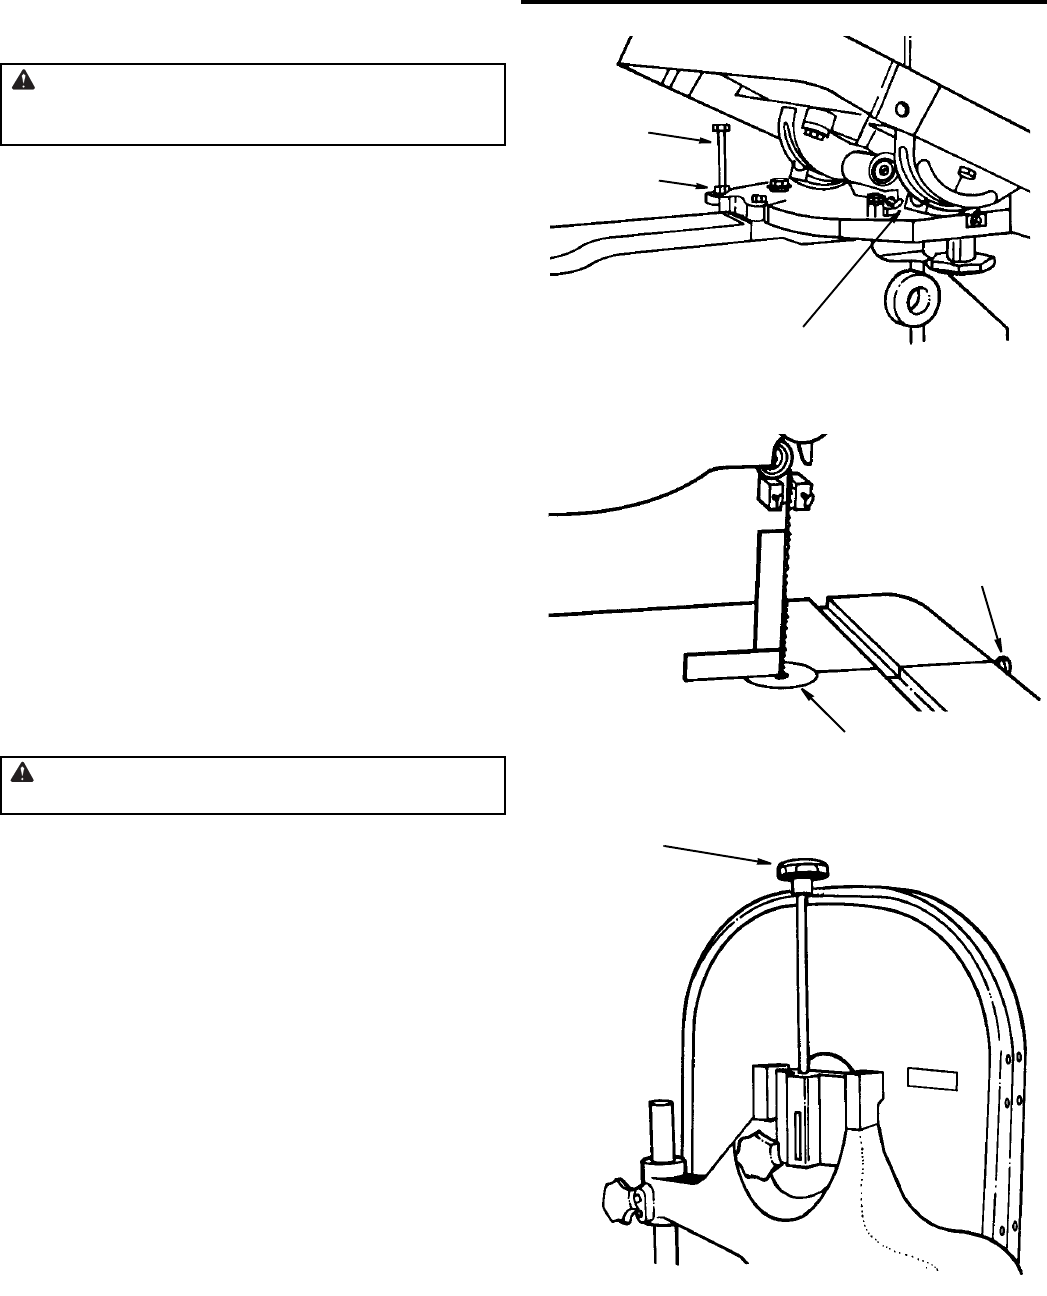
Adjusting 90° Table Stop
1. Disconnect machine from the power source.
2. Loosen lock knobs and tilt table left until it rests against
table stop.
3. Use a square placed on the table and against the
blade, to see if the table is 90 degrees to the blade.
4. If an adjustment is necessary, loosen lock knobs. Tilt
table to the right, and lock in place.
5. Loosen jam nut and turn table top left or right to raise
or lower the stop. Tighten jam nut to hold table stop in
place.
6. Unlock table, tilt back onto table rest and confirm table
is 90 degrees with the blade.
7. If necessary, adjust pointer to zero.
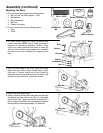
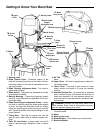
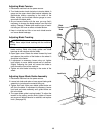
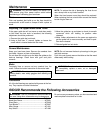
Changing Blades
WARNING: Blade teeth are sharp. Use care when
handling the sawblade.
1. Disconnect the machine from the power source.
2. Loosen blade tension by turning blade tension knob
counterclockwise until it stops.
3. Remove the table insert and the table pin.
4. Open upper and lower cover. Remove screws and
washers from guard blade rear. Then remove guard.
5. Insert screwdriver through table insert hole to loosen
pivot screw one turn for guard under the table. Rotate
guard out of the way.
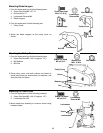
6. Remove the blade from between upper and lower
blade guides. Remove blade from upper and lower
wheels. Turn blade so it will fit through slot in table.
Remove blade.
7. Guide new blade through table slot. Place blade in
upper and lower blade guides. NOTE: Make sure
blade teeth point down toward table.
8. Place blade in the middle of the upper and lower wheel.
9. Replace guard blade rear and tighten screws.
10. Rotate guard under table to a closed position and
tighten screw.
11. Replace table insert and table pin.
12. Tension and track blade before operating saw. Find
instructions for tensioning and tracking the blade
under “Adjusting Blade Tension” and “Adjusting Blade
Tracking”.
Blade Tension Knob
Table Insert
Table Pin
Lower
Rotating
Blade Guard
90° Table
Stop
Jam Nut