


18
18
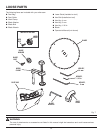
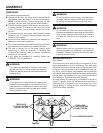
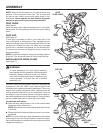
ASSEMBLY
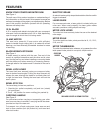
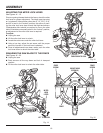
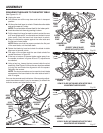
CUTTING A SLOT IN THE ZERO CLEARANCE
THROAT PLATE
In order to use your compound miter saw, you must cut
a slot through the zero clearance throat plate to allow for
blade clearance. To cut the slot, set your saw at 0
°
miter,
turn saw on and allow the blade to reach full speed, then
carefully make a straight cut as far as it will go through the
throat plate. Turn your saw off and allow the blade to come
to a complete stop before raising the saw arm.
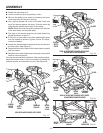
Adjust the bevel angle (right) to 48°, turn your saw on and
allow the blade to reach full speed, then carefully make
another cut through the zero clearance throat plate. Next,
adjust the bevel angle (left) to 48°, turn your saw on and allow
the blade to reach full speed, then carefully make another
cut through the zero clearance throat plate.
The slot in the throat plate will then be wide enough to allow
the blade to pass through it at any angle from 0° to 48°.
DANGER:
Laser radiation. Avoid direct eye contact with light
source.
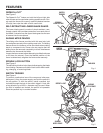
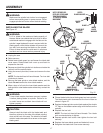
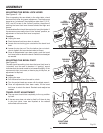
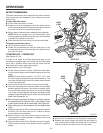
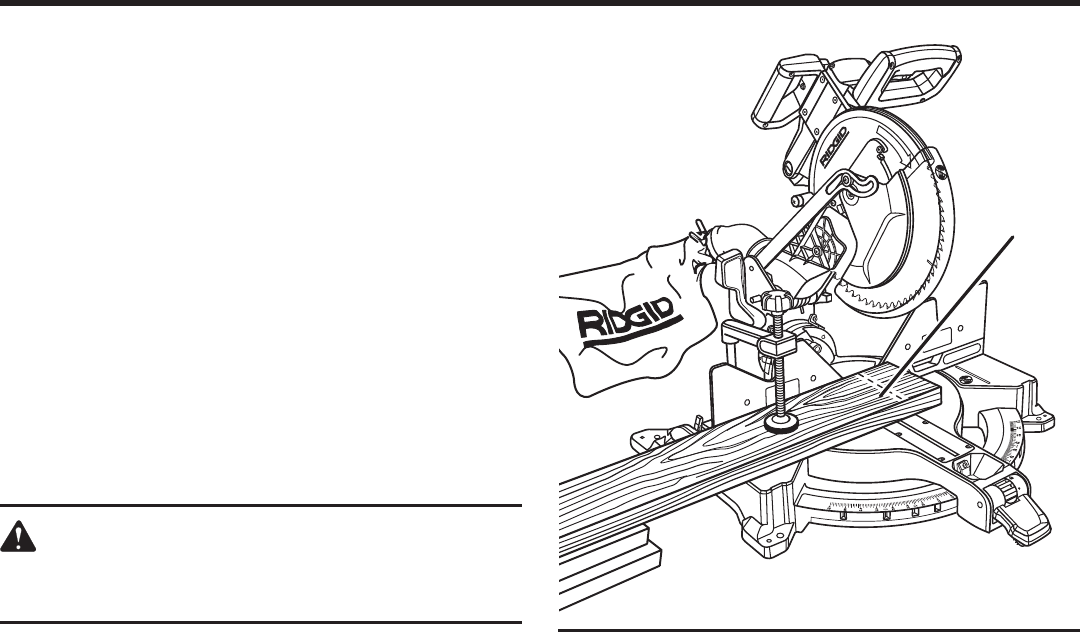
ALIGNING THE LASER GUIDE LINE
See Figure 13.
The laser guide will generate a laser line on the work surface
when the saw blade is spinning. The laser line will appear as
a broken line on the workpiece when the blade assembly is
in the uppermost position and the motor switch is activated.
This broken line will let you see your mark and your laser
guide line at the same time, and will assist you in lining up
your mark for more accurate cutting of the workpiece.
Align the laser line and your mark with the blade at the
uppermost position. Once both lines are in alignment, do not
move the workpiece until after you have finished cutting.
As the blade assembly is lowered toward the workpiece, the
broken line will become solid.
Fig. 13
BROKEN
LINE
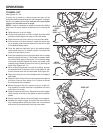
Follow the directions below for using the laser guide:
Removing the Mark:
Position the laser line on the left edge of your mark on the
work surface in order to remove the mark.
To Cut the Mark:
Position the laser line near or over your mark on the work
surface in order to cut the mark.
To Leave the Mark:
Position the laser line near the right edge of your mark on
the work surface in order to leave the mark.
After you have become familiar with using the laser guide,
you will be able to remove, cut, or leave your mark on the
work surface. Practice will teach you the correct position for
aligning the laser line with your mark. To adjust the position of
the laser line, see the Adjustments section of this manual.