


36
ACCESSORIES
Look for these accessories at The Home Depot.
AC9944 .................................... Miter Saw Utility Vehicle
WARNING:
Current attachments and accessories available for use with this tool are listed above. Do not use any attachments
or accessories not recommended by the manufacturer of this tool. The use of attachments or accessories not
recommended can result in serious personal injury.
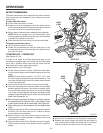
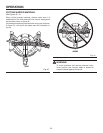
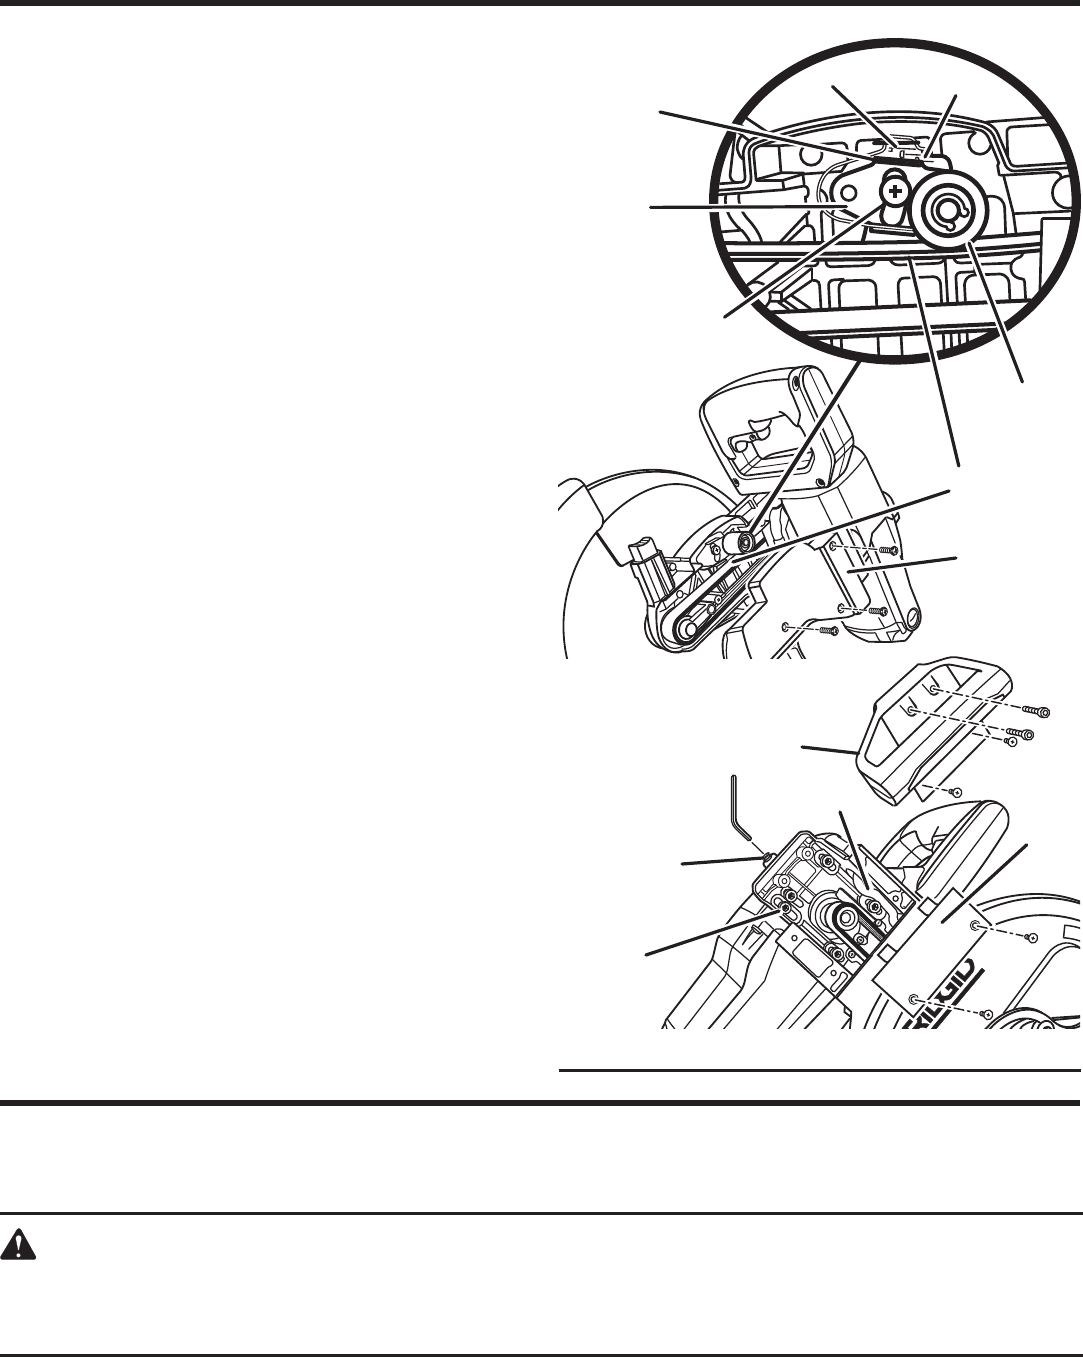
Fig. 45
ADJUSTING
SOCKET HEAD
SCREW
BELT COVER
MOTOR
MOUNT
SCREWS
BELT
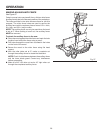
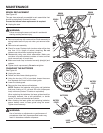
CHECKING MOTOR BELT TENSION AND
REPLACING THE BELT
See Figure 45.
The motor belt tension was adjusted at the factory but should
still be checked periodically.
To check belt tension:
Using a phillips screwdriver, remove the screws holding
the belt cover on the right side of the saw arm. Lift off
the cover.
The belt tension is correct when the tension mark on the
spring bracket is between “C” and “D” (see figure 54).
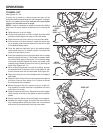
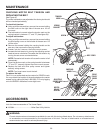
To adjust belt tension:
Using a phillips screwdriver, remove the screws holding
the drive pulley cover on the left side of the saw arm. Lift
off the cover.
Remove the screws holding the carrying handle on the
saw arm, then remove the carrying handle.
Loosen, but don’t remove, the motor mount screws.
Increase the belt tension by turning the adjusting socket
head set screw clockwise. Decrease the belt tension by
turning the set screw counterclockwise.
NOTE: Excessive belt tension will cause the motor to fail
prematurely.
Once the tension mark on the spring bracket is between
“C” and “D”, securely tighten the motor mount screws.
Replace the belt and drive pulley covers and tighten
securely using screws.
NOTE: Cord must never touch the belt.
To replace the belt:
Take it in to an authorized service center for RIDGID® tools.
You may obtain the location of the authorized service center
nearest you by calling (toll free) 1-866-539-1710 or by logging
on to the RIDGID® website at www.ridgid.com.
MAINTENANCE
IDLER
PULLEY
SCREW
CARRYING
HANDLE
DRIVE
PULLEY
COVER
SPRING
BRACKET
CORD
TENSION
MARK
D
C