


21
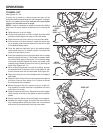
ASSEMBLY
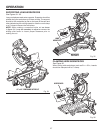
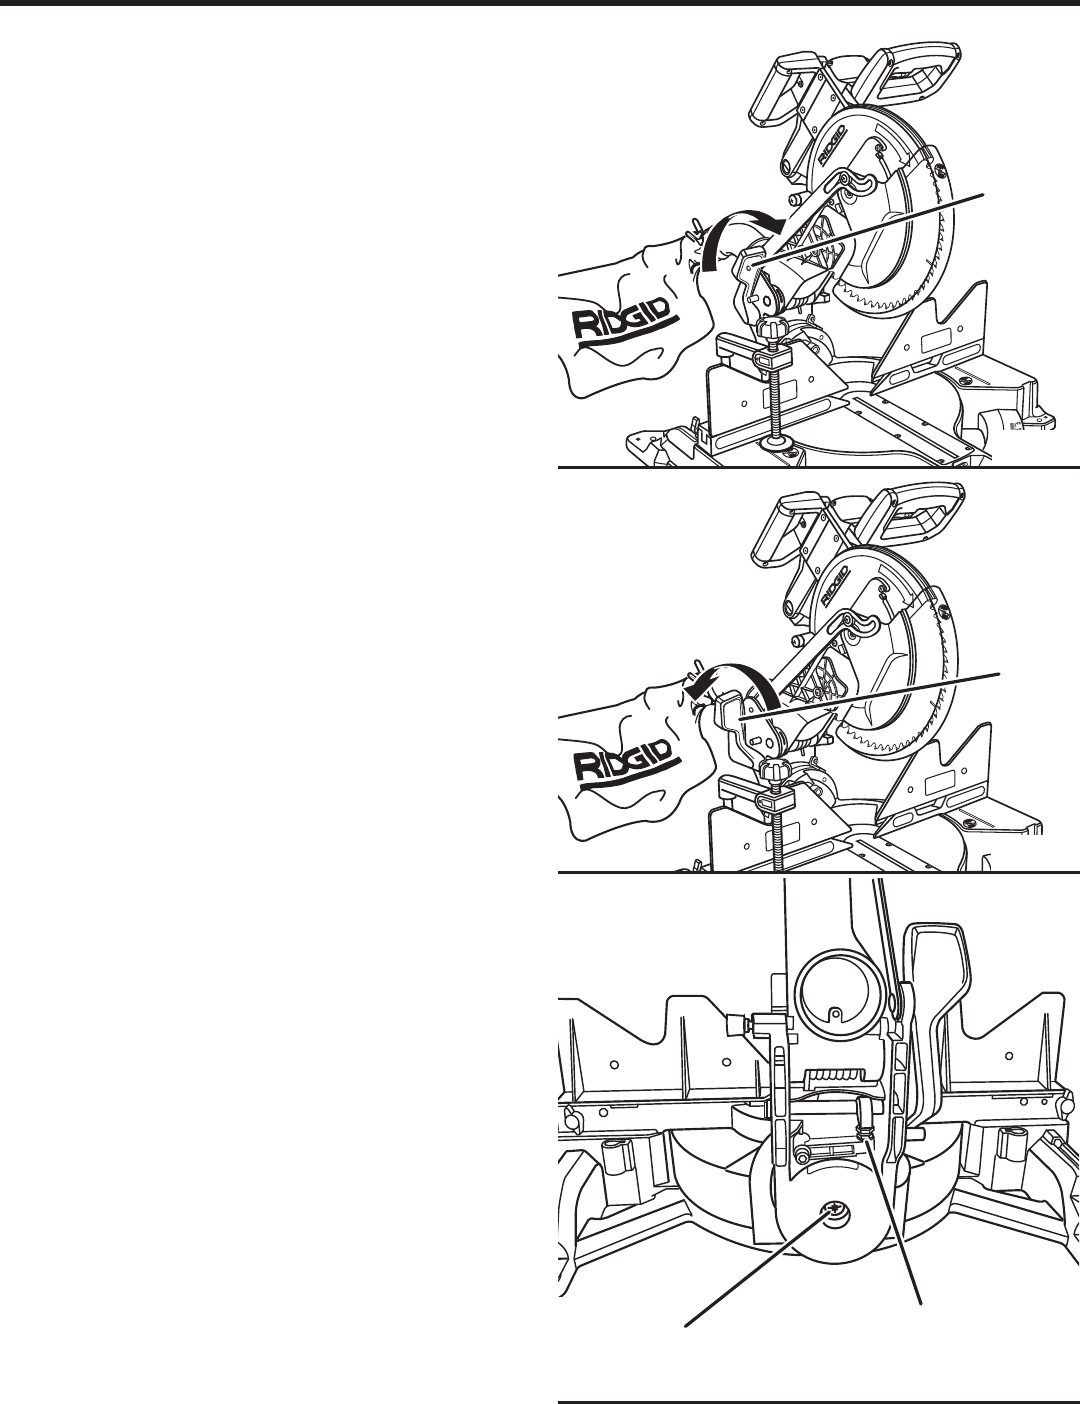
ADJUSTING THE BEVEL LOCK LEVER
See Figures 21 - 23.
Prior to squaring the saw blade to the miter table, check
the bevel lock lever for proper adjustment. The blade must
be set at an “unindexed” bevel position other than 0
°
, 22.5
°
,
33.9
°
, and 45
°
to test. In the “locked” position, the action of
pushing the bevel lock lever forward should feel tight and
secure.
Considerable effort should be required to bevel the blade. If
the saw arm moves easily when in the “locked” position, an
adjustment of the bevel lock lever is required.
To adjust:
Unplug the saw.
Push the bevel lock lever down to unlock.
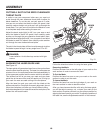
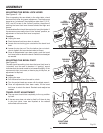
Locate the two locking jam nuts behind the bevel lock
lever.
Loosen the top jam nut. Turn the bottom jam nut clock-
wise to tighten and counterclockwise to loosen.
Once all adjustments have been made, push the bevel
lock lever back to relock the bevel. Recheck and readjust
as needed.
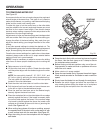
ADJUSTING THE BEVEL PIVOT
See Figure 23.
The saw should smoothly pivot when the bevel lock lever is
“unlocked” and the saw is beveled. A “grating” sound
indicates that the bevel needs to be loosened slightly. If the
movement is tight, too loose, or there is play in the pivot, an
adjustment is required.
To adjust:
Unplug the saw.
Pull the bevel lock lever forward to unlock.
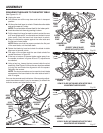
Turn the socket head cap screw with the blade wrench.
Once all adjustments have been made, lift the bevel
lock lever to relock the bevel. Recheck and readjust as
needed.
TRAVEL PIVOT ADJUSTMENT
The saw arm should rise completely to the up position
by itself.
If the saw arm does not raise by itself or if there is play
in the pivot joints, have saw repaired at the nearest
authorized service center.
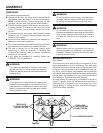
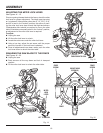
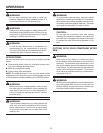
PULL
FORWARD TO
UNLOCK
PUSH BACK
TO LOCK
BEVEL
LOCK
LEVER
BEVEL
LOCK
LEVER
Fig. 23
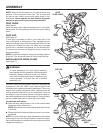
SOCKET HEAD
CAP SCREW
JAM NUTS
Fig. 21
Fig. 22