


Page 11
WARNING:
Failure to turn the saw off, remove the switch key, and
unplug the saw could result in accidental starting causing
possible serious personal injury.
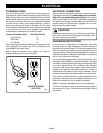
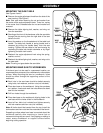
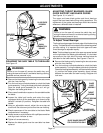
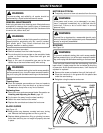
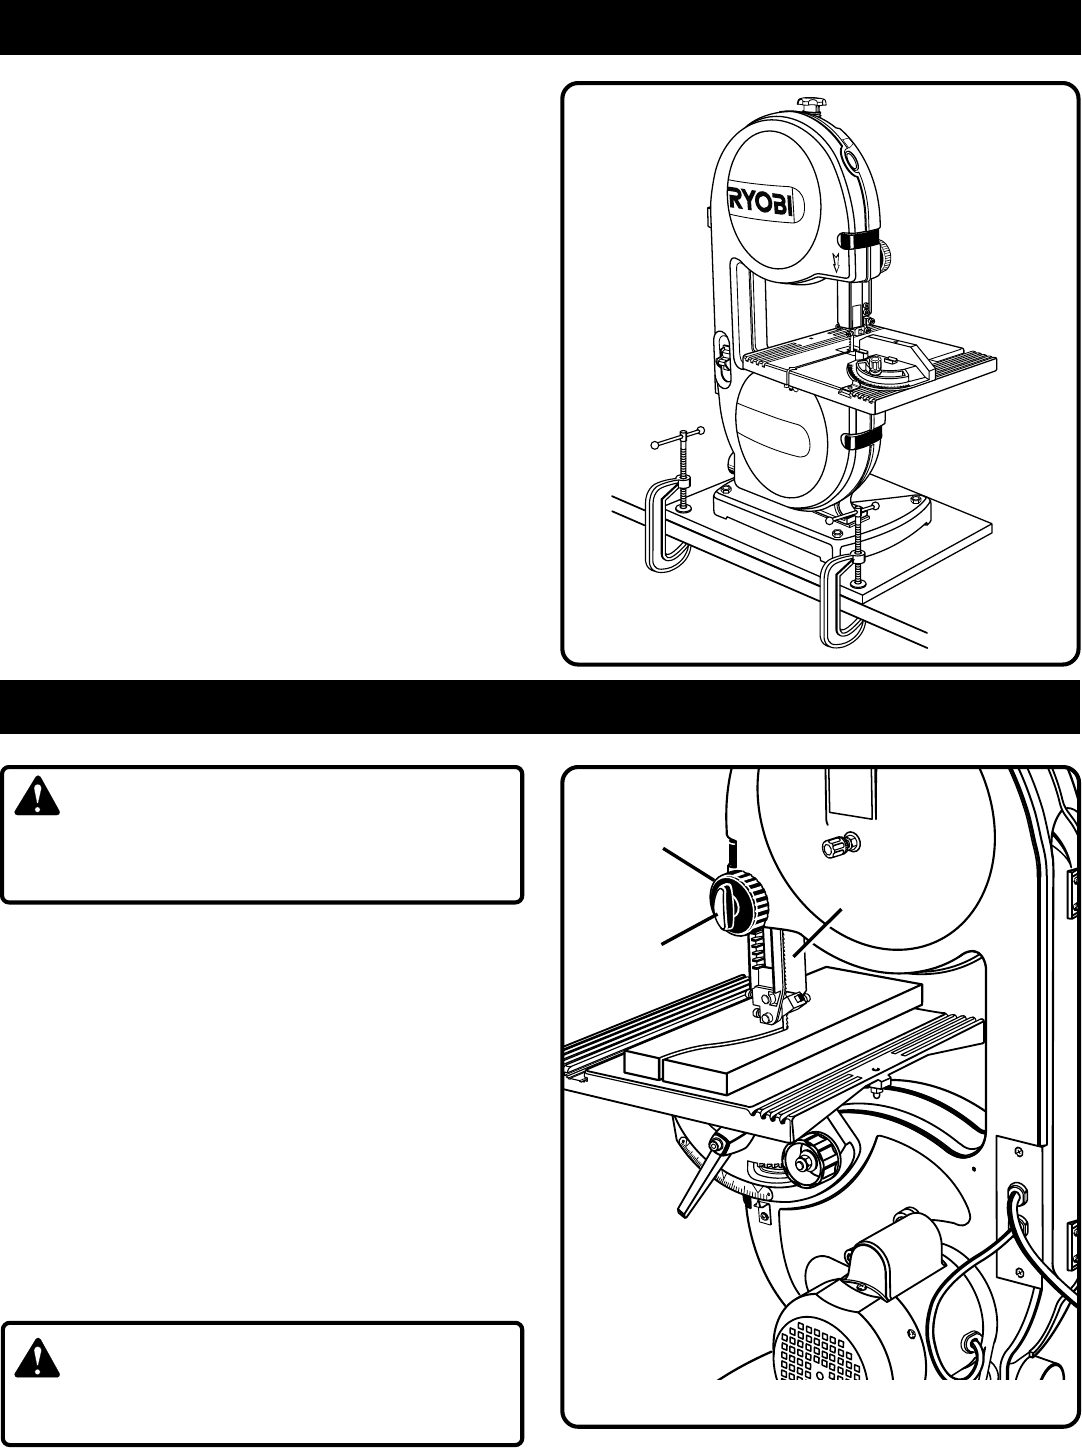
ADJUSTING BLADE GUIDE ASSEMBLY
See Figure 7.
To prevent the blade from twisting or breaking, the blade
guide assembly should always be set approximately 1/8 in.
(3 mm) above the workpiece.
■ Turn the lock lever counterclockwise to unlock the blade
guide assembly.
■ As a guide, use a scrap piece of the same wood you are
about to cut to set the height of the blade guide assembly.
Adjust blade guide assembly by turning the blade guide
knob.
■ Lock blade guide assembly in place by turning the lock
lever clockwise.
■ Always lock the blade guide assembly in place before
turning on the band saw.
WARNING:
To avoid personal injury, maintain proper adjustment of
blade tension, blade guides, and thrust bearings.
Fig. 6
ASSEMBLY
ADJUSTMENTS
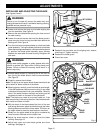
■ Mount saw to board using holes in saw base as a template
for hole pattern. Locate and mark the holes where the
band saw is to be mounted.
■ Follow the last three steps in the section Mounting Band
Saw to Workbench, page 10.
If lag bolts are used, make sure they are long enough to go
through holes in the saw base and material the saw is being
mounted to. If machine bolts are being used, make sure bolts
are long enough to go through holes in the saw base, the
material being mounted to, and the lock washers and hex
nuts.
Note: It may be necessary to countersink hex nuts and wash-
ers on bottom side of mounting board.
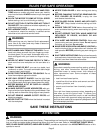
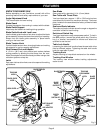
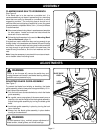
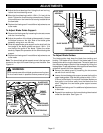
CLAMPING BAND SAW TO WORKBENCH
See Figure 6.
If the band saw is to be used as a portable tool, it is
recommended that you fasten it permanently to a mounting
board that can easily be clamped to a workbench or other
supporting surface. The mounting board should be of
sufficient size to avoid tipping of saw while in use. Any good
grade plywood or chipboard with a 3/4 in. (19 mm) thickness
is recommended.
Fig. 7
0
15
4
5
LOCK
LEVER
BLADE GUIDE
KNOB
BLADE GUIDE
ASSEMBLY
O
N
R
E
M
O
V
E
T
O
L
O
C
K
O
9”
BAND
SAW
30
4
5
6
0
75
9
0
7
5
6
0
4
5
3
0