


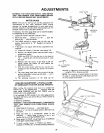
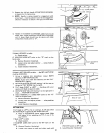
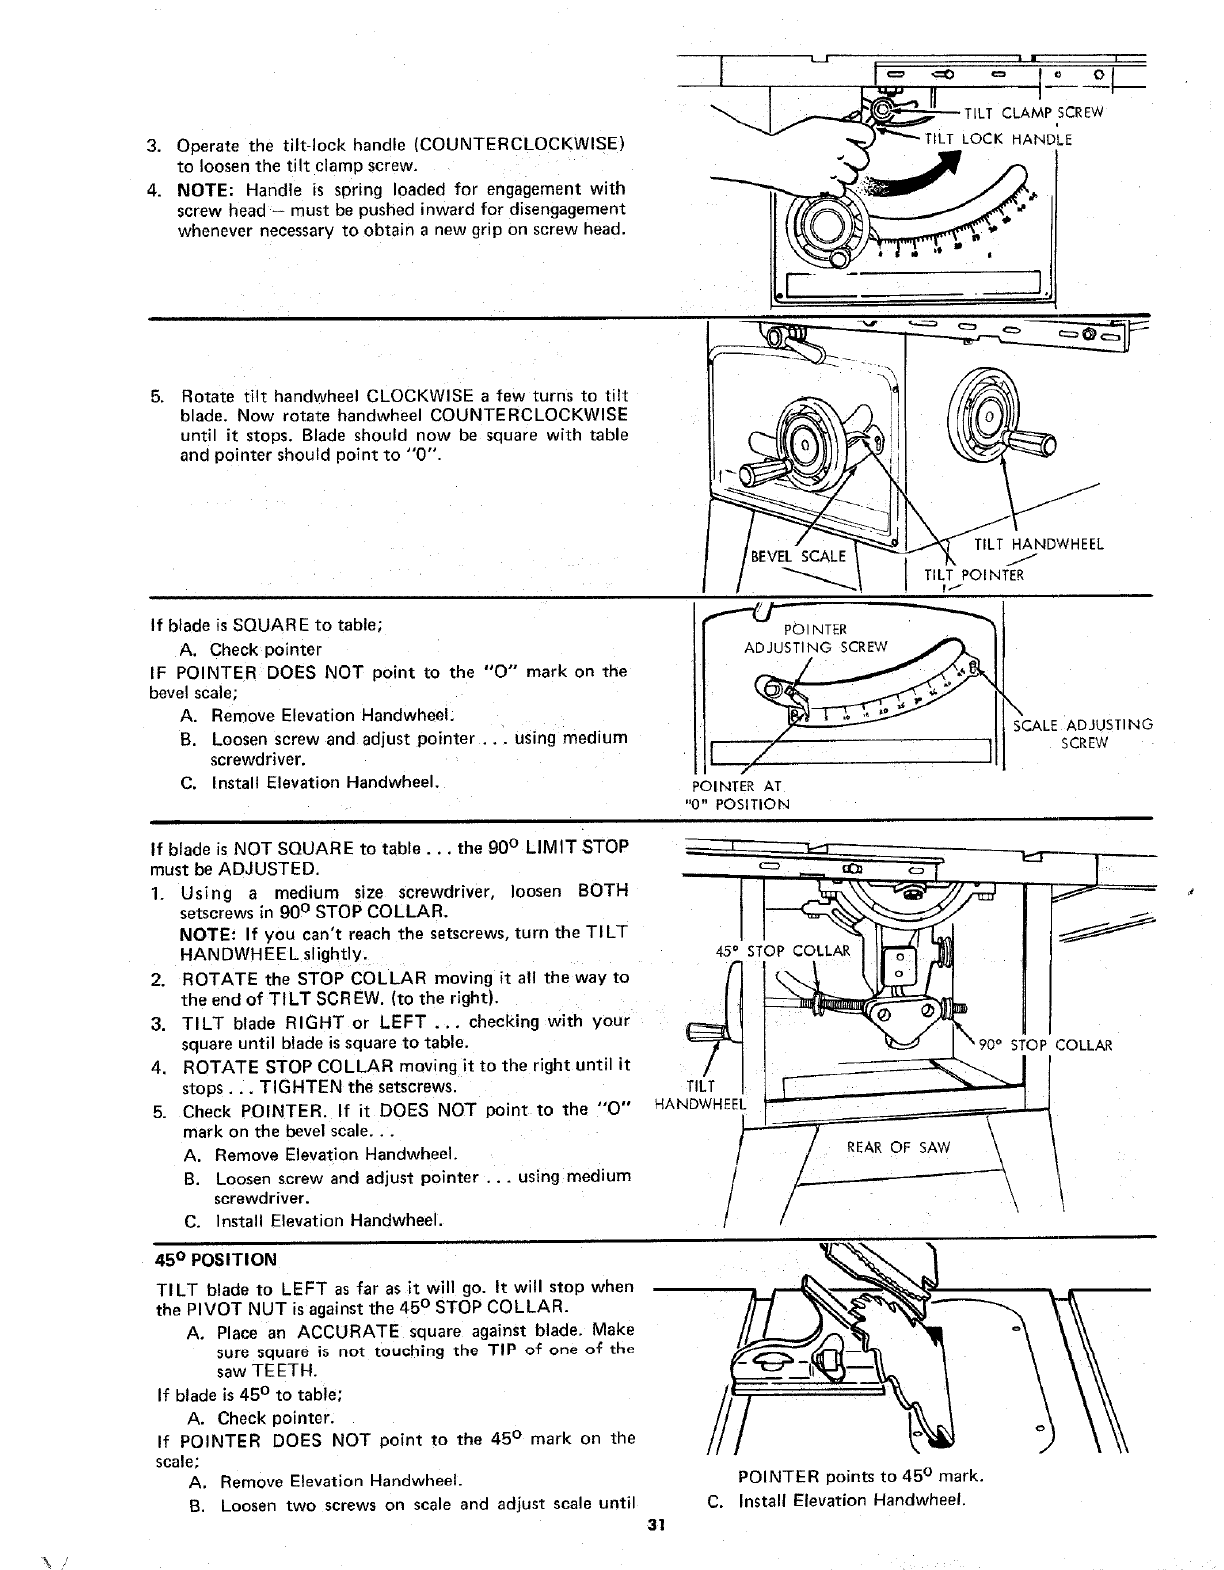
3. Operate the tilt-lock handle (COUNTERCLOCKWISE)
to loosen the tilt clamp screw.
4. NOTE: Handle is spring loaded for engagement with
screw head - must be pushed inward for disengagement
whenever necessary to obtain a new grip on screw head.
Rotate tilt handwheel CLOCKWISE a few turns to till
blade. Now rotate handwheel COUNTERCLOCKWISE
until it stops. Blade should now be square with table
and pointer should point to "0".
5.
If blade is SQUARE to table;
A. Check pointer
F POINTER DOES NOT point to the "O" mark on the
bevel scale;
A. Remove Elevation Handwheel.
B. Loosen screw and adjust pointer ... using medium
screwdriver.
C. Install Elevation Handwheel.
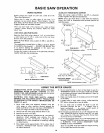
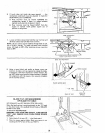
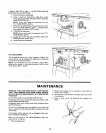
If blade is NOT SQUARE to table.., the 90 ° LIMIT STOP
must be ADJUSTED.
1. Using a medium size screwdriver, loosen BOTH
setscrews in 90 ° STOP COLLAR.
NOTE: If you can't reach the setscrews, turn the TILT
NANDWHEEL slightly.
2. ROTATE the STOP COLLAR moving it all the way to
the end of TILT SCREW. (to the right).
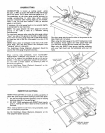
3. TILT blade RIGHT or LEFT ... checking with your
square until blade is square to table.
4. ROTATE STOP COLLAR moving it to the right until it
stops... TIGHTEN the setscrews.
5. Check POINTER. If it DOES NOT point to the "O"
mark on the bevel scale...
A. Remove Elevation Handwheel.
B. Loosen screw and ad)ust pointer ... using medium
screwdriver.
C. Install Elevation Handwheel.
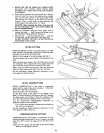
COLLAR
45 ° POSITION
TILT blade to LEFT as far as it will go. It will stop when
the PIVOT NUT is against the 45 ° STOP COLLAR.
A, Place an ACCURATE square against blade. Make
sure square is not touching the TIP of one o{ the
saw TEETH.
If blade is 45 ° to table;
A. Check pointer.
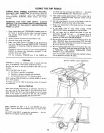
If POINTER DOES NOT point to the 45 ° mark on the
scale;
A. Remove Elevation Handwheel.
B, Loosen two screws on scale and adjust scale until
C.
31
POINTER points to 45 ° mark.
Install Elevation Handwheel.