


-28-
W1751 25" Wide-Belt Sander
SERVICE
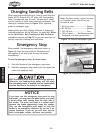
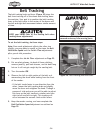
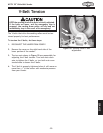
Changing V-Belts
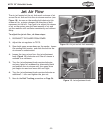
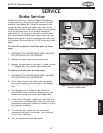
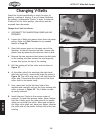
Figure 27. Roller casting end.
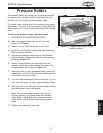
Figure 28. Roller spindle nut.
Figure 29. Roller removal.
Check the V-belts periodically to check for signs of
glazing, cracking or fraying. If any of these conditions
are present, change both V-belts. In order to take the
V-belts off of the roller pulleys, the rollers must be
removed from the sander.
Change the V-belt as follows:
1. DISCONNECT THE SANDER FROM POWER AND AIR
PRESSURE!
2. Loosen the V-belts and remove them from the motor
pulley. Refer to V-Belt Tension for any needed
details on
Page 29.
3. Open both access doors on the upper part of the
machine. At the left-hand access side, remove the
platen knob by loosening the setscrew near its dial.
4. Remove the two setscrews that secure the dial plate
to the casting and then remove the two large cap
screws that secure the top of the casting.
5. Pull the casting off of the roller ends as shown in
Figure 27.
6. At the other side of the machine (the right-hand
side from the front), remove the large nut shown in
Figure 28. The roller may turn if not held from the
other side. This secures the other end of the front
roller shaft to the sander body.
7. Now, move back to the left-hand side of the
machine and carefully pull out the front sanding belt
roller as shown in
Figure 29. The V-belts can now
be easily removed.
8. Install the new V-belts in the reverse order of
removal. To make this process easier, have a helper
hold the V-belts up at the other side of the sander
when you re-install the roller. When you retighten
the large roller shaft nut, have your helper stand at
the other side of the sander to keep the roller from
turning.