


-43-
N(/((('Jc`[`e^KXYc\JXn
FG<I8K@FEJ
:ifjjZlkk`e^=lccJ`q\GXe\cj
(% Install the crosscut fence in the forward mounting
location shown in =`^li\., and lock it in place.
)% Check to make sure the fence is at 90˚. If necessary,
adjust it as described in :Xc`YiXk`e^:ifjjZlk=\eZ\
0'Jkfgj on GX^\,/.
*% Set either flip stop to the desired width-of-cut.
Extend the crosscut fence slide if the workpiece is
more than 74".
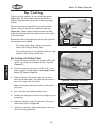
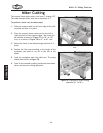
+% Load the workpiece onto the table saw (=`^li\.)).
,% Once all the necessary safety precautions have been
taken, perform the cutting operation.
:ifjjZlkk`e^JdXcc\iGXe\cj
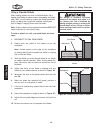
(% Install the crosscut fence in the rear mounting points
shown in =`^li\., and lock it in place.
)% Check to make sure the fence is at 90˚ and adjust
it as described in :Xc`YiXk`e^:ifjjZlk=\eZ\0'
Jkfgj on GX^\,/if necessary.
*% Set either flip stop to the desired width-of-cut.
Extend the crosscut fence slide if the workpiece is
more than 74".
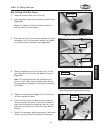
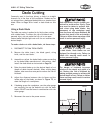
+% Load the workpiece onto the table saw (=`^li\.* %
,% Once all the necessary safety precautions have been
taken, perform the cutting operation.
:ifjjZlkk`e^ Lj`e^ I`g =\eZ\ Xj X :lk$F]]
>Xl^\
(% Install the crosscut fence in the rear mounting points
shown in =`^li\., and lock it in place.
)% Check to make sure the fence is at 90˚ and adjust
it as described in :Xc`YiXk`e^:ifjjZlk=\eZ\0'
Jkfgj on GX^\,/if necessary.
*% Position the rip fence for the desired width.
+% Load the workpiece onto the table saw (=`^li\.+).
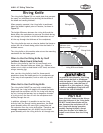
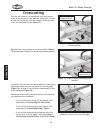
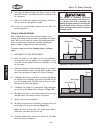
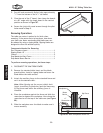
,% Slide the leading end of the rip fence behind the
front edge of the blade as shown in =`^li\.-. K_`j
jk\g`jZi`k`ZXckfi\[lZ\k_\i`jbf]YcX[\Y`e[`e^
Xe[b`ZbYXZb%
Figure .-. Correct rip fence position when
using it as a cut-off gauge.
Front Edge
of Blade
Leading Edge
of Rip Fence
Rip Fence
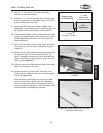
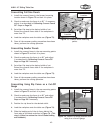
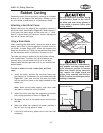
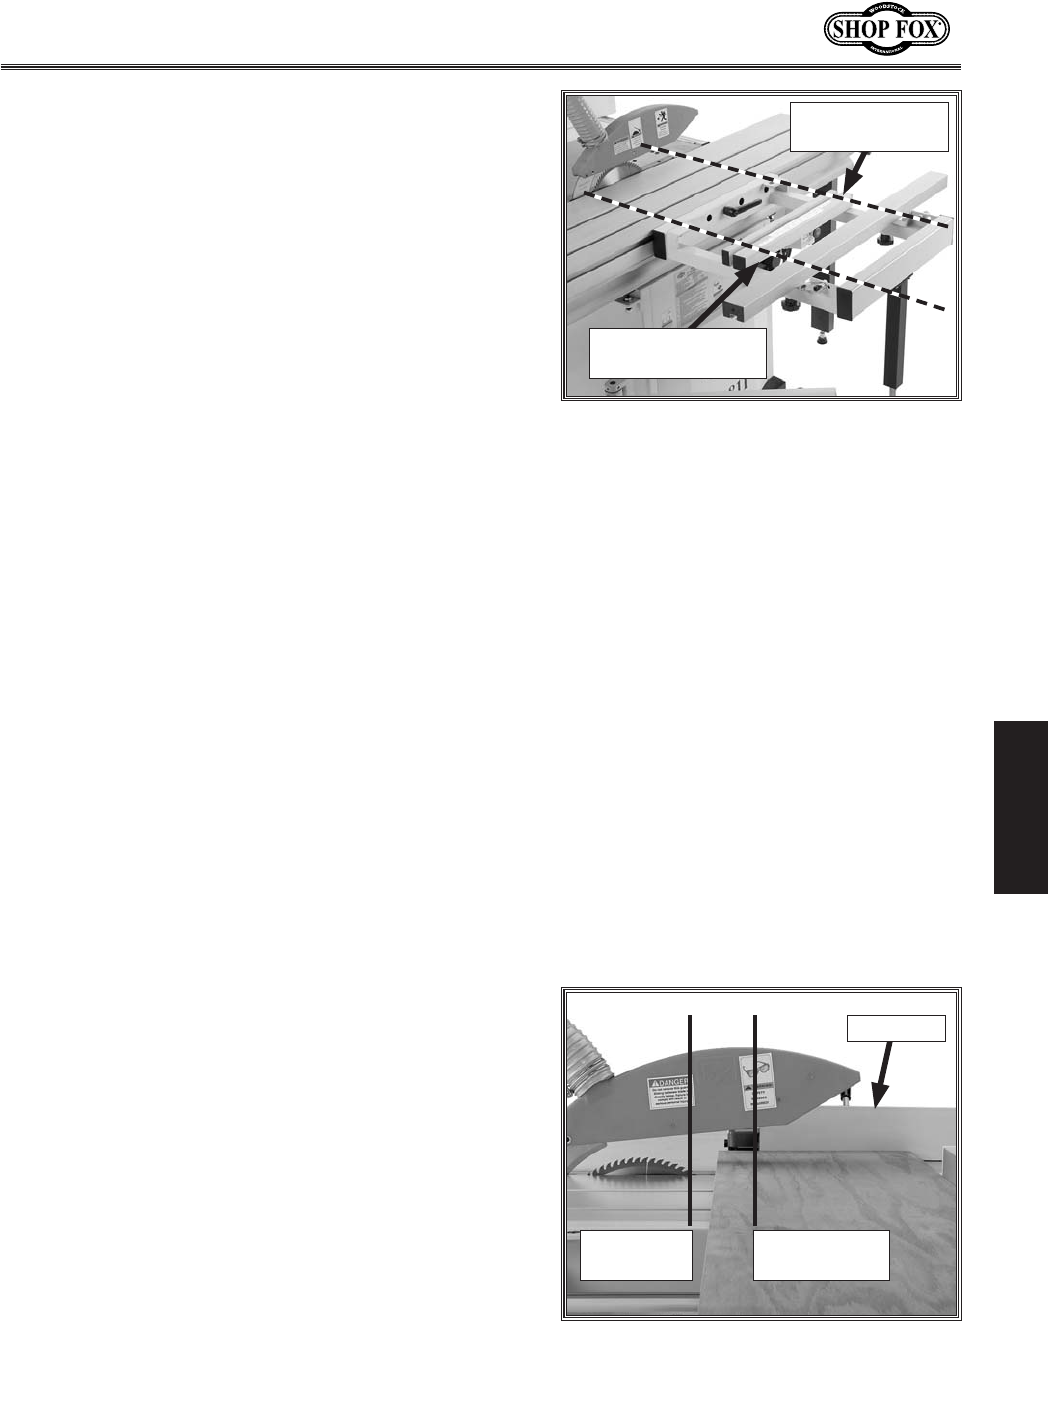
=`^li\.,% Crosscut fence mounting
points.
Forward Mounting
Location
Rear Mounting
Location