


9.
Assembly and adjustments
To reduce the risk of injury, never
connect plug to power source outlet
until all assembly steps are completed.
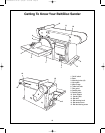
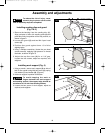
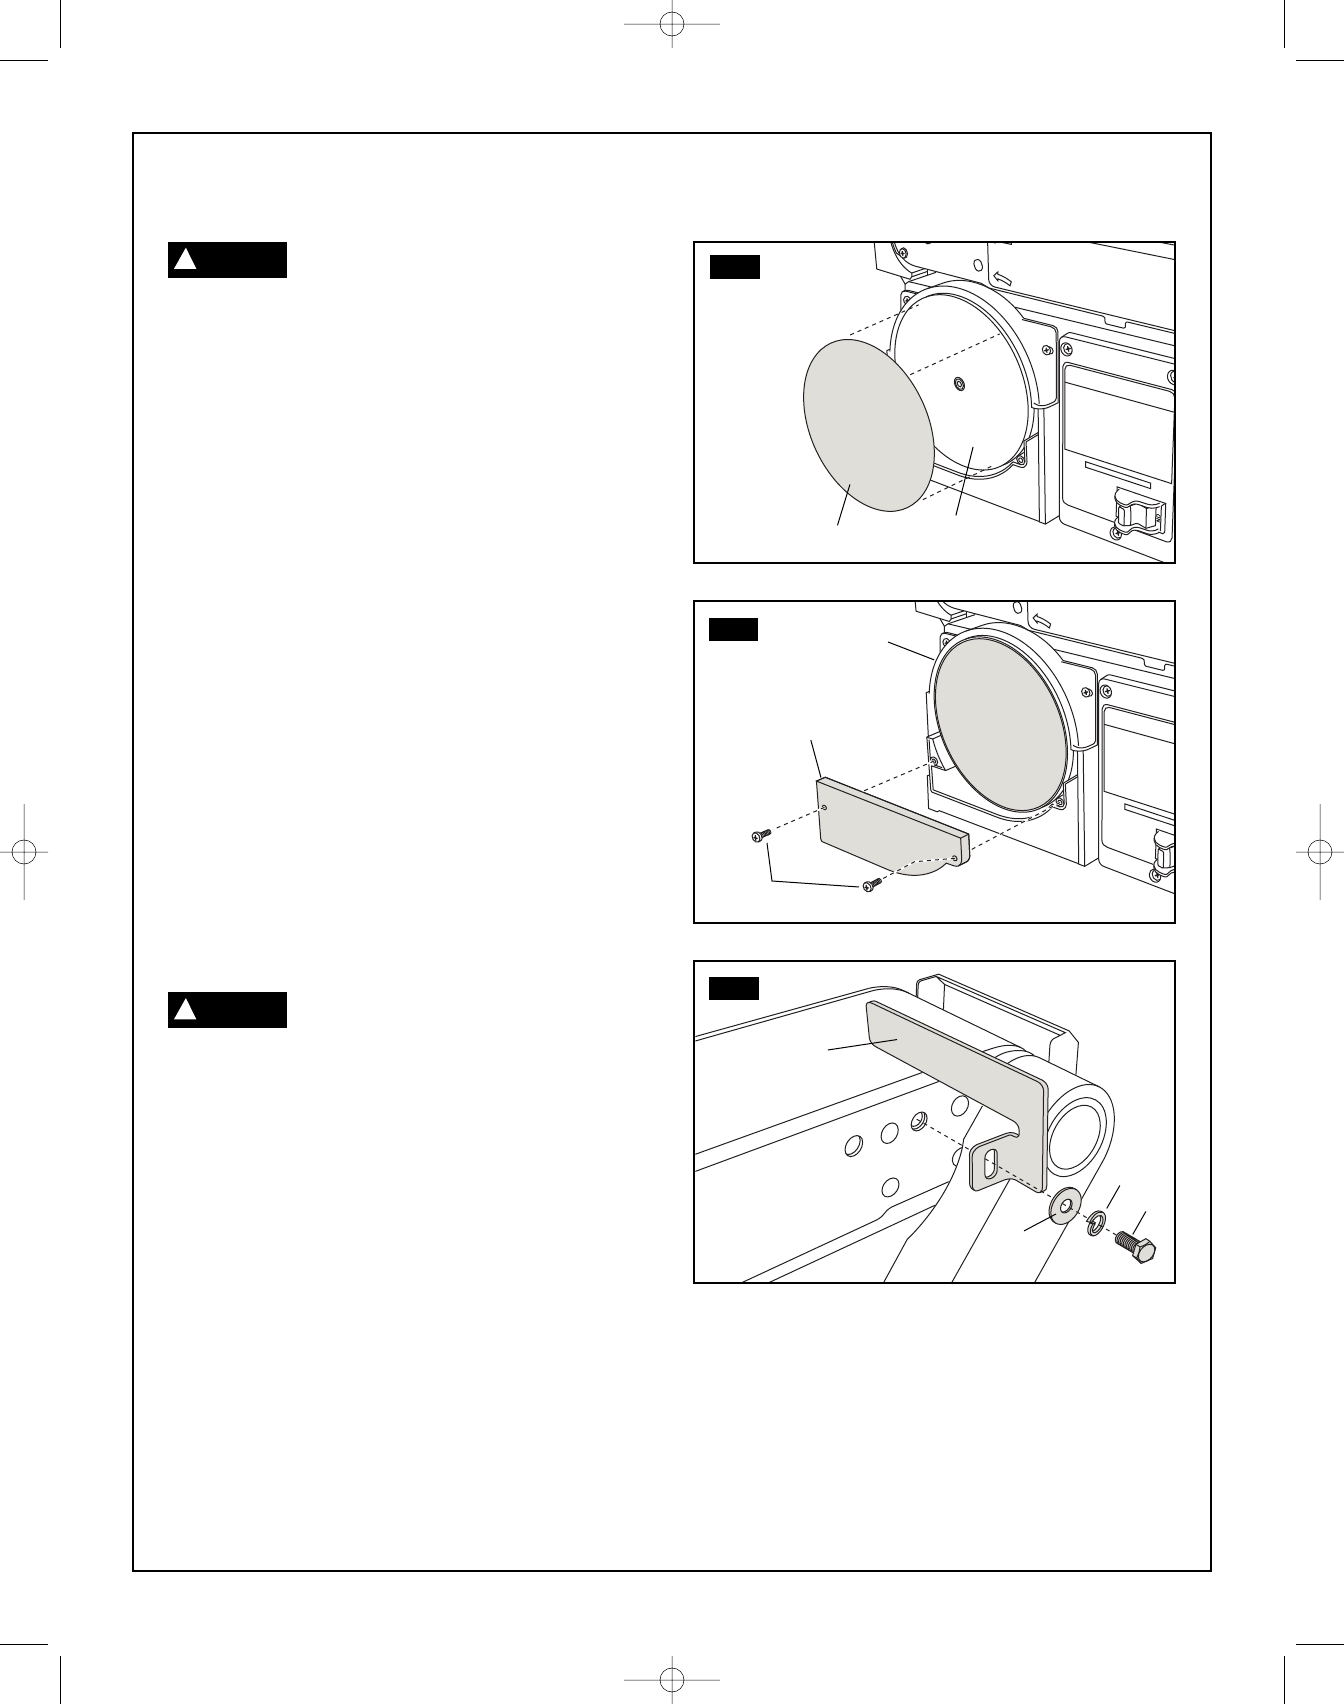
Installing sanding disc and guard
(Fig. 2 & 3)
1. Remove the backing from the sanding disc (1).
Align perimeter of disc with sanding plate (2) and
press disc firmly into position all the way around, as
shown in figure 2.
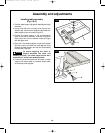
2. Locate disc guard
(3) and two M4.2 pan head
screws (4).
3.Position disc guard against lower 1/3 of disc
aligning holes.
4. Using a Phillips screwdriver, fasten the pan head
screws securely, applying light pressure to thread
the holes, as shown in figure 3.
5. Adjust the top disc cover
(5) for a 1/16” gap.
Loosen the two screws, adjust as required, and
retighten.
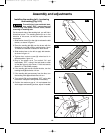
Installing work support (Fig. 4)
1. Using a wrench, secure work support (5) to side of
belt & disc sander using M6 hex screw (6), spring
lock washer (7) and washer (8), (Figure 4).
2. Hold work support in position and fasten.
To avoid trapping the work or
fingers between the work support
and sanding surface, the support edge should be
a maximum of 1-2 mm from sanding surface.
3. Loosen the hex screw of work support, adjust as
required, and retighten.
WARNING
!
WARNING
!
FIG. 2
FIG. 3
FIG. 4
1
4
5
3
6
5
8
7
2
SM 2610957110 05-08 6/5/08 7:36 AM Page 9