


© 2002 Wagner Spray Tech - All rights reserved. 5 Customer Service: 800-686-8525
English
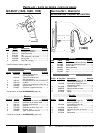
TOOLS NEEDED FOR SETUP
• Two adjustable wrenches
• 3/16” allen wrench
• Extension cord (refer to Important Electrical Information
(page 3).
Do not plug in the unit until setup is complete.
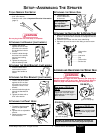
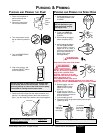
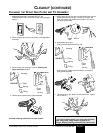
ATTACHING THE HANDLE (CART MODEL)
1. Position the handle
against the cart so that
the holes in the handle
line up with the holes in
the cart.
2. Insert the bolts through
the holes in the handle
and cart and locking
washers.
3. Tighten the wing nuts
onto the bolts by hand.
ATTACHING THE HOSE BRACKET (CART MODEL)
1. Insert the ends of the
hose bracket into the
holes of the handle as
shown.
ATTACHING THE PAIL BRACKET (CART MODEL)
1. Position the pail bracket
against the unit so that
the holes in the unit line
up with the holes in the
bracket.
2. Insert the bolts through the
holes in the bracket and
the unit.
3. Tighten the bolts with a
3/16” allen wrench.
A
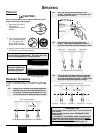
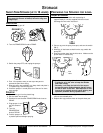
TTACHING THE PAINT HOSE
1. Thread the high pressure
hose to the paint hose
port.
2. Tighten with an adjustable
wrench.
3. Remove pusher stem
from inlet valve.
WARNING
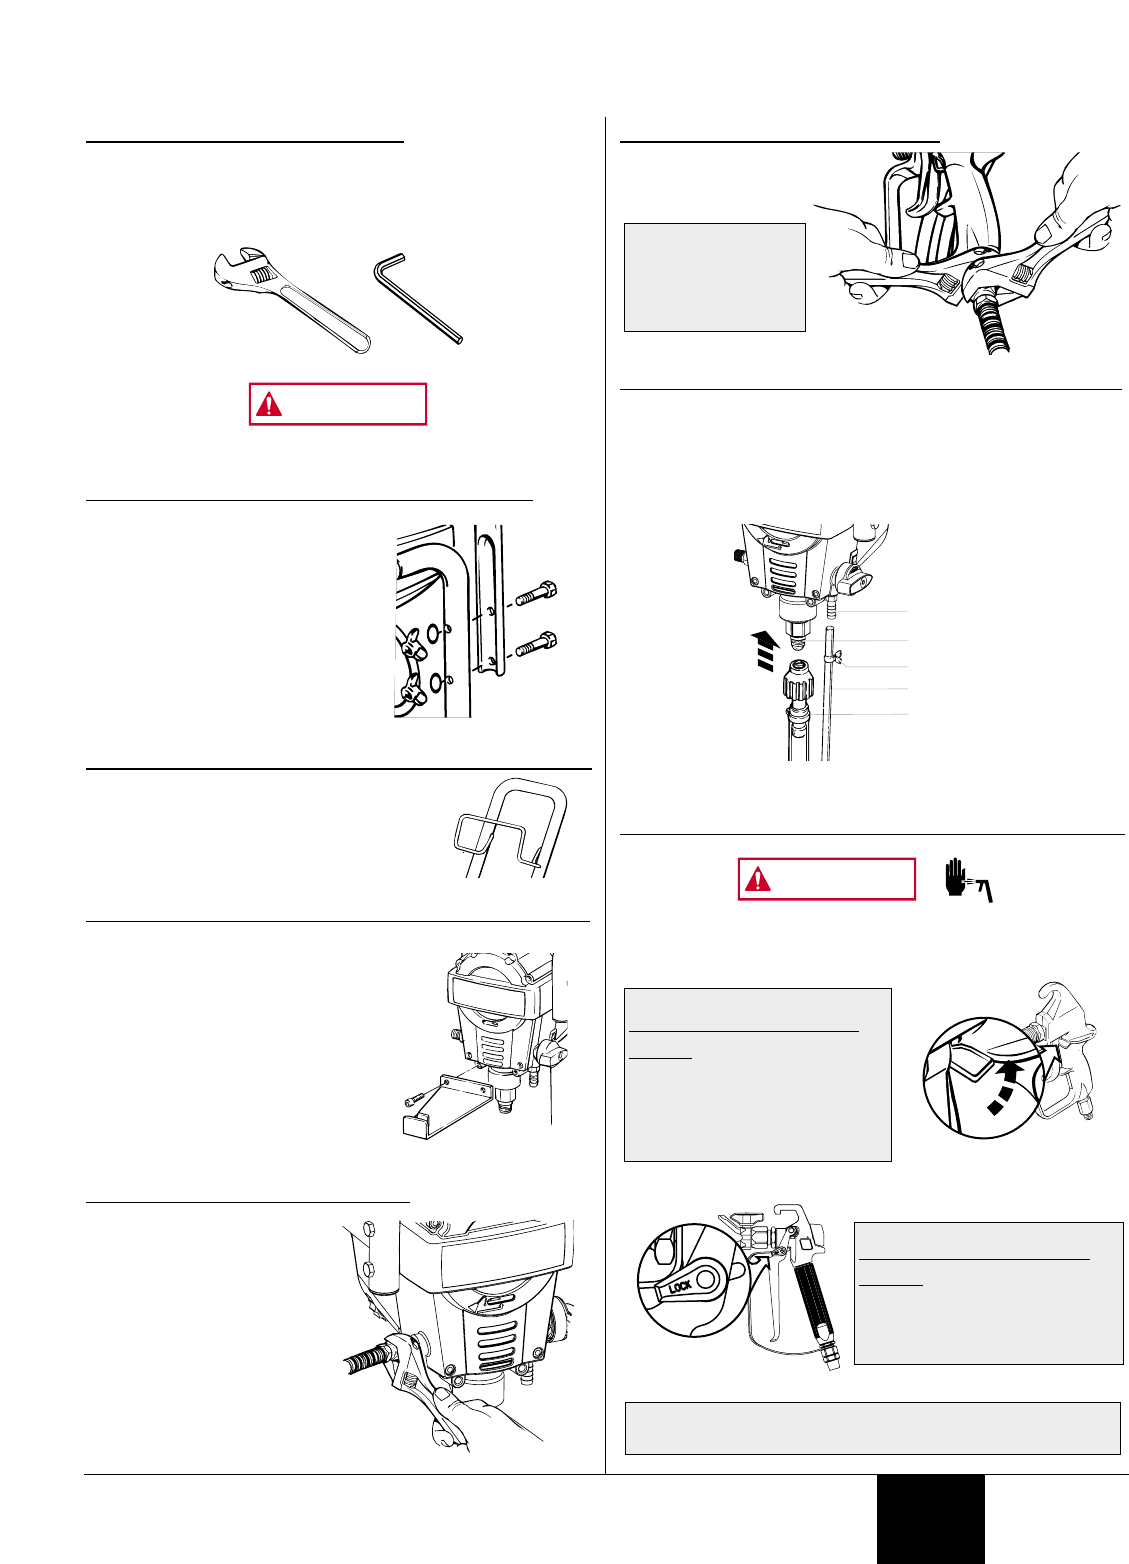
ATTACHING THE SPRAY GUN
1. Thread spray gun
onto the other end
of the hose.
ATTACHING THE SUCTION SET & RETURN TUBE
1. Attach the suction tube to the inlet valve and tighten firmly
by hand. Be sure that the threads are straight so that the
fitting turns freely.
2. Press the return tube onto the return tube fitting.
3. Squeeze clip over the return tube fitting to secure return
tube.
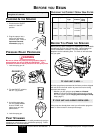
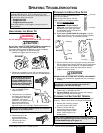
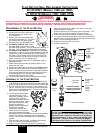
LOCKING AND UNLOCKING THE SPRAY GUN
Always lock the trigger off when attaching the spray tip or
when the spray gun is not in use. Refer to Spray Gun/Tip
Chart on page 4 to determine the gun model you have.
The spray tip SHOULD NOT be attached until after the
sprayer and paint hose have been purged and primed.
GUN MODELS GX-08 AND
GX-10
To lock the gun, turn the trigger
lock forward and slightly down
until it stops.
Gun locked
(gun will not spray)
GX-08/10
GUN MODELS GX-06 AND
GX-07
The gun is secured when the
trigger lock is at a 90° angle
(perpendicular) to the trigger in
either direction.
Gun locked
(gun will not spray)
GX-06/07
WARNING
Return tube
fitting
Return tube
Inlet valve
Suction set
Clip
Hold the gun with
one adjustable
wrench, and tighten
with the other.
SETUP--ASSEMBLING THE SPRAYER