


1
VALVE SEAL REPLACEMENT
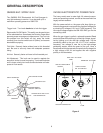
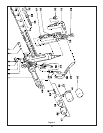
To replace valve seals you must remove the entire valve
rod.
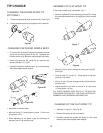
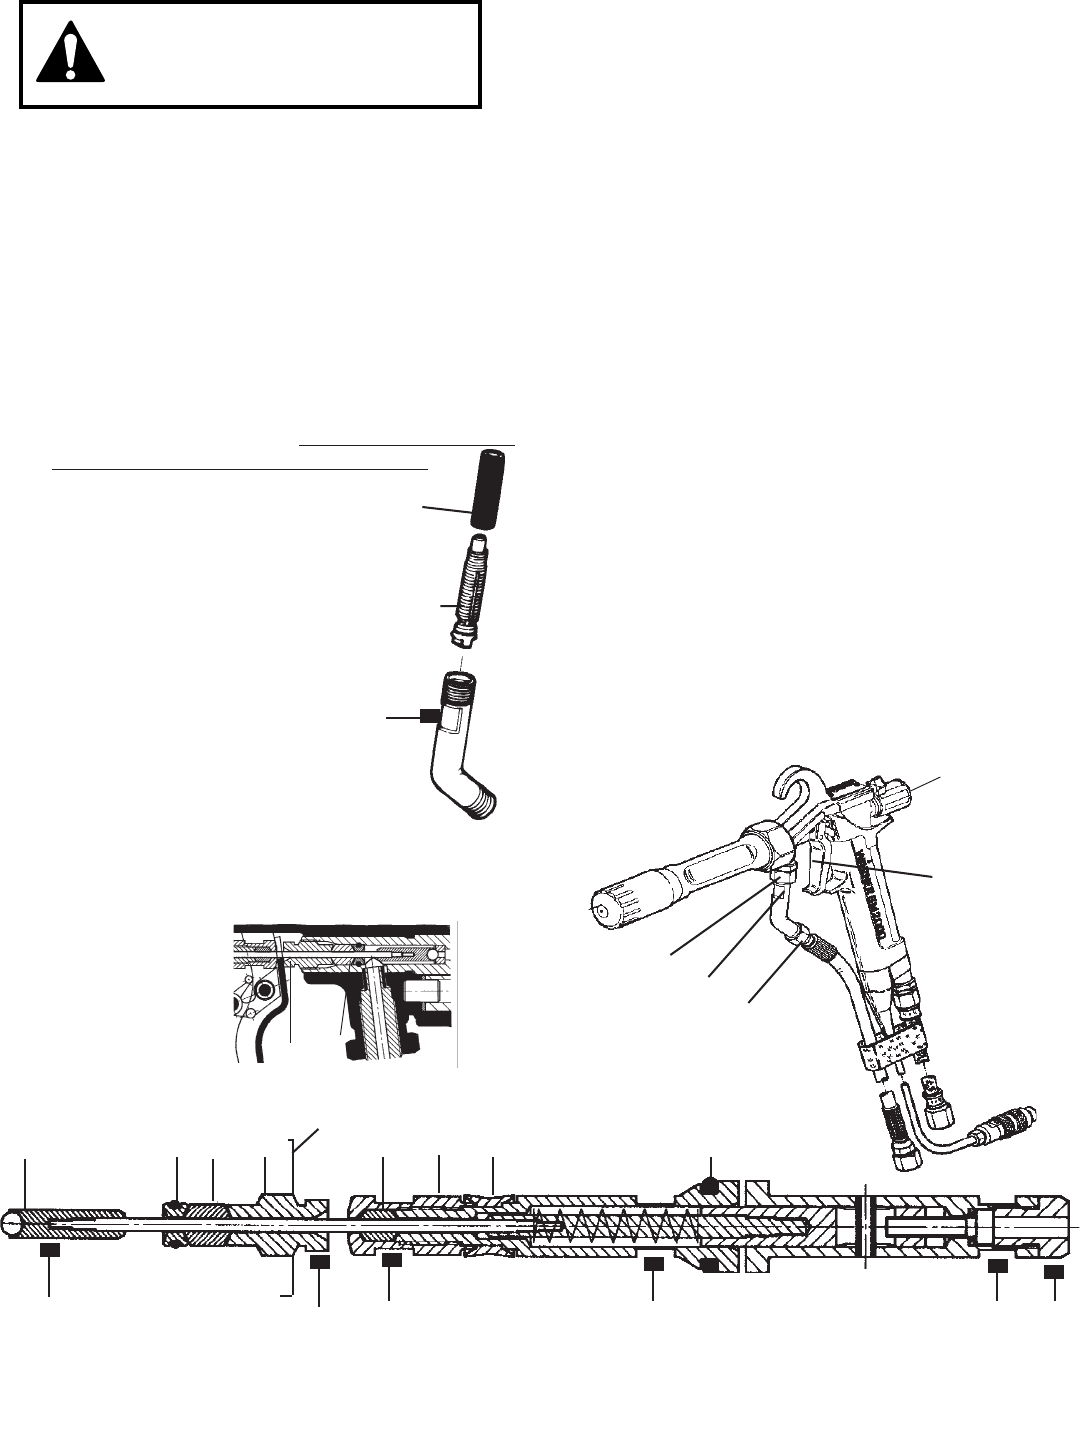
1. Actuate trigger (3) and unscrew trigger lock knob (2),
remove the compression spring. Fig. 11
2. Remove screws holding trigger asembly in place and
remove trigger (3). Fig. 11
3. Unscrew seal screw (11/C) from gun body. Fig. 12
4. Carefully remove complete valve rod by pulling end of
rod (12). Fig. 12
5. Hold the rod valve using the universal spanner at
surface (F) and using a pliers turn the valve seal
(8/B) and remove. Fig. 12
6. Remove compression ring (9) and front seal
(10). Fig.12
7. To remove push rod cap (14) hold universal spanner
at surface (E) and unscrew at surface (D). Fig.12
8. Replace compression ring with O-Ring (9), front seal
(12), rear seal (11) and if necessary push rod seal
(15) and O-Ring (16) of the air valve . Fig. 12
9. Assemble in reverse order.
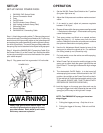
MAINTENANCE
WARNING
FILTER REPLACEMENT AND CLEANING.
10
8
12
10 11
13
9
14 15
16
C
B
D
EF
G
A
7
6
11
Figure 10
Figure 9
Figure 12
13
5
3
Figure 11
1
4
2
FRONT PACKING ADJUSTMENT
1. If there is evidence of material leakage past the front
seal (10) lightly tighten the packing nut (11)with the
universal wrench. Fig. 10
1. Disconnect material hose at fitting (1) Fig 11. Hold
material connecting tube with the universal spanner
wrench at surface (A ).
2. Disconnect union nut (4). Do not allow locking nut
(5) to rotate while disconnecting union nut.
3. Unscrew red filter screw. Fig. 9
4. Slip filter cylinder(6) from filter screw.
5. Rinse or replace filter cylinder, (7).
6. Assemble in reverse order.
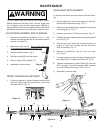
Turn off Power Pack and unplug from power source.
Relieve pressure to the Spray Gun, Lockout trigger and
turn off supply pump and air supply before cleaning or
replacing filters, tips, or any other parts failure to follw these
procedures may result in fire, explosion or injection injury.