


10
Controlling the cut:
Hydraulic feed control
The weight of the saw arm typically provides all of
the force needed to move the saw blade through the
workpiece. In fact, if the full weight of the arm is allowed
to make the cut, rapid blade wear and poor cutting
accuracy will result. Therefore, a hydraulic feed control is
provided which gives the operator control over the speed
and efficiency of cutting.
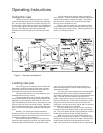
The hydraulic feed control is a single-acting
hydraulic cylinder attached between the saw base and
saw arm. The hydraulic control cylinder has two flow
controls. The control needle valve -- used by the operator
to control the rate of cutting -- is on top of the cylinder. A
quick shut-off valve is located in a hydraulic line on the
outside of the cylinder.
The control cylinder is single-acting because it can
be used to resist motion in the downward direction, only.
The control cylinder offers no resistance to upward
movement.
The amount of downward force can be controlled by
using the needle valve on top of the cylinder. When the
needle valve is closed the cylinder is "locked." With the
needle valve open slightly, the cylinder permits slow, or
light downward force. As the needle valve is opened
further, increasing weight of the saw arm presses on the
blade and workpiece.
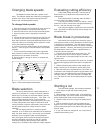
The needle valve is opened, during any cut, until the
operator determines that the saw is operating efficiently.
This is usually evaluated by observing chip formation.
See the section on Blade Selection, for more information
on evaluating cutting efficiency.
The quarter-turn quick shut off valve in the external
line of the control cylinder can be turned to lock the
cylinder at any time. For instance, it can be used to lock
the blade above the work piece to allow you to measure
the length of cut on the workpiece. Or, it can be used for
making repeated cuts after the needle valve has been set
for best cutting efficiency. (This is described in the next
section.)
To close the hydraulic control circuit and lock the
cylinder, turn the quick shut off valve handle so it is at
right angles to the hydraulic line or hydraulic cylinder.
To open the hydraulic control circuit and return feed
control to the needle valve, turn the quick shut off handle
so it is parallel with the hydraulic line or hydraulic cylinder.
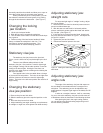
Using the stock stop
for repeated cuts
If you are cutting multiple pieces of stock, all to the
same specified length, use the stock stop.
1. Lower the saw arm to its horizontal position.
2. Loosen the stock stop set screws as necessary to slide
the stop upward and more-or-less into position.
(There are two set screws which are use to lock the stop
stock in position. One is on the saw table and is typically
used to adjust the distance between the stop and the
blade. The other set screw is on the stop, itself, and is
typically used to adjust the height of the stop above the
table. However, you can use any combination of set
screws you find convenient to adjust the stop to the
distance and height which works for the stock you are
cutting.)
3. Using a ruler or scale, measure the distance between
the blade and stock stop.
4. When the correct cut-off distance is obtained, be sure
the stock stop is at a position which allows the cutoff
piece to fall away from the blade as the cut is completed.
Then, tighten the stock stop set screws securely.
5. Raise the saw arm.
6. Place a workpiece in the saw vise and slide the
workpiece so it contacts the stock stop.
7. Open the hydraulic control cylinder quick shut off valve
and move the saw blade to just above the workpiece -
then close the needle valve so the arm is locked in
position.
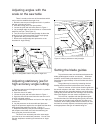
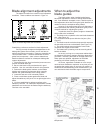
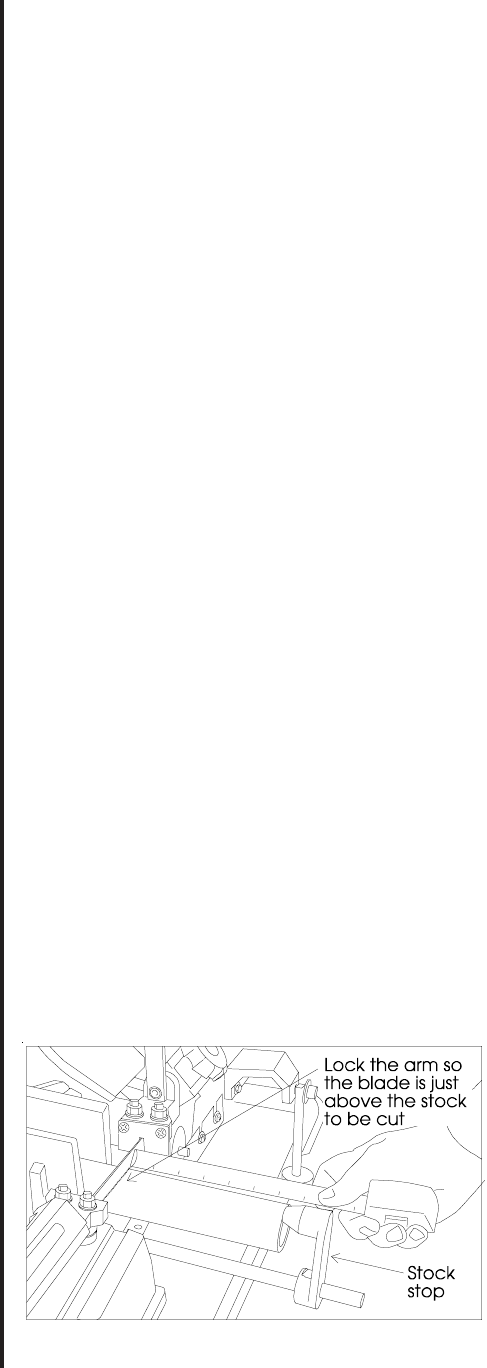
8. Measure the distance between the end of the
workpiece and the blade to verify that you have set the
stock stop at the correct distance. (See Figure 6.)
9. When you are satisfied that your cut-off distance is
correct, you may begin cutting by turning on the saw and
opening the needle valve until the blade is cutting
efficiently.
To continue making multiple cuts take the following steps:
1. Do not change the setting on the needle valve.
2. Raise the saw arm so it clears the stock being cut and
lock the hydraulic control cylinder using the quick shut off
valve.
3. Release the vise slightly using the handle wheel --
move the stock up to the stock stop -- tighten the vise
again.
4. Turn on the saw and open the quick shut off valve.
Because you established an efficient cutting rate on the
previous cuts using the needle valve, there is no reason to
change its setting. The quick shut off, alone, can be used
to begin and complete the cut.
Figure 6: Using the stock stop