


13
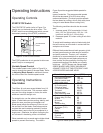
1. Turn the main switch to off.
2. Pull the door open on the pulley case.
3. Turn the clutch handle clockwise and push in,
to engage the high speed pulley drive. Or, turn
the clutch handle clockwise, and pull out, to
engage the reduction gearbox drive.
NOTE: When pushing or pulling the clutch knob,
the dogs on the clutch mechanism are being
engaged. Take the time make sure the clutch
handle is all the way in, or all the way out, so the
clutch dogs are in full engagement when the saw
is started.
4. Close the pulley case door.
5. Plug the electrical cord into the power source or
close the circuit breaker on the branch circuit.
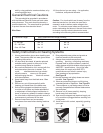
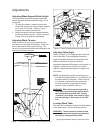
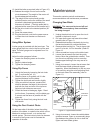
Changing Drive Belt Position
WARNING: The saw must be turned off and
power disconnected before changing drive
belt positions.
Refer to Figure 9, below.
1. Unplug the electrical cord or open the circuit
breaker in the branch circuit.
2. Open the door on the machine base and the
door on the pulley case.
3. Push up on the motor to pivot the motor
upward and slacken the drive belt.
4. Move the drive belt to the desired pulley
position.
NOTE: Never force the belts to change pulley
location without pivoting the motor to loosen the
motor belt. Failure to do so can cause damage
to the drive mechanism, and accelerate belt
wear and possibly result in belt failure.
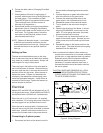
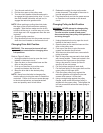
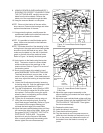
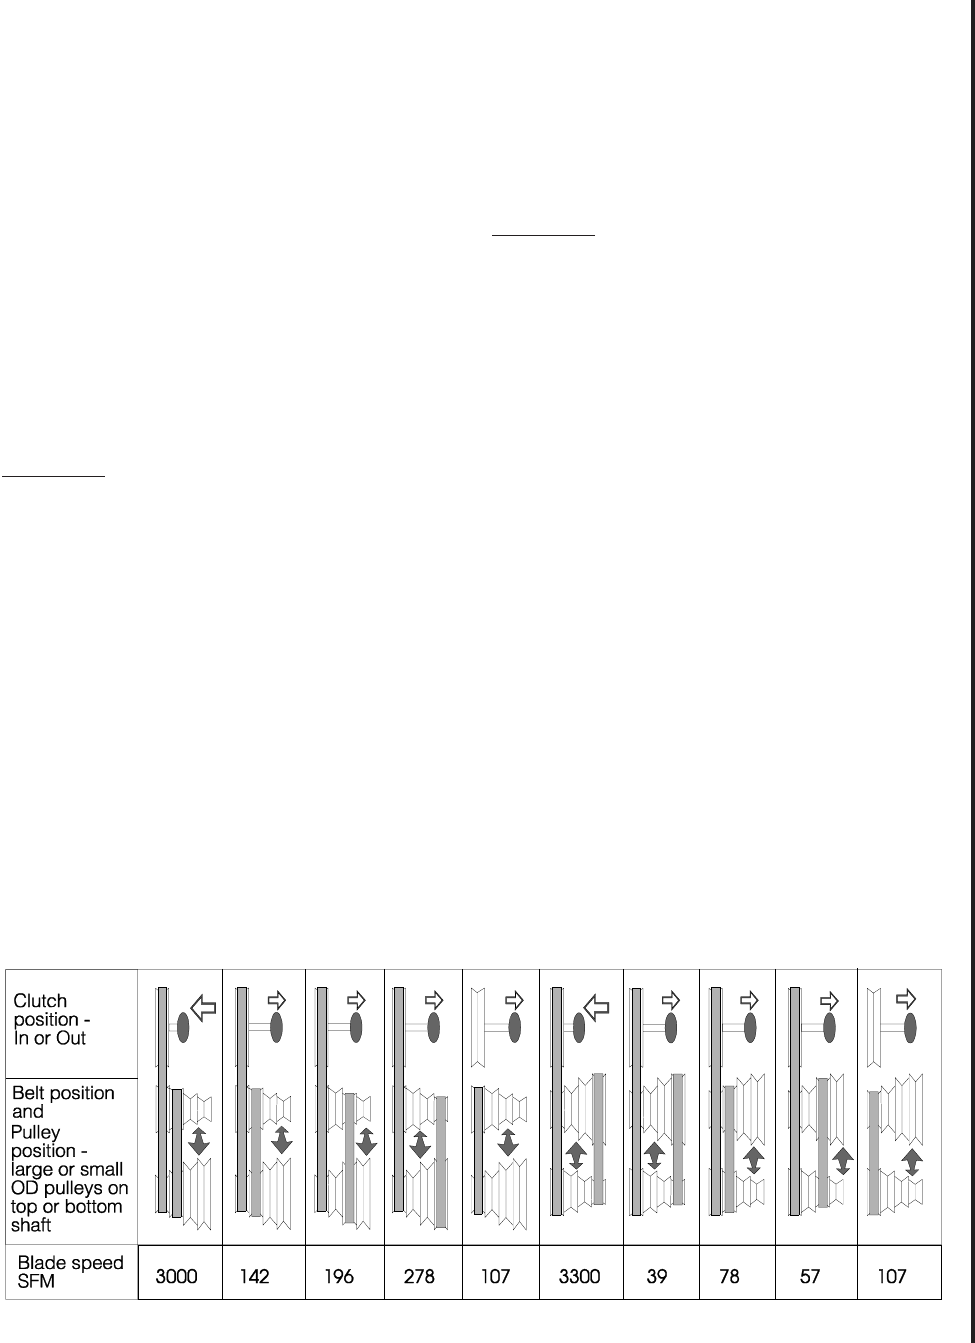
Figure 10. Clutch to Pulley Speed Settings
5. Release the weight of motor so the motor
pivots downward. The weight of the motor is
provide adequate belt tension.
6. Plug the electrical cord into the power source
or close the circuit breaker on the branch
circuit.
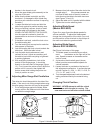
Changing Pulley-to-Belt Position
WARNING: NEVER attempt to change pulley
shaft positions while the saw is running.
The saw must be turned off and power
disconnected any time pulley shaft poistions
are being changed.
1. Unplug the electrical cord or open the circuit
breaker in the branch circuit.
2. Open the door on the machine base and the
door on the pulley case.
3. Push up on the motor to pivot the motor
upward and slacken the drive belt.
4. With the motor drive belt loose, remove both
pulley drive belts.
5. Both of the pulleys are secured to their shafts
with two set screws. These are located in the
bottoms of the V-grooves on the pulleys.
Using a hex wrench, loosen (but do not
remove) all four set screws.
6. Pull the pulleys straight off each shaft.
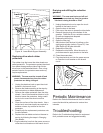
7. Put the lower pulley on the upper shaft and the
upper pulley on the lower shaft.
8. Push the upper pulley firmly against the
reduction gearbox and tighten the two set
screws which secure it to the shaft.
9. Using a straight edge against the pulley
flanges, make certain the bottom pulley is
aligned with the upper pulley. Then tighten the
two set screws that secure the lower pulley to
the shaft.