


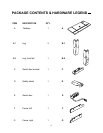
9
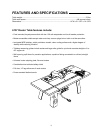
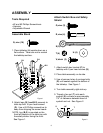
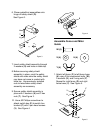
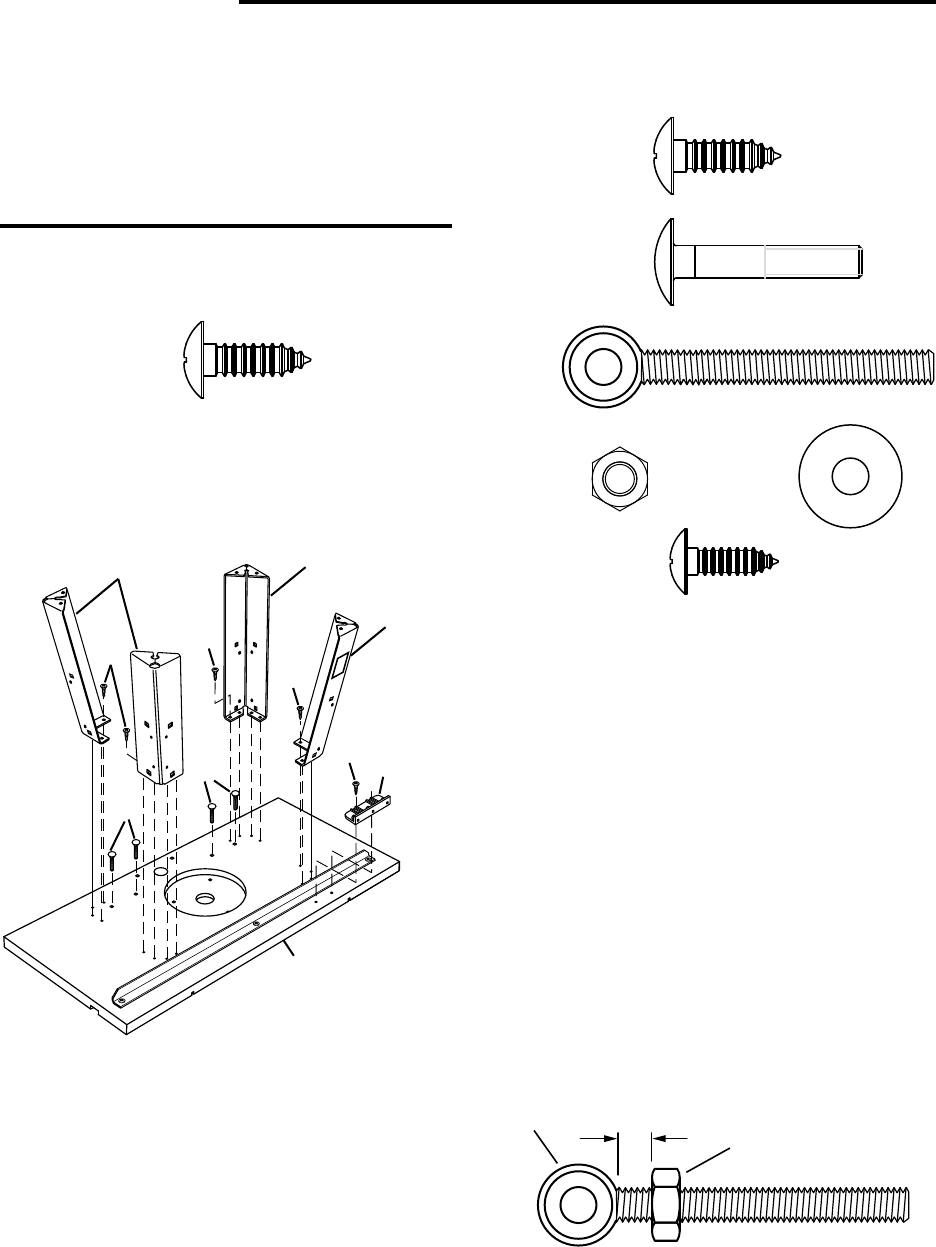
2. Attach legs (B-1 and B-2) securely to
table top with 16 pan head screws
(Q). Use a #3 Phillips screwdriver to
keep from stripping the screw heads.
NOTE: Leg (B-2) is mounted on the
front left position of the table top with
the safety sticker facing the front.
See Figure 1.
ASSEMBLY
Tools Required
• #2 and #3 Phillips Screwdrivers
• Hammer
• Adjustable Wrench
Assemble Stand
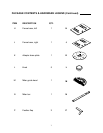
Q, zinc (16)
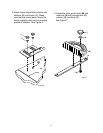
Attach Switch Box and Safety
Shield
1. Attach switch box bracket (C) to
tabletop with 2 pan head screws (Q).
2. Place table assembly on its side.
3. Use a hammer to tap 4 carriage bolts
(R) until seated against the bottom of
the tabletop. See Figure 1.
4. Turn table assembly right-side up.
5. Thread a hex nut (T) onto each
eyebolt (S) so there is approximately
1/4" of clearance between head of
eyebolt and nut. See Figure 2.
1. Place tabletop (A) upside-down on a
flat surface. Take care not to scratch
the tabletop surface.
Figure 2
R
Q
Q
Q
A
C
B-1
Q
B-1
Figure 1
Q, zinc (2)
R, zinc (4)
S (2)
T (4)
U (4)
V, black (3)
T
S
1/4"
R
B-2
W
A
R
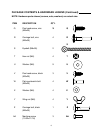
N
I
N
G