Viewing, Printing, and Saving Photos 79
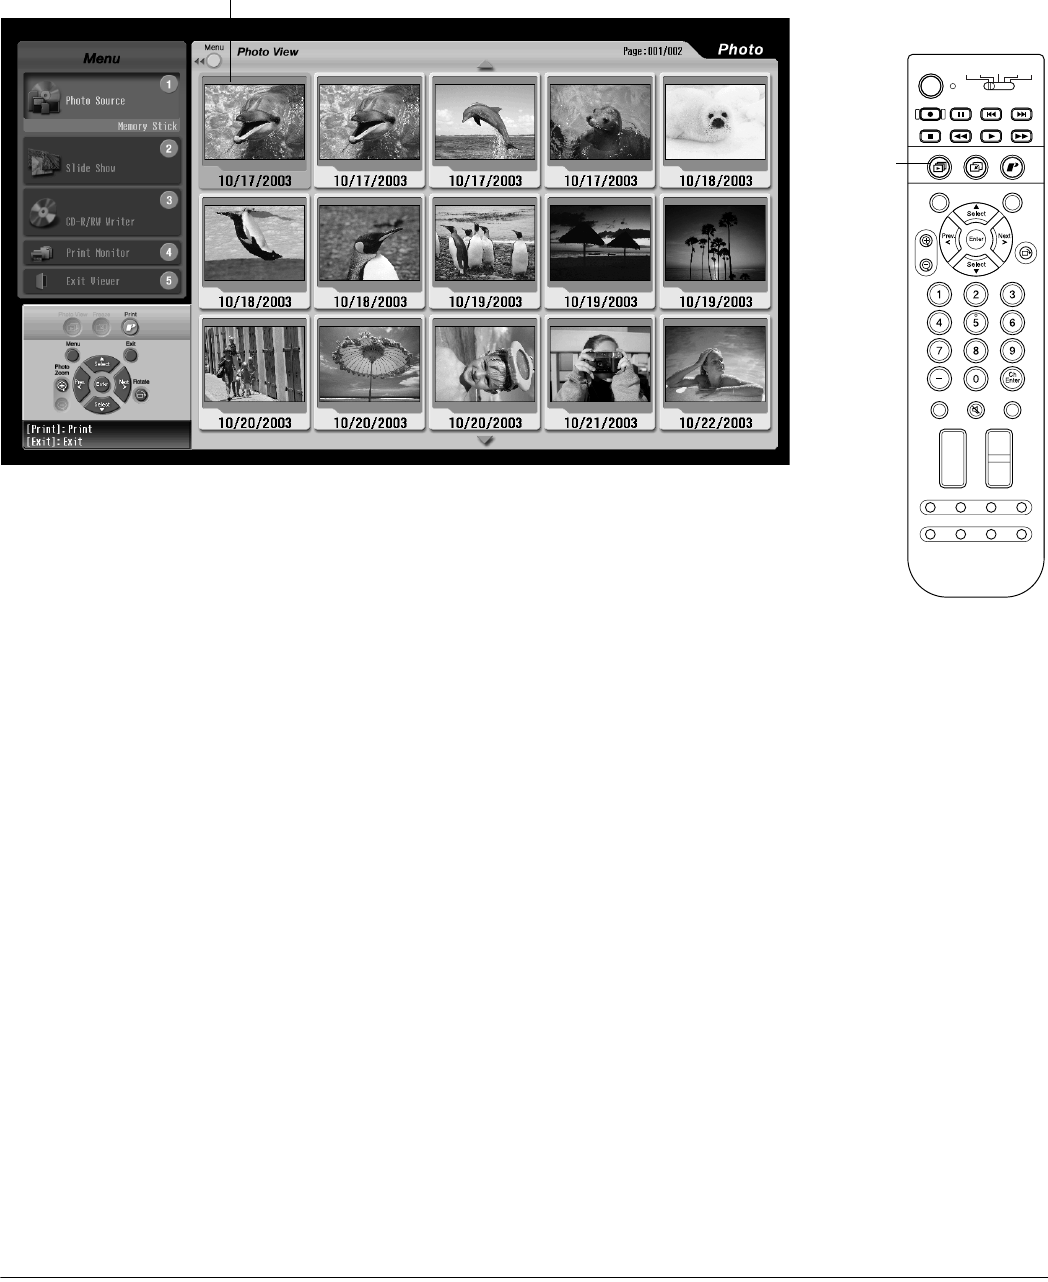
3 After a few seconds, the Photo screen appears. It displays the photos on your card and
outlines the first one in gold:
4 If you inserted more than one photo card, the photos on the card you inserted first appear
on the screen.
To switch to the photos on another card, press the 1 button. (Or press Menu, press
Select d or Select u to highlight Photo Source, then press Enter.)
The Photo Source menu on the left is opened. Press Select d or Select u to highlight
the card you want to view and press Enter.
5 Follow the instructions in these sections to view or print your photos:
• “Enlarging and Rotating Photos” on page 83
• “Viewing a Slide Show” on page 84
• “Printing Photos” on page 86
6 To exit the photo viewer, press the 5 button or press Menu, highlight Exit viewer, and
press Enter.
7 Wait for the Card light to shine green or turn off, then remove your digital photo
card(s).
o
e
If the photo viewer doesn’t
come up automatically,
press the Photo View
button on the TV panel or
remote control.
Photo
Zoom
Select
Prev.
Enter
Next
Select
Rotate
132
456
789
0
Ch
Enter
STB1TV
Power
STB2 VCR DVD
Photo View
Menu
Exit
Print
Vol.
TV/Video
Mute Favorite
Ch
PAUSEREC SKIP
STOP REW PLAY FF
Ch Display
Info
MTS
Guide
Ch Prev.
SleepSwapAspect POP
Freeze
Photo
View
Selected photo
Note
You can select the menus
on the left of the screen by
pressing the Menu button,
highlighting the menu, and
pressing Enter. You can also
select them by pressing the
number button for the
menu, such as 1 for the
Photo Source menu or 2 for
the Slide Show menu.
Caution
Don’t remove a card from
the slot when the Card light
is flashing or you may
damage the card.
