


7
HVLP Paint Sprayers
Operating Instructions and Parts Manual
www.chpower.com
HV2100, HV2105
Operation
(Cont.)
13. Pull the trigger. Notice the pattern
has become smaller. (You can
continue reducing the material
flow and move the spray gun even
closer to the surface and the
pattern will keep getting smaller).
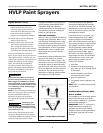
14. Rotate the air cap to a diagonal
position (See Figure 2).
15. Every so often, turn the material
flow knob to a different position.
Also, change the distance of the
spray gun from work surface. Notice
how doing this changes pattern size.
There is one additional control to
know. If you loosen the air cap locking
ring, approximately 1-2 turns, you can
control the fan pattern size and trim or
feather the edge of the fan pattern
itself. This should be considered a
secondary control, the primary fan
pattern size being adjusted between
fluid flow and distance of the spray
gun from the work piece.
Even when the turbine is turned off,
pressure will remain in the spray cup.
When trigger is pulled back, a stream
of fluid will flow. To prevent accidents,
turn material flow knob clockwise until
it is completely closed, locking trigger
in closed position.
NOTE: It is not necessary to empty and
clean your spray gun when you pause
between applications. Be sure,
however, to clean your spray gun
thoroughly at the end of your work
session.
Clean spray gun
thoroughly at end
of work session. Do not allow coating
to dry in spray gun overnight or at any
time when not in use.
Extra caution should be taken when
spraying coatings that have a catalyst
or hardener added since many of these
coatings have short pot life. These
NOTICE
!
WARNING
coatings can harden in your spray gun
quickly, making cleaning difficult or
impossible. Read manufacturer’s
coating instructions to help determine
how quickly a particular coating will
harden in your spray gun.
SPRAYING TECHNIQUE
Practice is the key element in achieving
a proper spray technique. Never try to
rush the spray finishing process. Learn
the properties of the coating you will
be spraying. Build up layers of material
(3-4 applications, or more if needed).
Sand between coats, if needed, and
allow proper drying time between
applications.
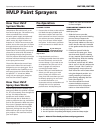
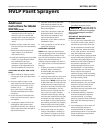
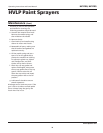
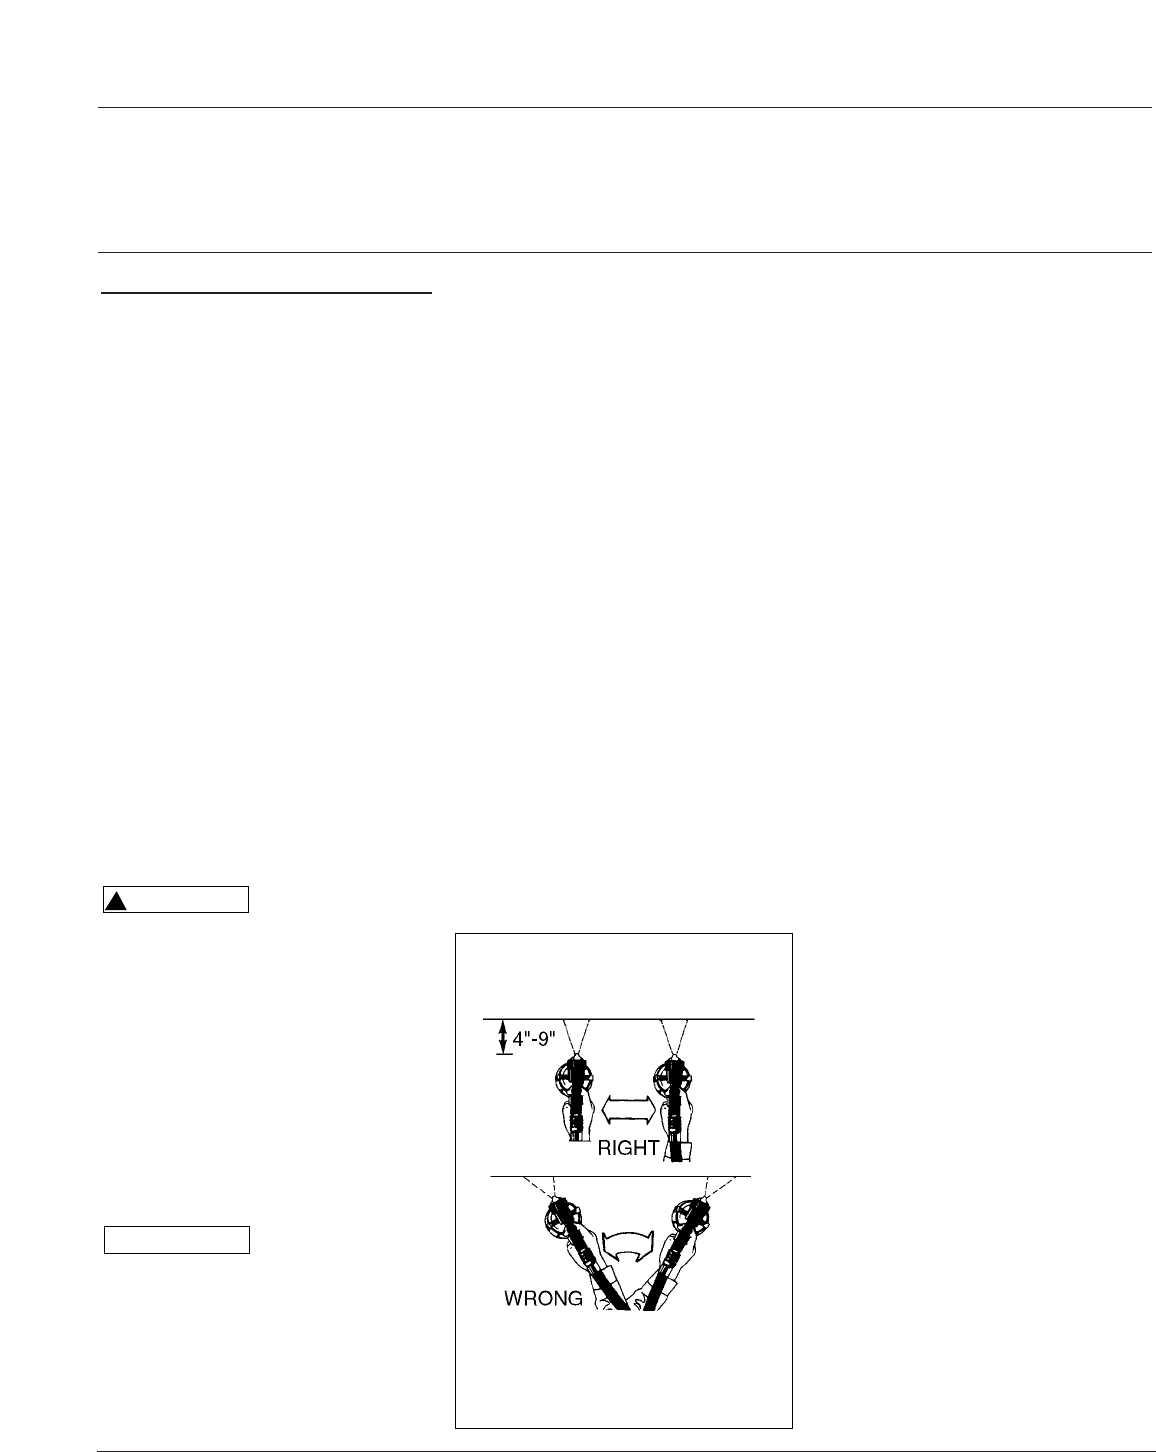
Remember to keep the distance of the
spray gun the same when moving
across your work (called a “pass”). Do
not rotate or turn your wrist from side
to side (See Figure 3). Move the spray
gun across your work from end to end.
Be sure to maintain the same speed of
movement. This will ensure an even
application of coating. Always release
the trigger at the end of a pass.
Continue spraying in the opposite
direction overlapping your previous
coat by 1/3 to 1/2. When finished, you
should have an even wet coat on your
work. If you have dry spots, you have
overlapped too widely.
If you have heavy or wet spots, you
have overlapped too much. When
spraying a large or pre-assembled
piece, start at the top and work down.
Try to spray the hard-to-reach surfaces
first. Keep in mind that a light, wet
film will generally produce better
results than a heavy, wet coat. When
spraying a vertical surface, apply a
thin“tack” coat first, followed by a
normal light wet coat. This technique
will help prevent “runs” and “sags.”
When using your Spray Gun you
control five variables.
1. Fluid flow
2. Distance of the spray gun from
your work. (4"–8" is average. Closer
if necessary.)
3. Pattern Direction (vertical fan,
horizontal fan and round)
4. Speed of application
5. Fan pattern control (adjust air cap
ring)
NOTE: Items 1, 2, and 4 directly relate
to each other.
RUNNING MULTIPLE SPRAY GUNS
WITH A TURBINE
It is possible to run the 4-stage turbine
system with two spray guns at the
same time by installing “Y” Connector
to the turbine outlet port.
IMPORTANT: If the “Y” connector is
installed and only one spray gun
operated, the 2nd outlet must be
capped or closed so that performance
to the single spray gun will not be
affected.
Figure 3 - Proper Spray Technique