


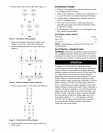
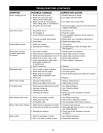

ADJUSTING TABLE ANGLE
Refer to Figure 16.
Angle cuts can be made by tilting table left to right.
Loosen socket head bolts (Key No. 12) to tilt table up
to 15° right or left. Use angle scale to set table angle
(Key No. 18).
TYPE OF CUT
• Band saw can be used to perform a variety of cuts.
Cutting procedure used depends on size and
desired shape of cut.
• The rip fence is used to guide workpiece to produce
straight cuts on longer pieces.
• Contour cutting is done by guiding workpiece free-
hand to produce curved shapes.
• Beveled cutting can be done with any proper work
guide method by tilting table.
• Regardless of which method is used, a workpiece
which overhangs table by more than 10" should be
properly supported by free standing material stands.
See "Recommended Accessories," page 17.
USING RIP FENCE
Refer to Figure 16.
• Rip fence is used to guide workpiece straight into
blade producing a desired width of cut. Set rip fence
to desired width of cut on either side of blade. Kerr
of the blade must be considered when setting up.
• Lock rip fence securely with rip fence lock knob
(Key No. 43). The portion of material between blade
and rip fence is considered the workpiece. Material
outside of blade is considered scrap to be cut off.
• Guide workpiece into blade but do not push on scrap
side of material. Avoid passing hands beyond blade.
Use push sticks to finish cuts and pass workpiece
away from blade.
CONTOUR CUTTING
• When contour cutting, both hands must be used
to keep workpiece flat against table and guided
along path.
• Avoid placing hands in line of blade. If hands contact
blade it may cause injury.
• Stand in front of saw and use both hands over
portion of table to right of blade and before cut.
Do not attempt to cut sharp corners.
• Cut small corners by sawing around them and
removing scrap until shape is produced.
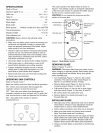
CHIP BLOWER
Refer to Figure 16.
• Band saw is equipped with chip blower used to
remove chips to make contour cutting easier.
• Adjust air nozzle (Key No. 31) so that pump air
blows chips away from blade and workpiece.
MITER GAUGE
• Use miter gauge (not provided) for securing and
holding workpiece at desired angle to produce
angled cuts. Use scale to adjust gauge to desired
angle.
• Never use miter gauge (not provided) and rip fence
at the same time. The blade might bind in the work-
piece. Operator could be injured and/or workpiece
could be damaged.
PREPARING BLADE FOR WELDING
• A properly prepared blade is essential in producing
a high-quality, long lasting band saw blade.
• The blade must be cut to proper length.
• Blade ends should be cut and ground square.
• Any rust, oil or dirt must be removed.
• Some teeth must be ground off blade ends depending
upon the pitch of the blade.
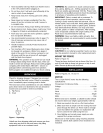
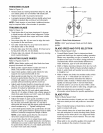
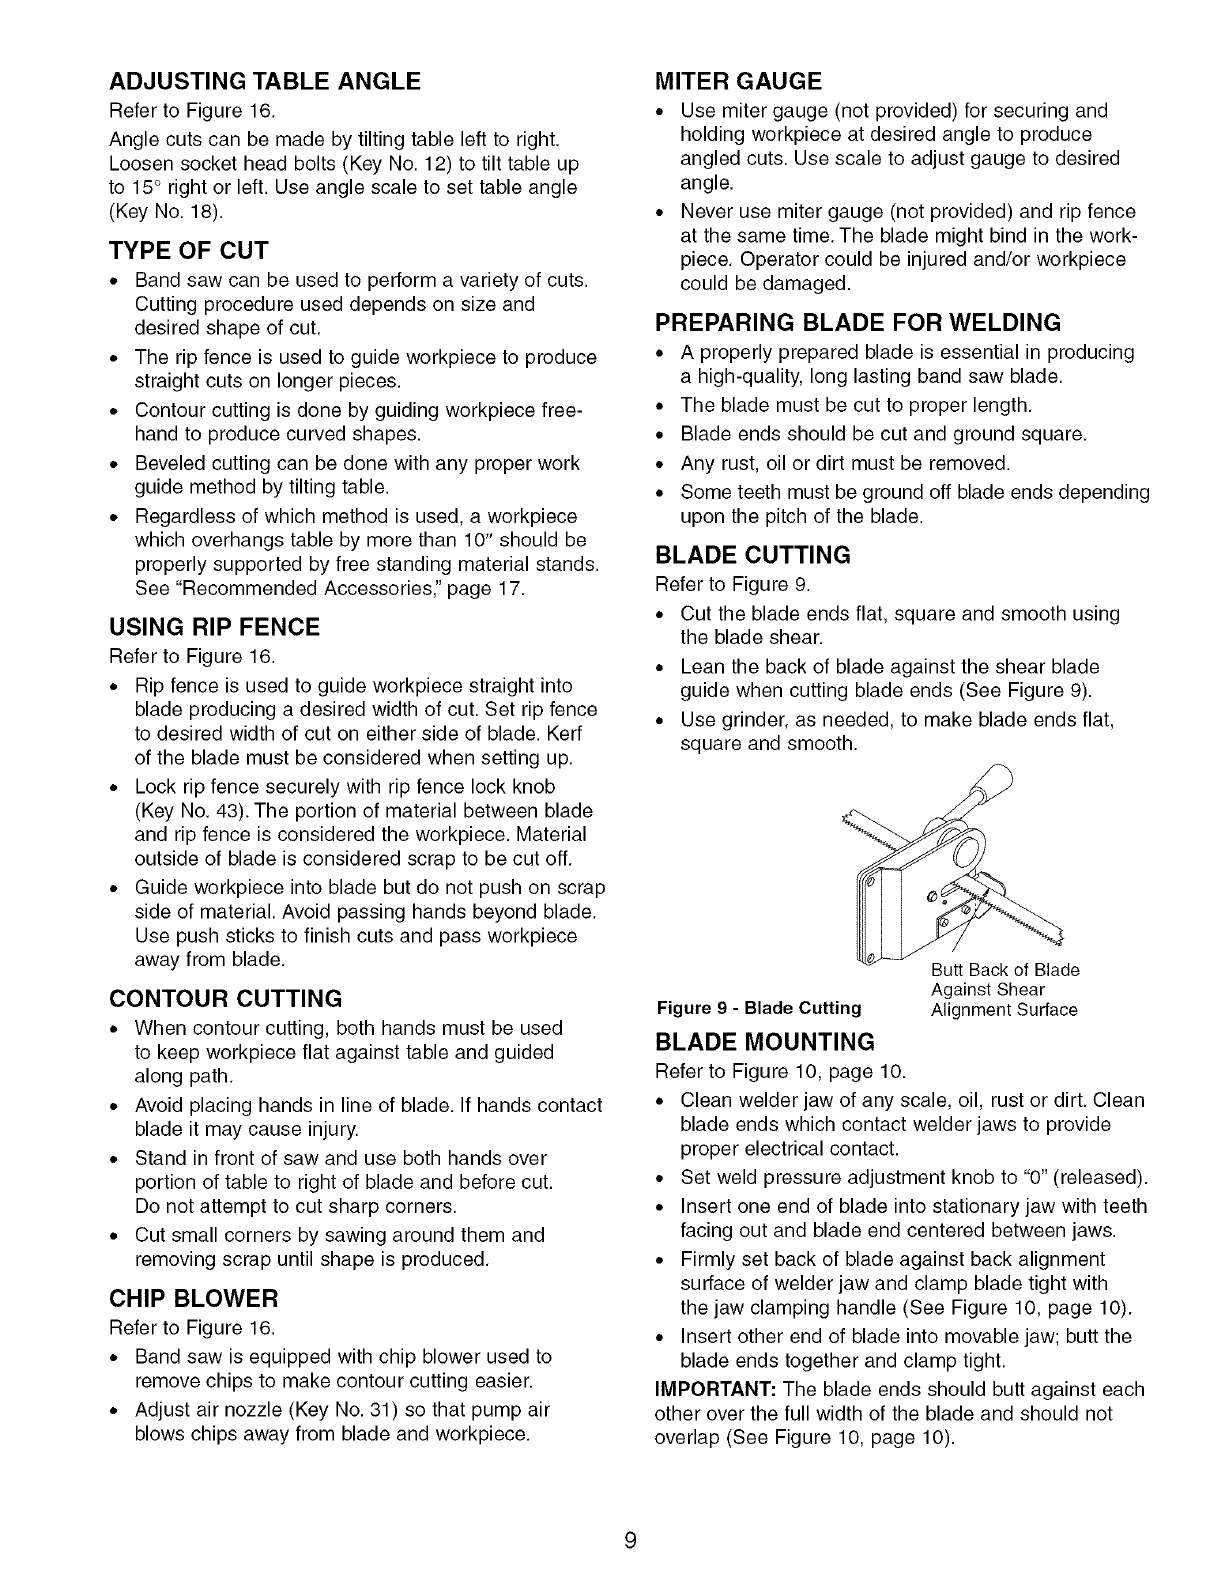
BLADE CUTTING
Refer to Figure 9.
• Cut the blade ends flat, square and smooth using
the blade shear.
• Lean the back of blade against the shear blade
guide when cutting blade ends (See Figure 9).
• Use grinder, as needed, to make blade ends flat,
square and smooth.
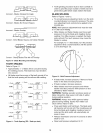
Butt Back of Blade
Against Shear
Figure 9 - Blade Cutting Alignment Surface
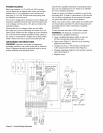
BLADE MOUNTING
Refer to Figure 10, page 10.
• Clean welder jaw of any scale, oil, rust or dirt. Clean
blade ends which contact welder jaws to provide
proper electrical contact.
• Set weld pressure adjustment knob to "0" (released).
• Insert one end of blade into stationary jaw with teeth
facing out and blade end centered between jaws.
• Firmly set back of blade against back alignment
surface of welder jaw and clamp blade tight with
the jaw clamping handle (See Figure 10, page 10).
• Insert other end of blade into movable jaw; butt the
blade ends together and clamp tight.
IMPORTANT: The blade ends should butt against each
other over the full width of the blade and should not
overlap (See Figure 10, page 10).