


1414
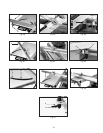
Fig. 68
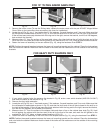
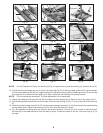
1. Loosen the clamp handle (A) and the clamp knob (D) Fig. 68. Slide the fence (C) Fig. 68 from the two fence clamps (B).
2. Remove the fence locking handle, the clamp knob, and the fence clamps (B) and re-position the fence clamps (B), clamp
handle, and clamp knob to the rear of the sliding table (Fig. 68).
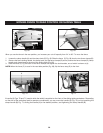
3. Slide the fence (C) Fig. 69 back on the fence clamps and tighten the lock handles, one of which is shown at (A).
NOTE: When the fence (C) is used in the rear table position (Fig. 69), flip the fence stop (D) to the front.
Fig. 69
A
B
C
A
C
D
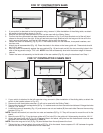
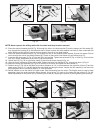
MOVING FENCE TO REAR POSITION ON SLIDING TABLE
L
Fig. 70 Fig. 71
A
D
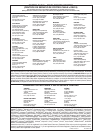
When you use the fence in the rear position, you increase your cut-off capacity from 24" to 36". To move the fence:
B
A
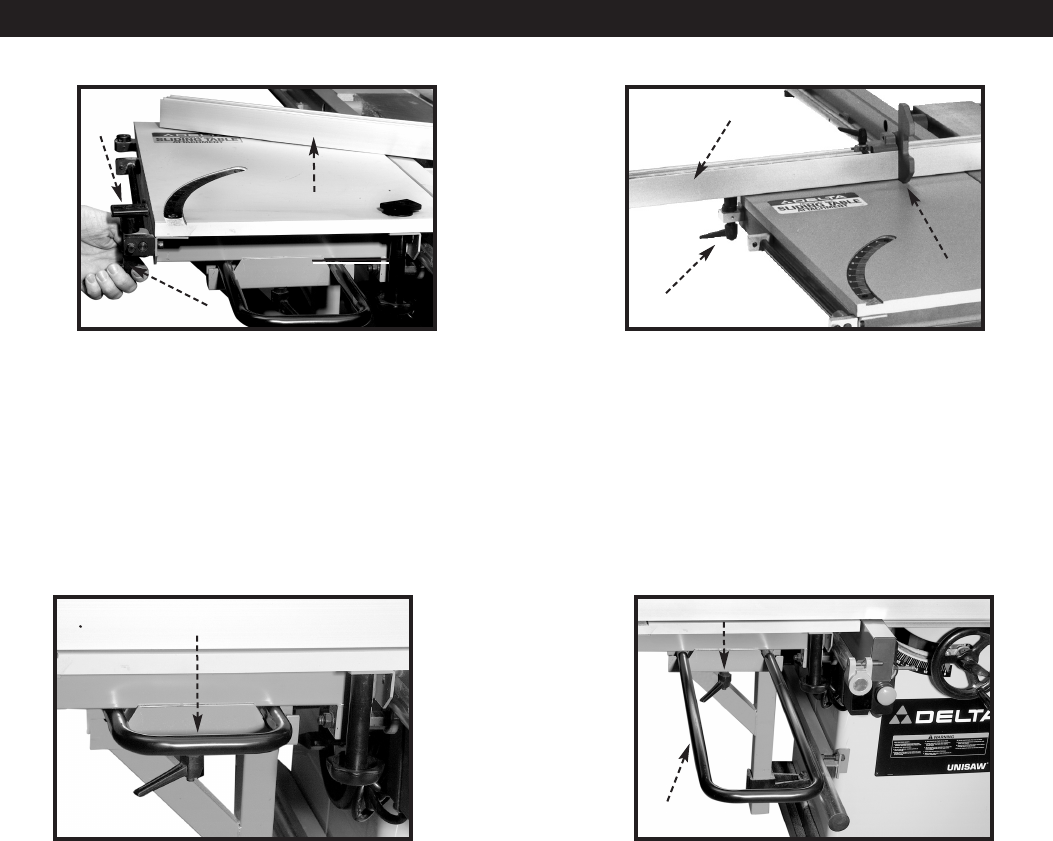
A handle (A) Figs. 70 and 71 (used to slide the table) is supplied on the front of the sliding table mechanism. Depending
on the size of the workpiece and/or operator convenience, you can move the handle (A) (Fig. 70) out by loosening the
clamp handle (B) Fig. 71, sliding the handle (A) to the desired position, and tightening the clamp handle (B).