


5
ASSEMBLY
If your saw is equipped with the Delta Jet-Lock Rip Fence with round guide rails, cut 5-1/2" off of the left end of both
the front and rear guide rails. If your saw is equipped with a Beisemeyer fence, measure 1-1/2" to the left from the left
side of the table and cut the rail. If your saw is equipped with the Delta Unifence Saw Guide, cut 8" off the left end of
the front guide rail. Another option for the old Unifence is to redrill the mounting holes in the front guide rail 8" to the
left and reposition the rip scale. On the new Unifence, the rail can slide by loosening the two bolts and repositioning
the rip scale.
DISCONNECT MACHINE FROM POWER SOURCE.
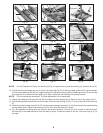
Fig. 4
Fig. 5
Fig. 6
A
Fig. 7
E
D
F
D
E
F
B
B
C
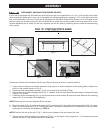
(Contractor II Saws and Contractor Saw (Current Style) instructions follow in another section).
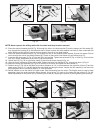
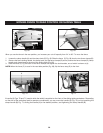
1. If your switch is attached to the left extension wing, remove it. (After installation of the sliding table, re-attach the
switch to the location shown in Fig. 8).
2. Remove the left-hand table extension. (It will not be used with the Sliding Table.)
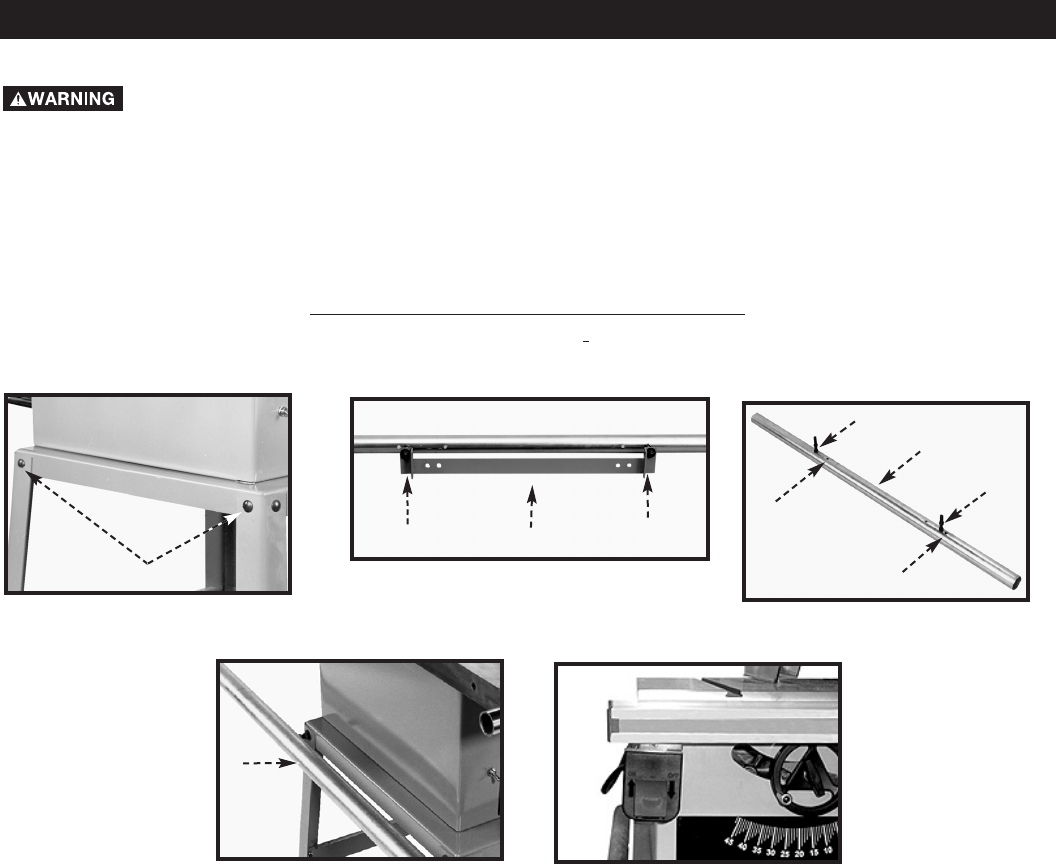
3. Remove the two top left carriage bolts (A) Fig. 4, washers, and nuts from saw stand and discard. Enlarge the holes
using a 7/16" drill bit.
4. Locate the lower rail assembly (Fig. 5), and remove one nut and washer (B) from each side. Remove the mounting
bracket (C). (It is not used in this assembly.)
NOTE: Save the two nuts and washers (B) for use later.
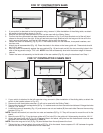
5. Move the studs (E) Fig. 6 on the lower guide rail (F) to the holes (D) in the guide rail. Holes should be 20-1/4" apart.
6. Attach the lower guide rail (F) Fig. 7 to the two holes in the stand using the two flat washers and nuts that were
removed from the lower rail assembly in STEP 3.
NOTE: Position the end of the rail (F) Fig. 7 with the stud closest to the end toward the front.
7. Tighten the four nuts that attach the guide rail (F) Fig. 7 to the stand. Leave a space of 1-1/4" between the guide
rail and the stand. Final adjustments will be made later.
FOR 10" CONTRACTOR’S SAWS
(OLD STYLE)
Fig. 8