Auto Setup
Optimize settings for speakers in use.
Some typical examples are described below.
SOURCE SELECT
TUNER
PHONO
HDP
DVD
CD
TV/CBL
Select input source and make playback
settings
AUTO SETUP
1 2 3 4 5
Start
RETURN
Amp Assign
STEP1 Speaker Detection
Please place the microphone at ear
height at main listening position.
Start Auto Setup
Enter Cancel
Config 5.1
Selected item
name
List of subsequent items
Guidance text for item at
cursor position
Illustration
Operation
button guidance
Guidance text for item at cursor
position
Operation guidance text
n Icon
n List
Assign
Input Mode
Rename
Other
Switch the selected item
Selected item
Switch the selected item
Switch to the next item
Selected item
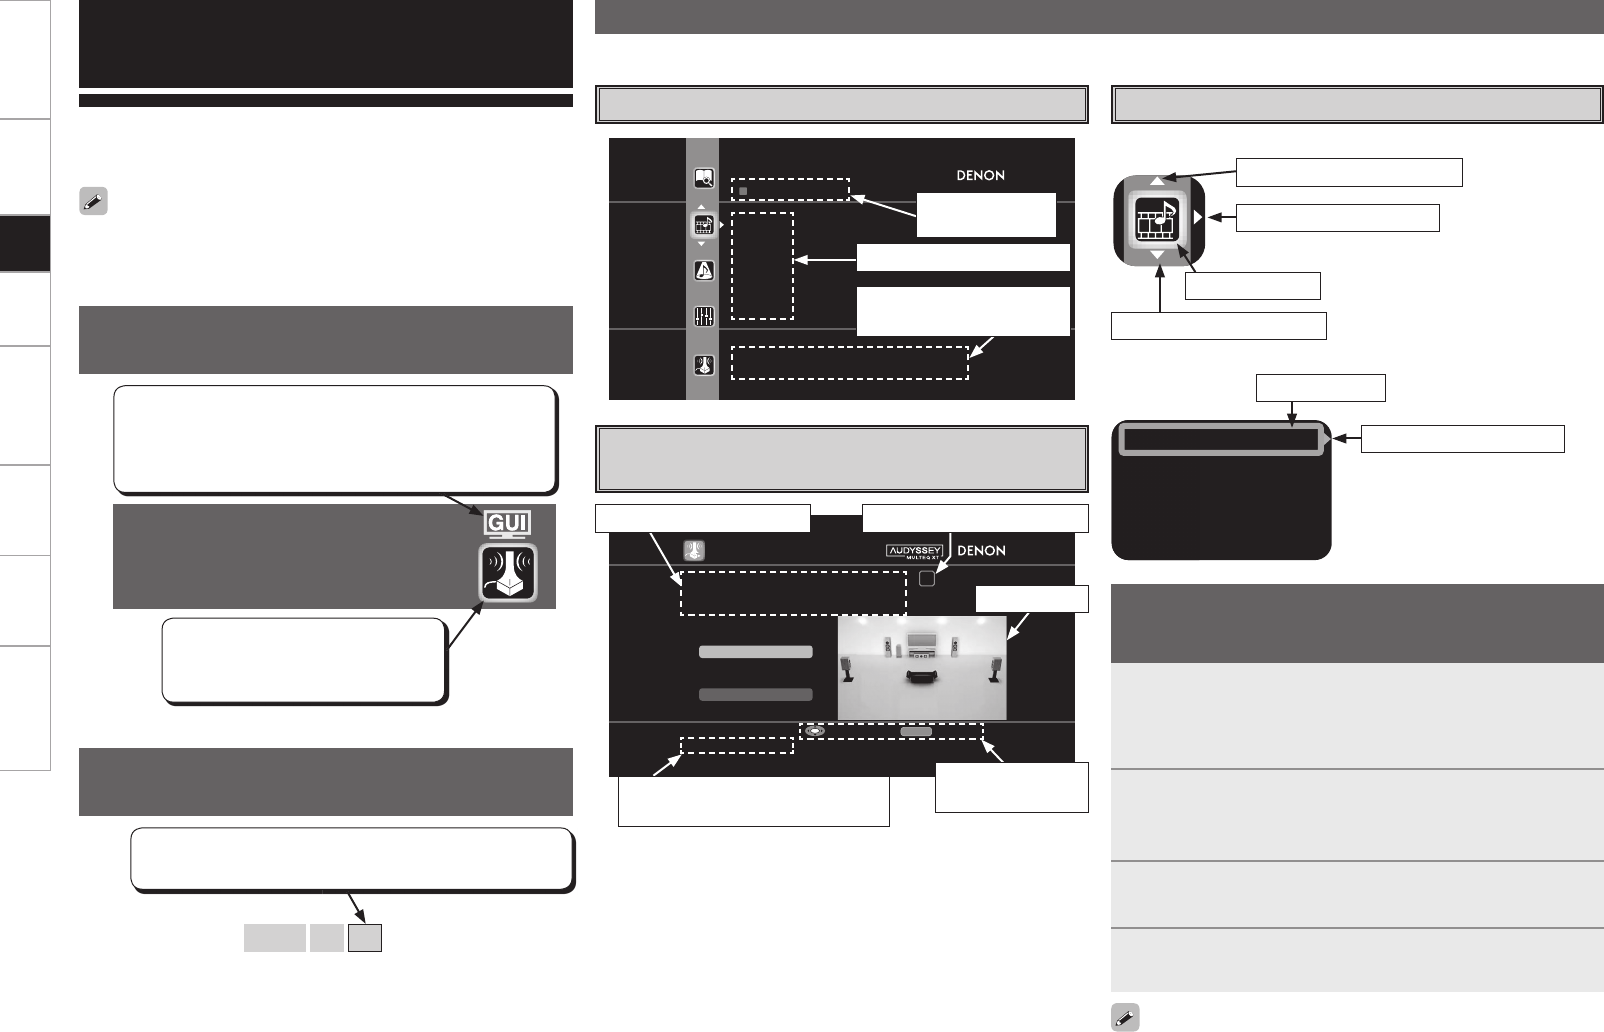
Example of the Display of the GUI
Mark at a Title
Example: Browse Menu (Top Menu)
Examples of GUI Screen Displays
Example: Menus with Illustrations
(Auto Setup)
Cursor Position Display
Operations
The same operation is possible on the main unit
or remote control unit.
GUI Menu Operations
With the AVR-3808CI, settings and operations for most functions can
be performed by operating while looking at the GUI menus displayed
on the monitor screen.
b Switch the selected item using
ui.
1
Press the MENU button.
The GUI menu is displayed.
b To operate from the main remote control unit, be sure to set the
remote control unit to the AMP mode.
2
Press the u i p button to select the menu to be set
or operated.
b To return to the previous item, press the o or RETURN button.
3
Press the ENTER button to enter the setting.
4
Press the MENU button to fi nish.
Example of Display of Default
Values
[Selectable items] 7.1 (B)
7.1
5.1
In lists of selectable items or adjustable ranges, the item
surrounded by a border is the default value.
Items for which this mark is indicated at the title can be
operated from the GUI.
We recommend performing such operations from the
GUI.
This is the GUI icon for this setting
item or for the menu series to which
this item belongs.
Switch to the next item
The GUI cannot be superimposed when xvYCC signals and component
1080p signal, computer’s resolution (e.g.VGA) are input.
Getting Started Connections Setup Playback Remote Control Multi-Zone Information Troubleshooting
Operation step indicators
When “Screensaver” is set to “ON”, the screensaver is activated if no
operation is performed for about 3 minutes.


