


14
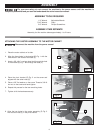
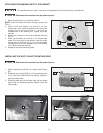
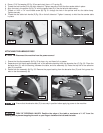
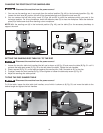
4. Place a 7/16" flat washer (C) Fig. 30 on each stud, then a 1/2" spring (D).
5. Thread the lock handle (E) on the right side stud. Tighten securely to hold the disc sander table in place.
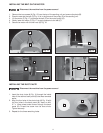
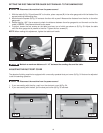
6. Align the hole in the pointer (A) Fig. 31 with the tapped hole (D) in the the left side table clamp.
7. Thread a 1/4-20 x 1/4" round head screw (B) Fig. 31 through the hole in the pointer and into the table clamp.
Tighten securely.
8. Thread the disc table lock handle (E) Fig. 30 on the left side stud. Tighten it securely to hold the disc sander table
in place.
E
D
C
B
A
D
Fig. 30
Fig. 31
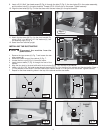
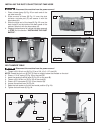
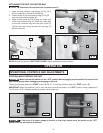
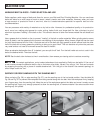
ATTACHING THE ABRASIVE DISC
1. Ensure that the disc assembly (A) Fig. 32 is clean, dry, and free of oil or grease.
2. Separate and fold back approximately half of the adhesive backing from the abrasive disc (C) Fig. 32. Place the
abrasive disc (C), with the backing, between the table, and disc assembly (A). Press the top half of the adhesive
disc (C) in position.
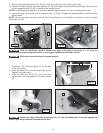
3. Rotate the disc assembly (A) Fig. 33. Remove the paper backing from the abrasive disc (C) and firmly press the
disc on the disc assembly (A).
Disconnect the machine from the power source!
Ensure that the abrasive disc (C) is securely in position before applying power to the machine.
Fig. 32 Fig. 33
A
C
A
C
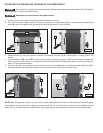
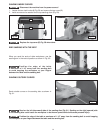
RISK OF PERSONAL INJURY. Position the edge of the table a maximum of 1/16" from the
sanding belt to prevent trapping the work or your fingers between the belt and the table.