


2
• Your DEWALT laser is equipped with 2, side by side laser diodes
which produce an extremely bright, visible beam when the laser
head is rotated.
• Always mark the center of the laser line or dot.
• To increase working distance and accuracy, set up the laser in the
middle of your working area.
• When attaching to a tripod or wall, mount the laser securely.
• When working indoor a slow rotary head speed will produce a
visibly brighter line, a faster rotary head speed will produce a visi-
bly solid line.
• To increase beam visibility, wear the Laser Enhancement Glasses
provided and/or use the Laser Target Card to help find the beam.
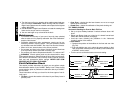
• To transfer a laser dot mark use the Manual Rotation Button on the
top of the laser head for quick and easy control. See “Manual Head
Rotation Button” section for instructions.
• Extreme temperature changes can cause movement of internal
parts that can effect accuracy. Check your accuracy often while
working.
• When working with the D
EWALT Digital Laser Detector set the
laser variable speed control to the fastest setting.
• Utilize the Bump Sensor feature on the laser to warn you if the tool
has been bumped after set up.
• If the laser has been dropped or has tipped over while set up on a
tripod, have the calibration system checked by a qualified service
center before continuing use.
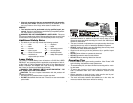
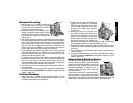
Installing Batteries
This tool is powered by 3 “D” batteries. To install the batteries provid-
ed, remove the battery compartment cover by loosening the thumb-
screw at the top of the cover. Insert the batteries as indicated by the
diagram molded into the battery compartment and replace the battery
cover.
WARNING: Batteries can explode, or leak, and can cause injury
or fire. To reduce this risk:
• Carefully follow all instructions and warnings on the battery label
and package.
English
• Always insert batteries correctly with regard to polarity (+ and –),
marked on the battery and the equipment.
• Do not short battery terminals.
• Do not charge batteries.
• Do not mix old and new batteries. Replace all of them at the
same time with new batteries of the same brand and type.
• Remove dead batteries immediately and dispose of per local
codes.
• Do not dispose of batteries in fire.
• Keep batteries out of reach of children.
• Remove batteries if the device will not be used for several
months.
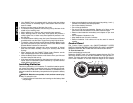
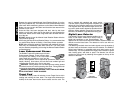
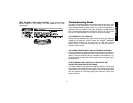
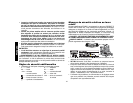
Control Panel
The Control Panel contains the ON/OFF/VARIABLE SPEED
SWITCH, ON/LOW BATTERY INDICATOR LED LIGHT, and BUMP
SENSOR CONTROL BUTTONS AND LED INDICATOR LIGHTS.
To Turn the Laser On:
Insert fresh batteries into the tool.
Rotate the ON/OFF knob (A) clockwise to power the laser ON. The
dual laser diodes will turn on and the POWER LED (B) Light will illu-
minate. The rotary head will remain stationary during the first 1/4 turn
of the knob. Rotation of the laser head will begin as the Variable
A B C D E
F