


68
MODEL 54eA SECTION 11.0
CALIBRATION - MONOCHLORAMINE
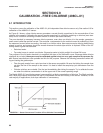
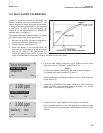
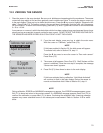
1. Place the sensor in the zero standard. Be sure no air bubbles are trapped against the membrane. The sensor
current will drop rapidly at first and then gradually reach a stable zero value. To monitor the sensor current, go
to the main display. Press any key to obtain the main menu. Press the ê key once to highlight “Diagnostic vari-
ables.” Press Enter (F4). The sensor current is the second item in the display. Note the units: nA is nanoamps,
μA is microamps. To return to the main display, press exit (F1) twice. Typical zero current for a monochloramine
sensor is 0 to +20 nA.
A new sensor or a sensor in which the electrolyte solution has been replaced may require several hours (occa-
sionally as long as overnight) to reach a minimum zero current. DO NOT START THE ZERO ROUTINE UNTIL
THE SENSOR HAS BEEN IN ZERO SOLUTION FOR AT LEAST TWO HOURS.
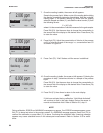
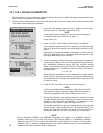
11.2 ZEROING THE SENSOR
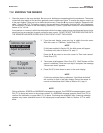
Calibrate main sensor
Zero main sensor
Adjust temperature
Exit Enter
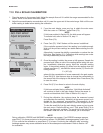
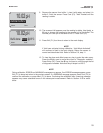
0.0 ppm
Sensor must be in zero
solution
Abort Cont
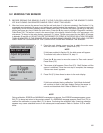
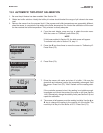
2. From the main display, press any key to obtain the main menu.
With the cursor on “Calibrate,” press Enter (F4).
NOTE
If Hold was enabled in Section 5.6, the hold screen will appear.
To activate hold, refer to Section 5.6, step 11.
Press the ê key once to move the cursor to “Zero main sensor.”
Press Enter (F4).
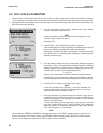
3. The screen at left appears. Press Cont (F3). “Wait” flashes until the
sensor is stabilized. Once the zero step is complete, the message
“Sensor zero done” appears.
4. Press Exit (F1) three times to return to the main display.
NOTE
If Hold was activated during calibration, “Hold Mode Activated”
will continue to flash in the main display. Return the sensor to
normal and deactivate Hold. Refer to Section 5.6, step 11.
NOTE
During calibration, ERROR and WARNING messages may appear. If an ERROR message appears, press
Exit (F1) to leave and return to the previous screen. If a WARNING message appears, press Cont (F3) to
continue the calibration or press Abort (F1) to leave. Continuing the calibration after a warning message
appears may cause substantial errors in the subsequent measurement. Refer to Section 16.7 for assis-
tance.