


12
Note: F3 and F4 clear automatically if the battery voltage falls within acceptable limits. All indications
except F8, F9 and F10 can be cleared by disconnecting the battery. For F8, F9 and F10, correct the
condition that caused the indication and disconnect the battery to clear the indication.
CAUTION: If F8 is showing, and the charger is providing current to the battery, remove AC power
from the charger before disconnecting the battery.
2.1.10 F3 (Low Battery) Override
If battery voltage is below 1.60 volts per cell the charger does not start automatically. If this is due to
an overly discharged battery of the correct voltage, the F3 indication can be manually overridden by
pressing ‘STOP’ while the F3 message (Low Battery) displays.
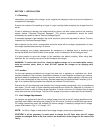
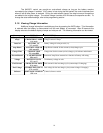
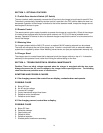
2.1.11 Jumper Settings
CAUTION: Remove AC and DC power from the charger before changing any jumper settings.
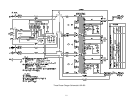
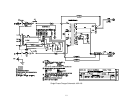
Refer to figure 1 for location of jumpers.
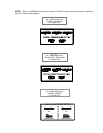
- Jumper J5 should be set to match the battery voltage.
Volts
80V
72V
64V
48V
36V
24V
12V
1
SP
2
1
For non-standard battery voltages above 80V, the jumper is set on 12 and a resistor is installed in the charger wire
harness based on the following calculation: R = 1250 x (Nominal Battery Voltage) – 15000.
2
For non-standard battery voltages between 12V and 80V, the jumper is set on SP and resistor R9 is installed on the
control based on the following calculation: R9 = 1250 x (Nominal Battery Voltage) – 15000.
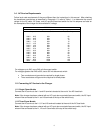
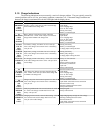
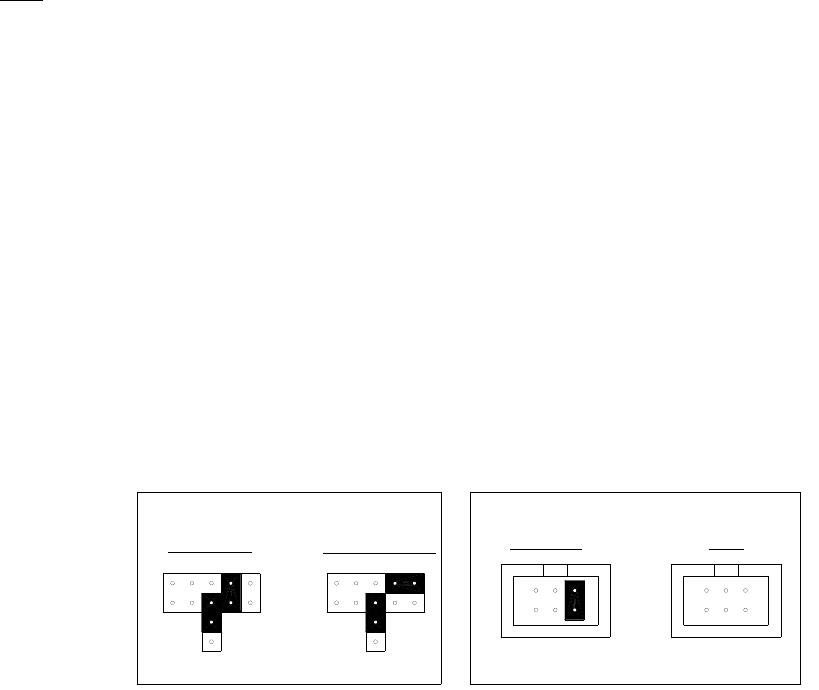
- Jumper J4 is used to lock out several parameters in the programming mode.
- Header J1 is used to select the charger type.
J4 J4
LOCKED
UNLOCKED
HF*
FERRO
*J1 used for interface to HF module
J1
J1
CHARGER TYPEPARAMETER LOCKOUT
Caution: Placing jumpers on any other position on J1 or J4 may damage the control and voids the
warranty.