4
SECTION 1 - INSTALLATION
1.1. Receiving
Immediately upon receipt of the charger, check it against the shipping invoice to ensure the shipment is
complete and undamaged.
Examine the outside of the packing for signs of rough handling before accepting the charger from the
carrier.
If there is evidence of damage, the receipt should be signed, and both copies (carrier's and receiving
copies) marked "Shipment Received Damaged". The carrier's representative should be called
immediately and asked to make a "Carrier's Damage Report".
If concealed damage is later detected, the carrier should be called and requested to make a "Carrier's
Inspection for Concealed Damage Report".
After inspection by the carrier, arrangements should be made with the charger representative to have
the charger repaired before placing it in service.
When contacting your charger representative for assistance on a damage claim or shipment error,
provide the Model, and Serial Number of the charger, and a full description of the damage or error.
It is good practice to move the charger to the installation site before uncrating. When using bars,
hammers, etc. for uncrating, use care to avoid damage to the charger
.
WARNING: To reduce the risk of fire, install the battery charger on a non-combustible surface
such as concrete, stone, brick, or steel. DO NOT operate the charger on its shipping skid
materials.
1.2. Location
For the best operating conditions and longest life, take care in selecting an installation site. Avoid
locations exposed to high humidity, temperature extremes or dust. Moisture condensing on machine
parts and electrical components can cause corrosion, which seriously affects operation, efficiency and
life. All units are designed for floor mounting. Standard cases may be stack-mounted if required, up to 3
high. If so, optional stacking brackets are required and available. Consult factory.
Dust and dirt will also decrease heat radiation from heat-generating components, such as transformers
and diodes. This will result in higher operating temperatures and shorter life. Adequate air circulation is
needed at all times in order to ensure proper operation. Provide a minimum of 6 inches of free air space
at the sides and rear of the charger. The front of the charger must remain unobstructed for serviceability.
1.3. Line Voltage Adjustments
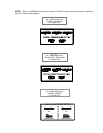
All chargers are shipped with the AC line voltage jumper wires set for the AC voltage specified on the
purchase order. Before connecting the charger to the AC service, it should be verified that the internal
AC voltage connections match the available AC service voltage. If necessary change the AC voltage
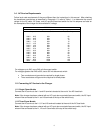
jumper wires shown in Figs. 1.3.1 through 1.3.3.
NOTE: For 50 Hz. Single or three phase fixed voltage chargers, there are no adjustments.
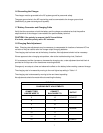
CAUTION: It will be necessary in most cases to change the AC fuses when the AC voltage
jumpers are changed. Refer to the fuse chart on the inside door of the charger for the correct fuse
rating.


