


Changing the Sawblade
Sawblade Checks and Warnings
► Use only sawblades that are approved for use with the
saw, and appropriate for the type of material being cut.
► Use only sawblades with a diameter of 160 mm, and an
arbor bore of 20 mm.
12 ATF 55E Circular Saw
► Do not use a sawblade that is bent or warped.
► Do not use a sawblade with missing or damaged teeth.
► The hex hey provided with the saw is specifically designed
not to cam-out and damage the arbor bolt. Do not use a
standard Allen wrench or hex key.
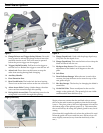
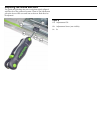
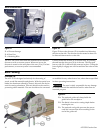
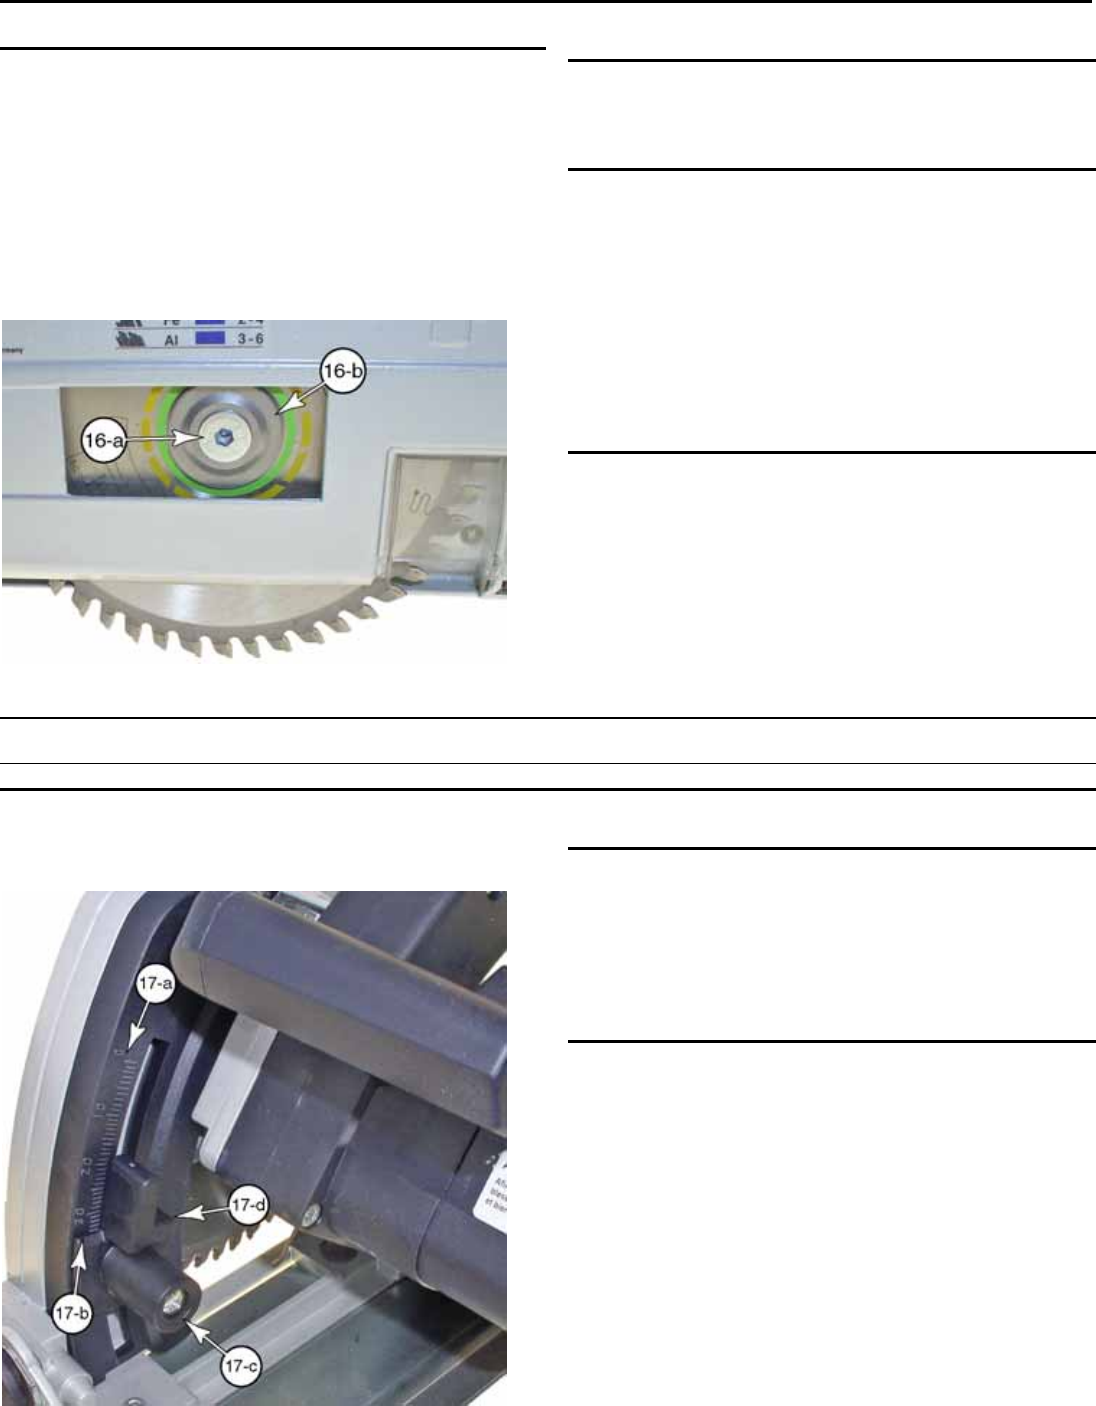
Figure 16
16-a Arbor Screw
16-b Arbor Flange
Removal Procedure
1. Unplug the saw.
2. Lower the blade until the arbor screw (16-a) is accessible
as shown.
3. Press down on the arbor lock (figure 1-c).
4. Using the hex key stored on the sole plate (figure 2-f),
unscrew the arbor screw by turning it counterclockwise
(standard thread), and remove the arbor screw (16-a)
and arbor flange (16-b).
5. Remove the sawblade out the bottom of the saw.
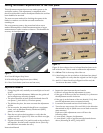
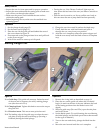
Replacement Procedure
1. Insert the new blade up through the bottom of the saw,
and place it on the arbor. Make sure the blade teeth are
pointing forward as shown.
2. Place the arbor flange over the arbor, and rotate it until
the tabs line up with the slots in the arbor.
3. Make sure the arbor and arbor flange are properly
seated with one another.
4. Insert and tighten the arbor screw.
Operation
Setting the Blade Depth
The ATF 55 E is equipped with a plunging depth-stop for
setting the blade depth.
Figure 17
17-a Depth Gauge
17-b Pointer
17-c Lock Button
17-d Depth Stop
Adjustment Procedure
1. Determine the optimal blade depth:
► The depth of the blade is determined by the depth gauge
in millimeters (17-a).
► For optimal chip-free cutting in plywood and hard
plastics, the sawblade should be slightly below the
bottom of the material (about ½ of a blade tooth).
► For dense hardwoods, softer plastics, and aluminum
(where chipping is less of a concern) the blade should be
set a little deeper. At a deeper setting, the blade cuts
more efficiently.
2. Push in on the lock button (17-c) and slide the depth
stop (17-d) to the desired depth.
► Add 5 mm to account for the thickness of the guide rail.