


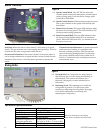
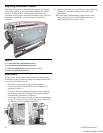

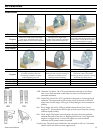
Safety Checks
► Inspect the saw for loose parts and for proper operation.
► Inspect the area underneath the cutting path to make sure
you will not cut through other objects.
► Make sure the power cord is behind the saw and not
within the cutting path.
► Before beginning the cut, make sure the sawblade is at
operating speed.
► During the cut, if the "Motor Overload" light turns on,
slow down the feed rate of the saw (see Motor Controls on
page 6).
► Push the saw forward to cut. Never pull the saw back, as
this can cause the saw to jump backward unexpectedly.
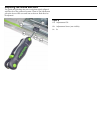
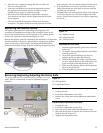
Operation
1. Set the plunge depth (page 12).
2. Set the motor speed (page 13).
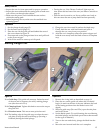
3. Place the saw on the guide rail and behind the start of
the cut as shown in figure 23.
4. Press upward on the plunge release lever and pull back
on the power trigger.
5. Wait for the motor to come up to full speed.
6. Plunge the saw down until it reaches the depth stop.
7. Firmly hold the saw with both hands and push it
through the cut, away from your position.
8. After the cut is complete, release the power trigger and
hold the saw steady until the blade comes to a complete
stop.
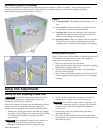
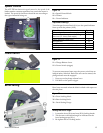
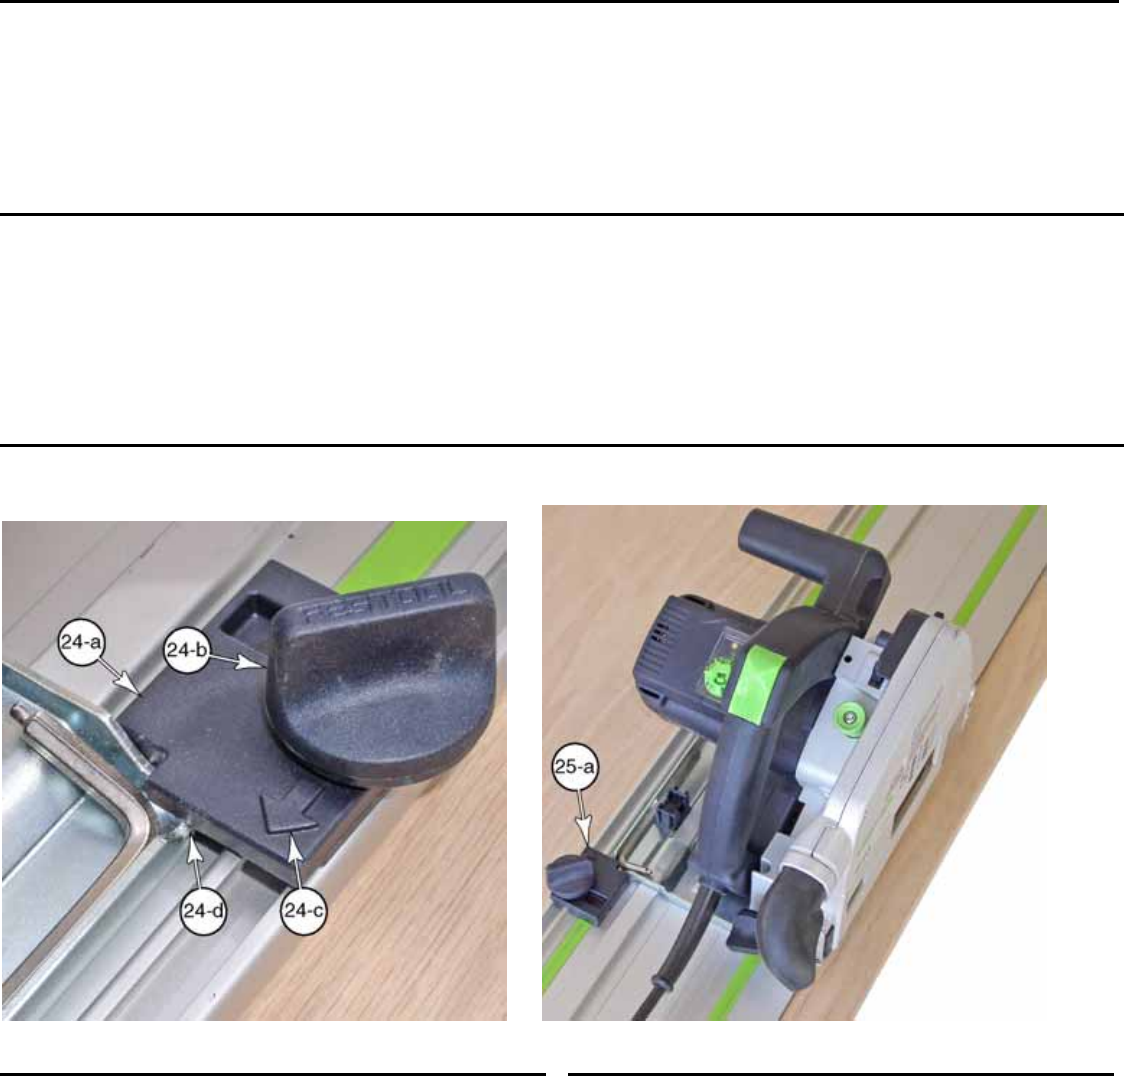
Making Plunge Cuts
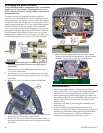
Figure 24
24-a Guide Stop. This guide rail accessory limits the travel
of the saw and is necessary for safely making plunge
cuts (also shown in 25-a).
24-b Clamping Knob. Tighten this knob to secure the stop to
the guide rail.
24-c Direction Arrow. This arrow must point forward.
24-d The leading edge of the guide stop overlaps the saw's
sole plate to stop the saw from lifting up (causing a
kickback) during the initial plunge.
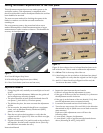
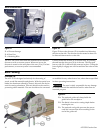
Operation
1. Remove the riving knife as described on page 11.
2. Place the saw on the guide rail where the cut should
begin. (A mark on the face of the saw indicates the back
of the cutting position when the blade is set to full
depth.)
3. Slide the guide stop (24-a and 25-a) up to the sole plate
and lock it down.
4. Set the blade speed. (To avoid burning the wood during
the initial plunge, set the blade speed lower than normal
for the type of material.)
5. Turn on the saw and slowly plunge the blade into the
cut.
6. Move the saw forward until the cut is complete.
Instruction Manual 15