


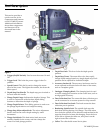
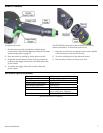
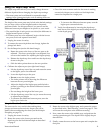

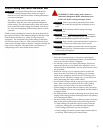
Setting the Plunge Depth
10 OF 1400 EQ Router
Using Basic Plunge Features
The basic plunge features are used for the majority of
operations including both fixed depth routing and
plunge routing.
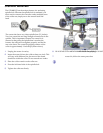
1. Unplug the router for safety.
2. Loosen the depth stop clamping lever so the depth
stop is free to move up and down.
3. Lower the router to the approximate depth desired
and lock the depth stop clamping lever.
► Note: With the depth stop clamped, the router can
be raised and lowered as needed to check the final
depth of cut.
4. Fine tune the depth stop by turning the fine
adjustment dial. Use the following guidelines:
► To increase the depth, turn the dial toward the
increasing numbers.
► To decrease the depth, turn the dial toward the
decreasing numbers. (Do not decrease the depth
setting with the plunge lock knob tightened.)
► Each index number represents 0.1 mm (0.004 inch) of depth,
and one full turn represents 1 mm (0.040 inch) of depth.
5. Operate the router as described in the “Basic Routing”
section on page 12.
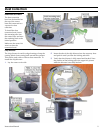
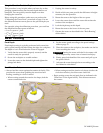
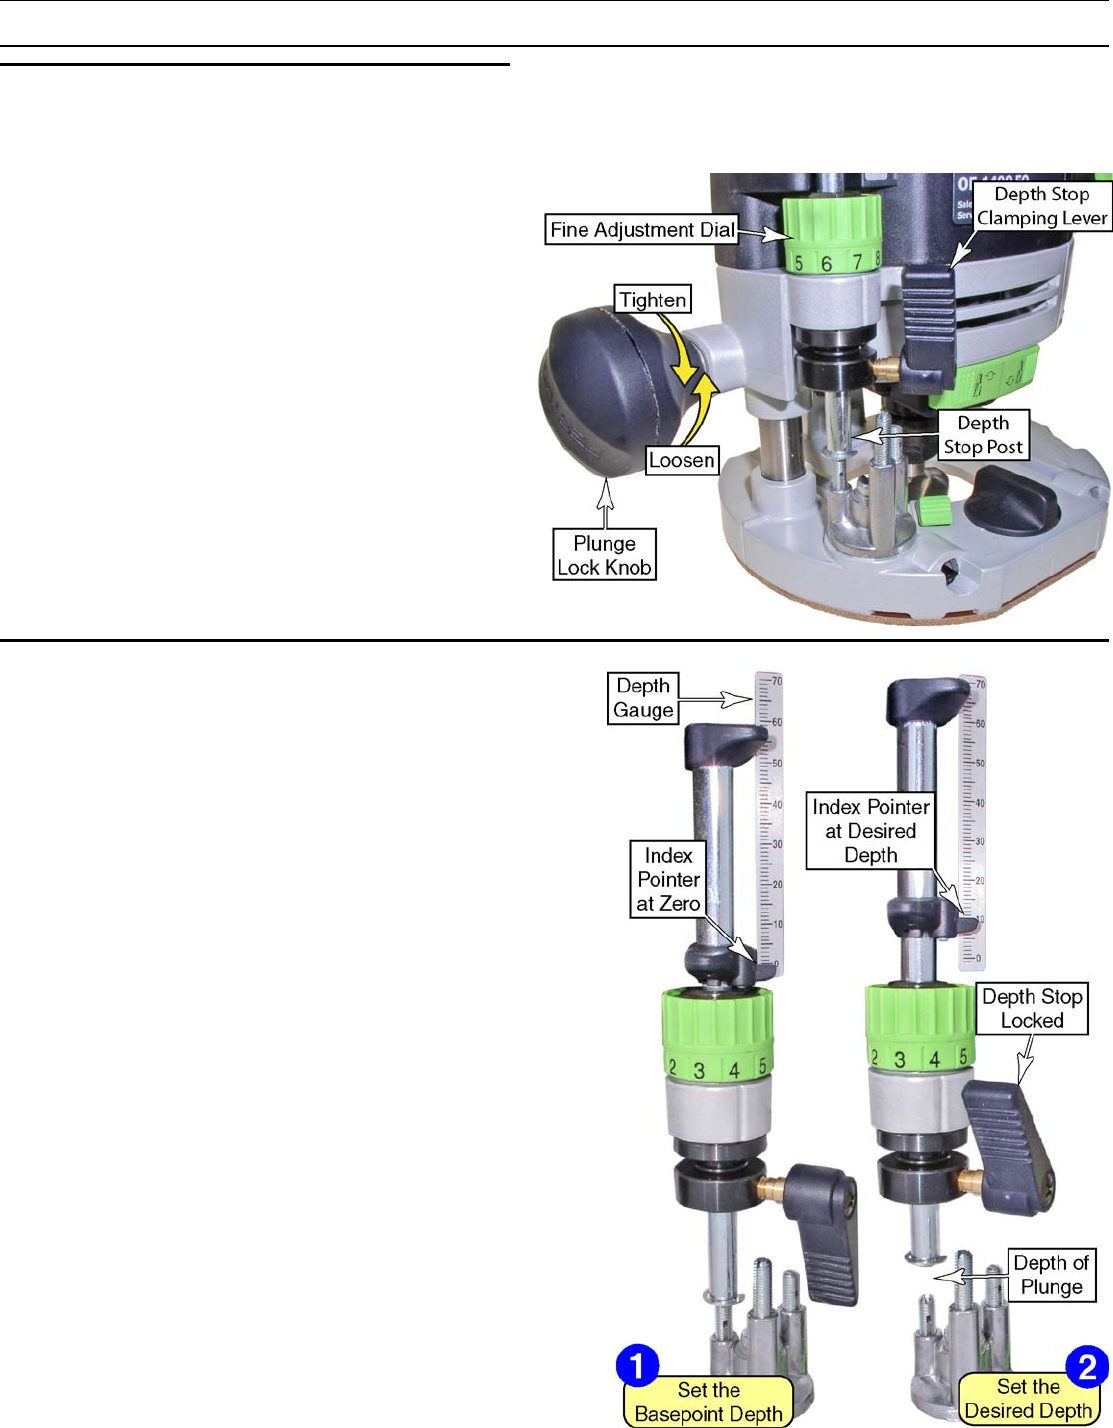
Using the Plunge Depth Gauge
The depth gauge is used to set the cutting depth relative to a
basepoint setting. A typical example where this is used is when
the cutting depth needs to be relative to the surface of the
workpiece, such as a dado cut.
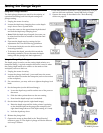
1. Unplug the router for safety.
2. Loosen the plunge lock knob ¼-turn and lower the router
until the router bit touches the basepoint (such as the surface
of the workpiece).
3. For convenience, you may wish to re-tighten the plunge lock
knob.
4. Set the basepoint (see the left-hand image):
a. Lower the depth stop until it touches one of the posts on
the turret.
b. Slide the index pointer down to the zero-setting.
c. Note that the depth stop lever is unlocked.
5. Set the desired depth (see the right-hand image):
a. Raise the depth stop until the index pointer is pointing
to the desired depth on the gauge (the example in the
right-hand image shows a final depth setting of 10 mm).
b. Lock the depth stop lever.
6. Release the plunge lock.
7. Operate the router as described in the “Basic Routing”
section on page 12. The depth of plunge will be the amount
set in step 5.a above.