


Service
24 310692D
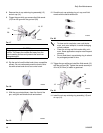
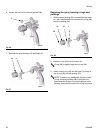
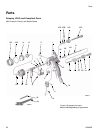
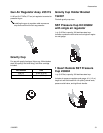
8. Install the trigger (10), pivot pin (17), wave washer
(18), and screw (11). Torque the screw to 20-30 in-lb
(2.3-3.4 N•m).
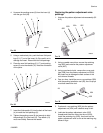
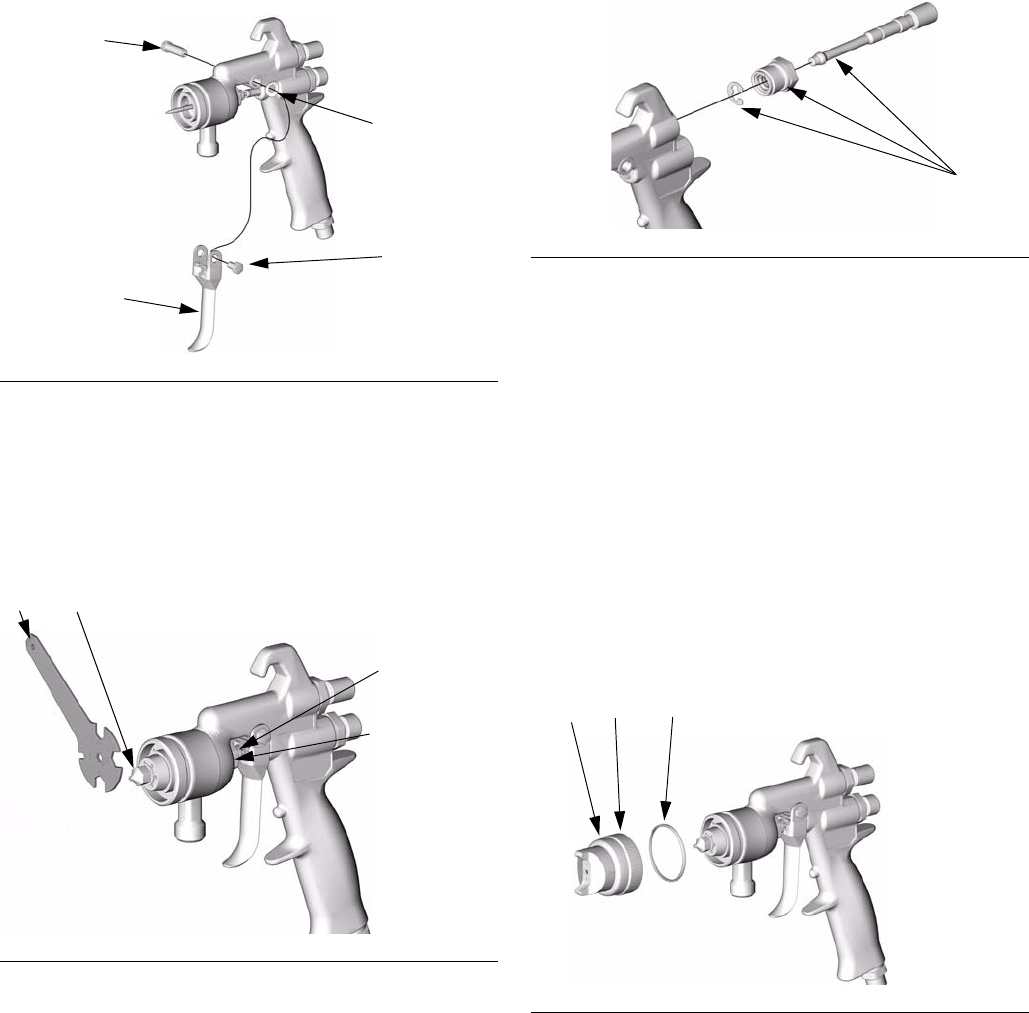
9. Apply a thin film of lubricant to the fluid nozzle seat
and threads.
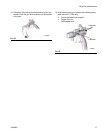
10. Trigger the gun while you install the fluid nozzle (12)
with the gun tool (28). Torque the nozzle securely to
40 in-lb (4.5 N•m).
11. Tighten the hex nut (9) securely to 125-135 in-lb
(14-15 N•m).
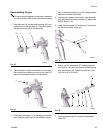
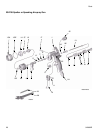
12. Install the pattern adjustment valve assembly
(25A-D). Torque the nut (25A) to 125-135 in-lb
(14-15 N•m).
13. Tighten the packing screw (8) by turning the screw
in until it touches the fluid packings, then tighten one
full turn to pre-set the packings. Loosen the screw,
then turn it in until it touches the packings again.
Tighten the screw 1/12 turn more (equal to half the
distance between points on the hex head). See F
IG.
41.
14. Trigger the gun to test the needle movement. If the
needle does not return after the trigger is released
or is slow in returning, loosen the packing screw (8)
until the needle returns freely.
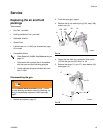
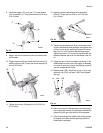
15. Replace seal (15B). Install the air cap (14), air cap
retaining ring (15A), and seal (15B). Hand-tighten
the ring.
16. Make sure the gun fluid packings are sealing prop-
erly by spraying solvent at low pressure before fully
pressurizing the gun with the fluid to be sprayed.
17. If the fluid packings leak, tighten the packing screw
(8) slightly and retest until the packings and fluid
needle seal completely.
F
IG. 40
F
IG. 41
17
18
11
10
ti4828a
ti4849i
28
12
8
9
F
IG. 42
F
IG. 43
ti4832a
25A-D
14 15A 15B
ti4980a