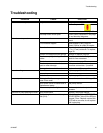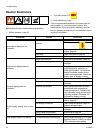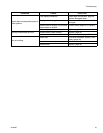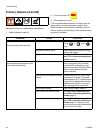
Motor Control Diagnostic Codes
312066Z 13
Checks for Fast E24 Errors
If gauge pressures are very close
1. Clear the error and run the unit.
2. Check plug J10 (E20/E-XP1) or J7 (E30/E-XP2) or
the jumpers 7 to 8, or 9 to 10 on the motor control
board.
3. Check pressure transducer performance:
The digital display on a Reactor always shows the
higher of the two pressures. As soon as the higher ana-
log pressure drops below the lower analog pressure the
digital display will switch to the new highest reading.
Determine which transducer is performing poorly.
1. For testing purposes only, find the dip switches
labeled SW2 on the motor control board, page 35.
Set dips witch 3 to OFF. This will allow the Reactor
to run with a pressure imbalance alarm.
2. Run the unit to build up some pressure (1000 –
1200 psi). Shut down the unit, clear the alarm and
power back up. Do not depressurize the unit.
3. Check the analog gauges to see which pressure is
higher. Check if the display pressure matches, indi-
cating that the motor control board “sees” that trans-
ducer. If not, the motor control board does not “see”
that transducer. Check the wire connections and or
replace the transducer.
4. With the pump zone off, use the pressure relief
valves to slowly relieve the “high” side pressure,
while watching the digital display and the analog
gauges. Once the higher analog gauge drops below
the lower analog pressure the motor control board
should start reading the “new” high side pressure
(because it is now the higher of the two). Continue
dropping the original “high” side pressure - the digi-
tal display should stop dropping. Repeat the pro-
cess to check the other pressure transducer.
The last test determines if the pressure transducer has
failed or if the socket on the pressure control board has
gone bad.
1. Swap the transducer plug-ins on the motor control
board. (J3 and J8 for the E-20 and E-XP1. J3 and
J5 for the E30 and E-XP1).
2. Repeat above test.
3. If the problem stays with the same side as before,
then the pressure transducer is bad.
4. If the problem switches to the other transducer, then
the problem is in the motor control boards socket.
If the gauge readings are
not
equal.
1. Clear the error and balance the pressures using the
dump valves.
2. If you cannot get the pressures to balance:
• Check for pump failure.
• Check for adequate material.
• Using the feed pump to push fluid out through the
gun manifold, check for a plugged fluid path.
• Run the unit.
• Check and clean the gun inlet screens.
• Check and clean the mix chamber “A” and “B”
impingement ports a well as the center port. Note:
Some mix chambers have counter bored holes,
and require two drill sizes to clean impingement
ports completely.
“Slow” E24:
• When spraying, gradual pressure imbalance and
eventual E24.
Possible Causes:
• One side of the Gun is partially blocked.
• The “A” or the “B” pump on the Reactor has failed.
• The “A” or the “B” feed pump has failed.
• The “A” or the “B” feed pump pressure is set too
high.
• The “A” or the “B” inlet screen is plugged.
• The hose is not heating properly.
• Kinked supply hose.
• Bottom of the drum is damaged causing a blockage
to the inlet of the feed pump.
• The drum is not vented properly.
If a fast E24 error occurs, first check the readings of
the analog gauges.


