9
307-730
Flushing Procedure (Oil-based Paint Only)
NOTE: Follow the instructions on page 8, except use
mineral
spirits.
DO NOT
heat the mineral spirits.
Installing
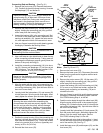
and Removing a Roller Cover
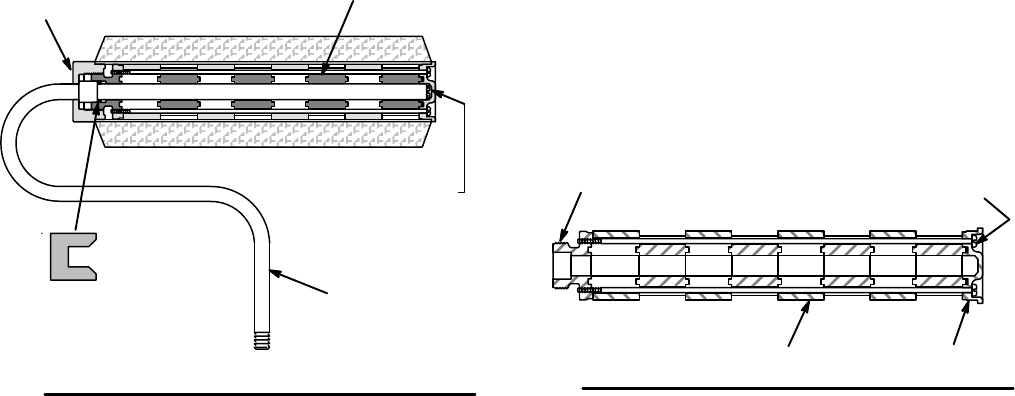
(See Fig 4.)
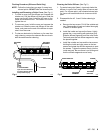
1. To install a cover, hold the dif
fuser and unscrew the
retainer
nut. Pull
the dif
fuser of
f the frame. Slide the
cover over the dif fuser. Install the dif fuser on the
frame and reinstall the nut.
Be careful not to over
tighten
the nut.
2. To remove a cover, hold the cover and unscrew the
retainer
nut. Slide the cover and dif
fuser
of
f the roller
frame,
and press on the end of the dif
fuser to sepa
-
rate it from the cover
.
3. To
clear an obstruction in the frame, or for more thor
-
ough
cleaning,
remove the setscrew
. Be sure to rein
-
stall
the setscrew after cleaning.
Fig 4
0244
RETAINER
NUT
U–CUP
P
ACKING
Lips must face diffusers,
as shown
.Grease lightly
with petroleum jelly
.
DIFFUSER
SEGMENT
SETSCREW
FRAME
Cleaning
the Roller Diffuser
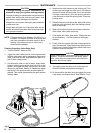
(See Fig 5.)
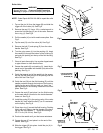
1. For water-base paint (latex), vigorously shake the
diffuser in a pail of hot, soapy water to remove wet
paint.
For oil-base paint, use unheated mineral
spir
-
its. Use a soft brass bristle brush to remove dried
paint.
2. Disassemble the dif fuser if further cleaning is
needed.
a. Remove
the
two screws. Pull of
f the outside end
cap. Disassemble all parts and clean thoroughly
in
water or mineral spirits.
b. Install the inside end cap on the frame. Lightly
grease the u–cup packing with petroleum jelly .
Slide
the dif
fuser segments onto the roller frame.
T
wist and press the last dif
fuser segment to snap
the
pieces together
.
c. Install the outside end cap and the two screws.
Holding the inside end cap, press on the two
screws
and rotate the dif
fuser segments to seat
the screws. Tighten the screws evenly into the
inside end cap. Be sure there is no binding
and
that the dif
fuser segments move freely
.
Fig 5
0245
DIFFUSER
SEGMENT
OUTSIDE
END
CAP
SCREW
INSIDE END CAP


