


-28-
Model G0440/G0441 (Mfg. Since 03/12)
System Design
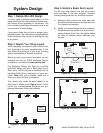
Step 3. Sketch a Basic Duct Layout
Dust
Collector
Figure 37. Basic sketch of shop layout.
Figure 38. Efficient duct layout.
Main
Line Duct
Branch
Line
Ducts
GOOD
Dust
Collector
Figure 39. Inefficient duct layout.
BAD
Dust
Collector
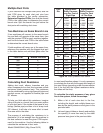
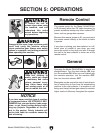
For the next step, sketch how you will connect
your machines to the dust collector. Consider
these general guidelines for an efficient system:
1.
Machines that produce the most saw dust
should be placed nearest to the dust collector
(i.e. planers and sanders).
2.
Ideally, you should design the duct system to
have the shortest possible main line and sec-
ondary branch ducts. See the figures below
for ideas of efficient versus inefficient duct
layouts.
Step 1. Decide Who Will Design
For most small-to-medium sized shops, you can
design and build the dust collection system your-
self without hiring engineers or consultants. We
have included some basic information here to get
you started on a basic design.
If you have a large shop or plan to design a com-
plicated system, we recommend doing additional
research beyond this manual or seeking the help
of an expert.
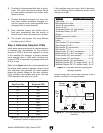
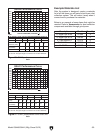
Step 2. Sketch Your Shop Layout
When designing a successful dust collection sys-
tem, planning is the most important step. In this
step, sketch a basic layout of your shop, including
space requirements of different machines.
Before you get out your pencil and paper, we rec-
ommend you visit our FREE Workshop Planner
available on our website at
www.grizzly.com.
Our
Workshop Planner will allow you to quickly
and easily design and print a basic shop layout.
Don't worry, non-Grizzly brand machines can be
substituted with Grizzly machines for layout pur-
poses.
Note:
After you're finished, make sure to
save your layout for later modification.
Your sketch only needs the basic details of the
shop layout, similar to
the Figure below, includ-
ing all your current/planned machines and your
planned placement of the dust collector
.