


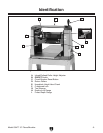

Model G0477 15" Planer/Moulder
-13-
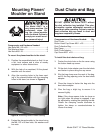
Stand Assembly
The stand for the Model G0477 must be assem-
bled before the planer/moulder can be mounted
on it. It may be helpful to refer to the Stand
Breakdown on Page 3
5 during this procedure.
Components and Hardware Needed: Qty
Notched Legs* ...................................................
2
Plain Legs ..........................................................
2
Long Frame Pieces ...........................................
2
Short Frame Pieces ...........................................
2
Long Braces ......................................................
2
Short Braces ......................................................
2
Carriage Bolts
5
⁄16-18 x
3
⁄4" ............................... 24
Flange Nuts
5
⁄16-18 ........................................... 24
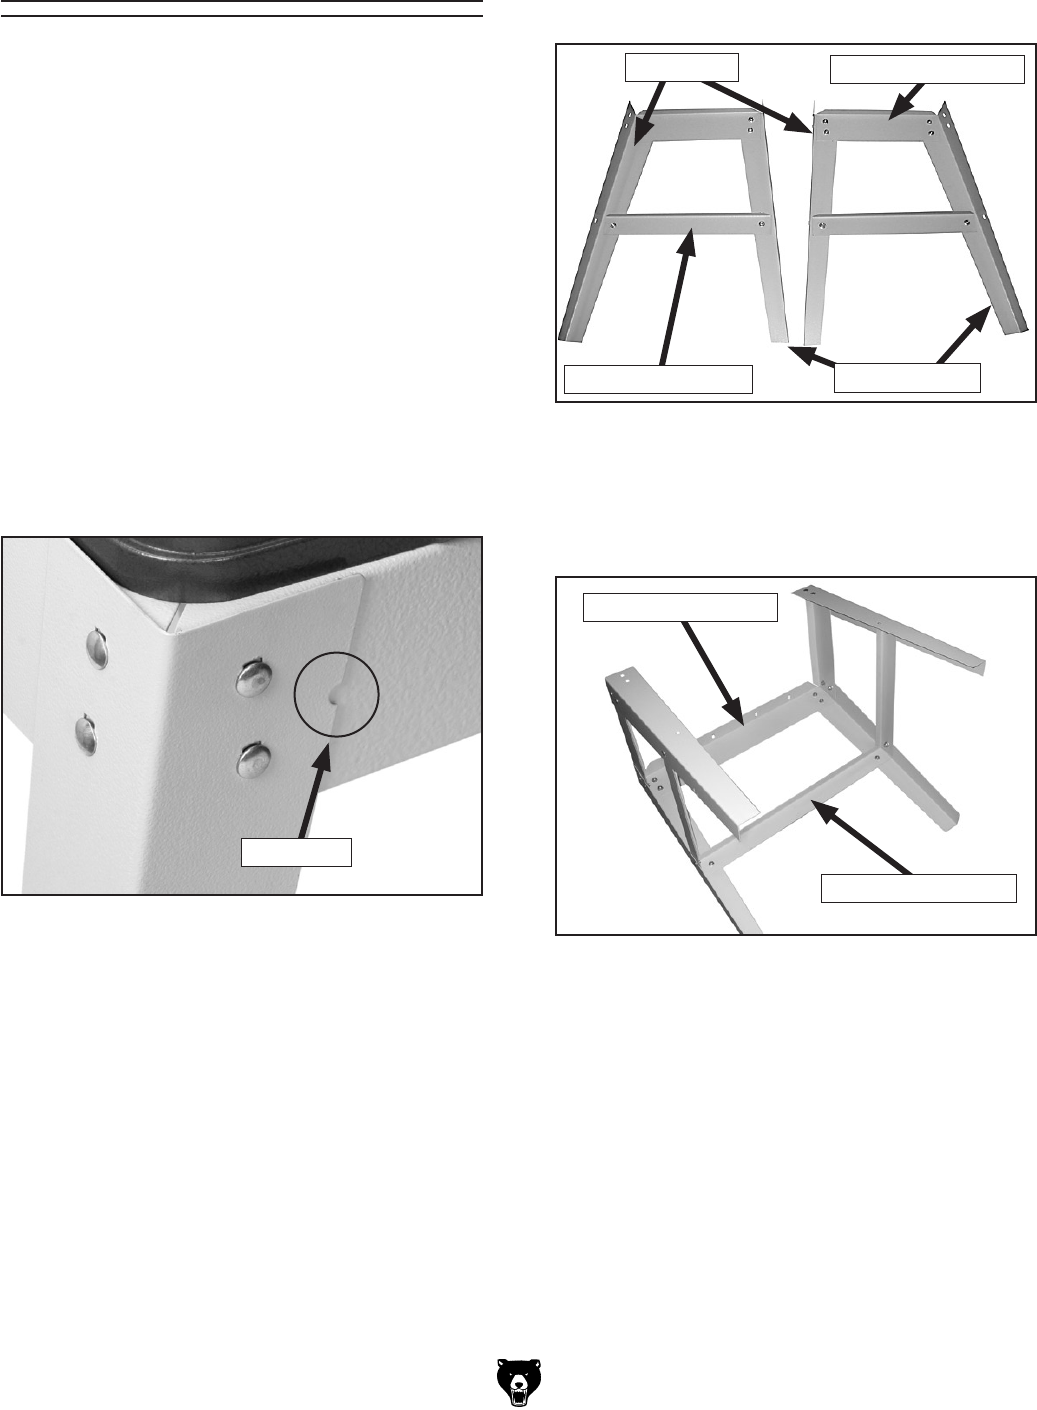
* These stand legs each have a small, semicircu
-
lar notch towards to top of the leg, as shown in
Figure
5.
Figure
6. Stand halves.
Figure 7. Joining stand halves.
Figure 5. Leg notches.
4. Repeat Steps 1–3 for the other side of the
stand. The finished halves of the stand
should look like those shown in
Figure 6.
To assemble the stand:
1. Place a plain leg and a notched leg side-by-
side on the ground, with the double bolt holes
of the legs towards the top. The notched leg
should be on the right of the unmarked leg.
2. Fasten a short frame piece to the legs using
5
⁄16-18 x
3
⁄4" carriage bolts and flange nuts.
3. Fasten a short brace piece to the legs, using
carriage bolts and flange nuts.
5. Fasten the stand halves together using a long
frame piece, a long brace piece, carriage
bolts and flange nuts as shown in
Figure 7.
6. Fasten the remaining long frame piece and
long brace piece to the stand using carriage
bolts and hex nuts.
Leg Notch
Notched Legs
Plain Legs
Short Frame Piece
Short Brace Piece
Long Frame Piece
Long Brace Piece