


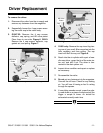

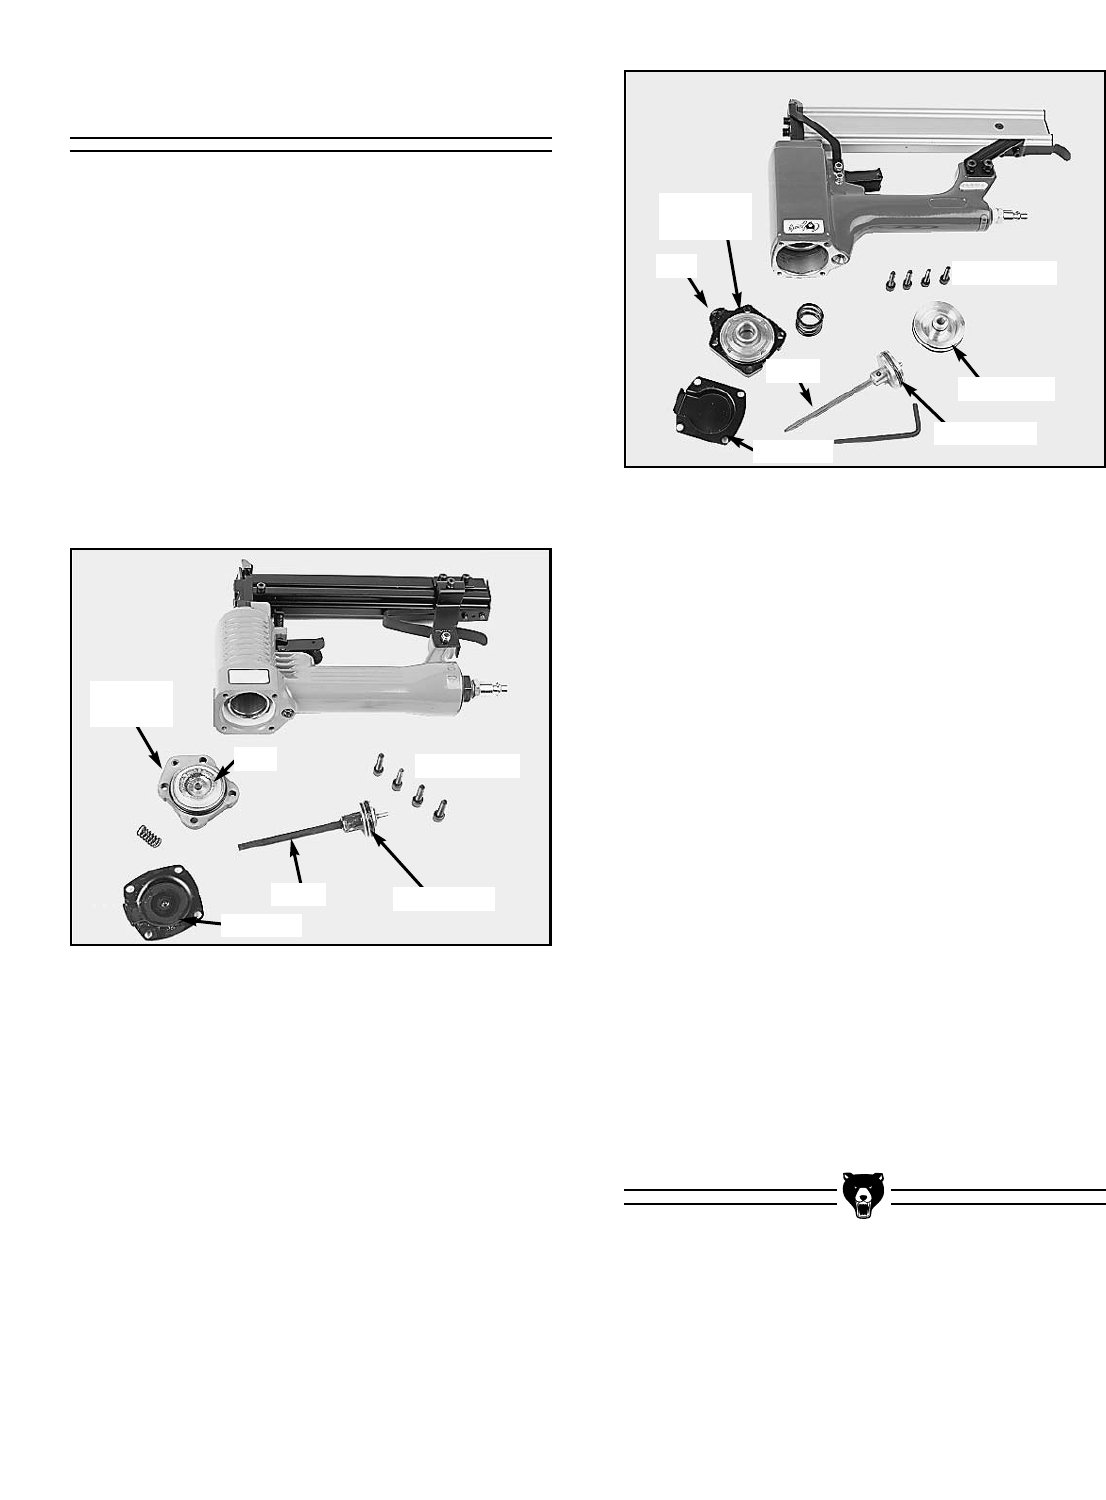
Figure 6. Stapler driver assembly.
Figure 7. Brad driver assembly.
G1847 / G1852 / G 1861 / G3811 Air Nailers/Staplers -11-
Driver Replacement
To remove the driver:
1. Disconnect the nailer from the air supply and
remove any fasteners from the magazine.
2. Sequentially loosen the 4 cap screws secur-
ing the nailer cap to the nailer body.
3. G1847/52: Remove the 4 cap screws,
deflector, cap, spring, and HD valve piston.
Place them to one side. Figure 6. G1861:
Remove the 4 cap screws, deflector, cap,
gasket set, and spring. Figure 7.
4. G1861 only: Remove the cap insert by plac-
ing one of your small Allen wrenches into the
hole, wedging, and then pulling. The cap
insert will work its way out. Figure 9.
5. Reach into the air cylinder with a pair of nee-
dle nose pliers, grasp the tip of the main pis-
ton unit, and pull it out. The driver is con-
nected to the main piston unit.
6. Inspect driver condition and repair or replace
as necessary.
7. Re-assemble the nailer.
8. Do not put any fasteners into the magazine.
Connect the air hose. Check for any leaking
air. You will hear it hissing or feel it rushing
through the spaces.
9. If everything sounds normal, press the safe-
ty nose down on a piece of wood and pull the
trigger a couple of times. Air should be
exhausted normally each time.
Cap Screws
Driver
HD Valve
Piston
Cap
Main Piston
Deflector
Cap Screws
Deflector
Cap
HD Valve
Piston
Gasket Set
Main Piston
Driver