


Page 10SKU 47158
For technical questions, please call 1-800-444-3353.
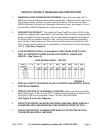
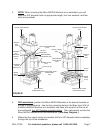
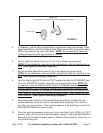
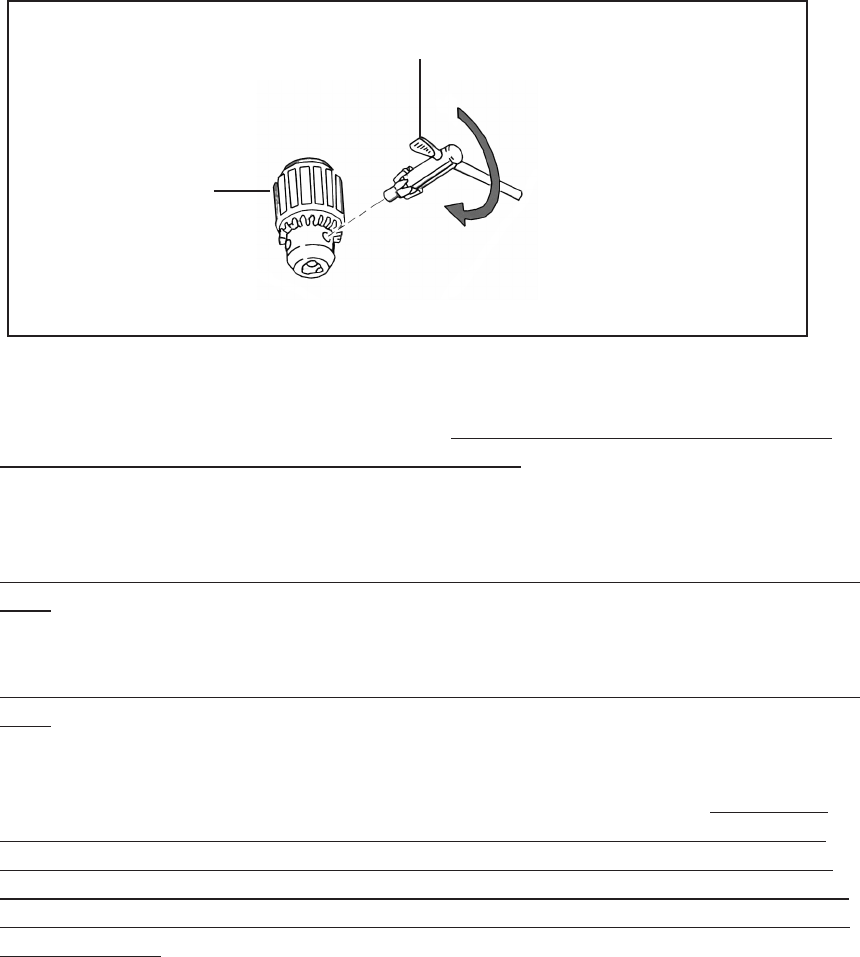
CHUCK KEY
(CLOCKWISE TO TIGHTEN. COUNTERCLOCKWISE TO LOOSEN.)
CHUCK (#132)
FIGURE C
5. If necessary, use the Lifting Hand Wheel, Longitudinal Feed Hand Wheel, Cross
Feed Hand Wheel, and Fine Feeding Hand Wheel (parts #97) to adjust the Micro
Mill/Drill Machine for the work to be done. NOTE: Do not attempt to make any
further adjustments while the machine is running.
(See Figure B, and Assy. Diagram.)
6. Set the High/Low Speed Knob (part #124) to the speed range required.
NOTE: Do not attempt to make any further adjustments while the machine is run-
ning. (See Figure B, and Assy. Diagram.)
7. Set the Variable Speed Knob (part #122) to fine-adjust the speed range.
NOTE: Do not attempt to make any further adjustments while the machine is run-
ning. (See Figure B, and Assy. Diagram.)
8. Turn the Switch (part #125) from its “OFF” position to either its “FORWARD” posi-
tion or its “REVERSE” position, depending on the work to be done. NOTE: Do
not attempt to turn the Switch directly from its “FORWARD” position to its “RE-
VERSE” position, or its “REVERSE” position to its “FORWARD” position, while
the machine is running. To change the rotational direction, turn the Switch to its
“OFF” position. Wait until the machine completely stops. Then, change the rota-
tional direction. (See Figure B, and Assy. Diagram.)
9. After testing the machine in Forward and Reverse position, evaluate the ma-
chine’s operation; check for loose or damaged parts, wobbling of the chuck or
any other unusual situation. If the machine appears to be operating normally, the
Micro Mill/Drill Machine is ready to use.
10. Once the work is completed, make sure to turn the Switch (part #125) to its “OFF”
position. Wait until the machine has completely stopped. Unplug the Micro Mill/Drill
Machine from its electrical power source. Remove the workpiece. And re m o v e
the drill bit/cutting tool.