


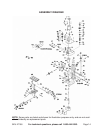
Page 7SKU 47158
For technical questions, please call 1-800-444-3353.
2. NOTE: When mounting the Micro Mill/Drill Machine on a workbench, you will
need four 3/8” diameter bolts of appropriate length, four lock washers, and four
nuts (not provided).
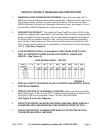
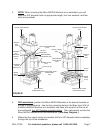
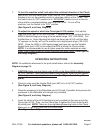
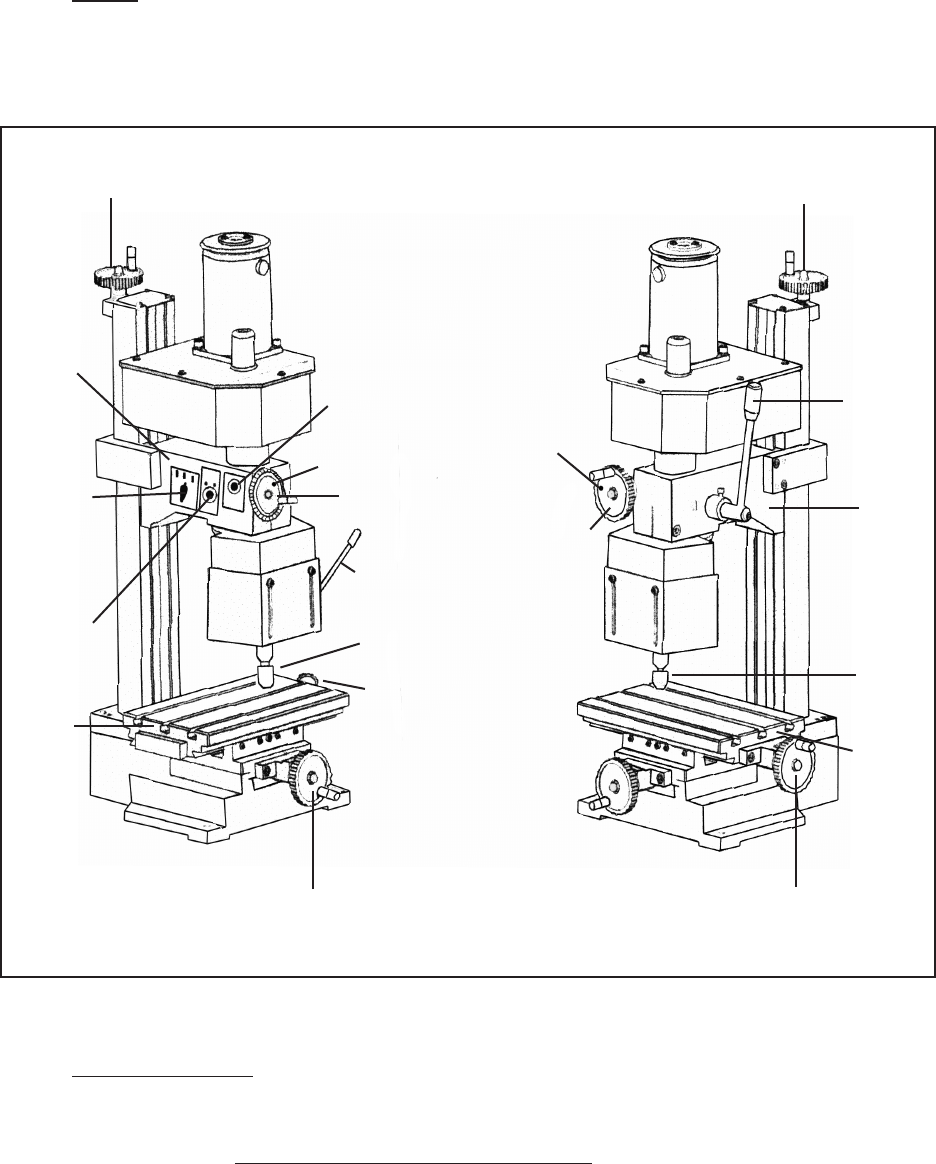
LIFTING HAND WHEEL
(#97)
SPINDLE
BOX
(#24)
FORWARD
OFF
REVERSE
SWITCH
(#125)
VARIABLE
SPEED
KNOB (#122)
WORK
TABLE
(#105)
CROSS FEED
HAND WHEEL (#97)
HIGH/LOW SPEED KNOB
(#124)
CLUTCH
LEVER (#65)
FINE FEEDING
HAND WHEEL (#97)
HANDLE SHAFT
(#87)
LONGITUDINAL FEED
HAND WHEEL
(#97)
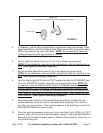
CLUTCH LEVER
(#65)
FINE FEEDING
HAND WHEEL
(#97)
LIFTING HAND WHEEL
(#97)
HANDLE
SHAFT
(#87)
SPINDLE
BOX
(#24)
CHUCK
(#132)
WORK
TABLE
(#105)
LONGITUDINAL FEED
HAND WHEEL (#97)
CHUCK (#132)
FIGURE B
3. With assistance, position the Micro Mill/Drill Machine in the desired location on
the top of the workbench. Use the four mounting holes in the Base (part #74) of
the Micro Mill/Drill Machine as a template, and trace with a pencil on the top of
the workbench four 3/8” diameter mounting holes . Then, temporarily remove the
Micro Mill/Drill Machine from the workbench. (See Assy. Diagram.)
4. Where the four pencil marks are located, drill four 3/8” diameter holes completely
through the top of the workbench.