


For technical questions, please call 1-800-444-3353;
Troubleshooting section at end of manual.
Page 12SKU 55167
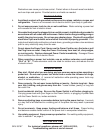
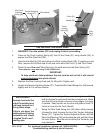
INSTALLING THE WIRE REEL
1. WARNING! Turn the welder OFF and unplug it before proceeding.
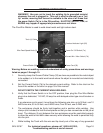
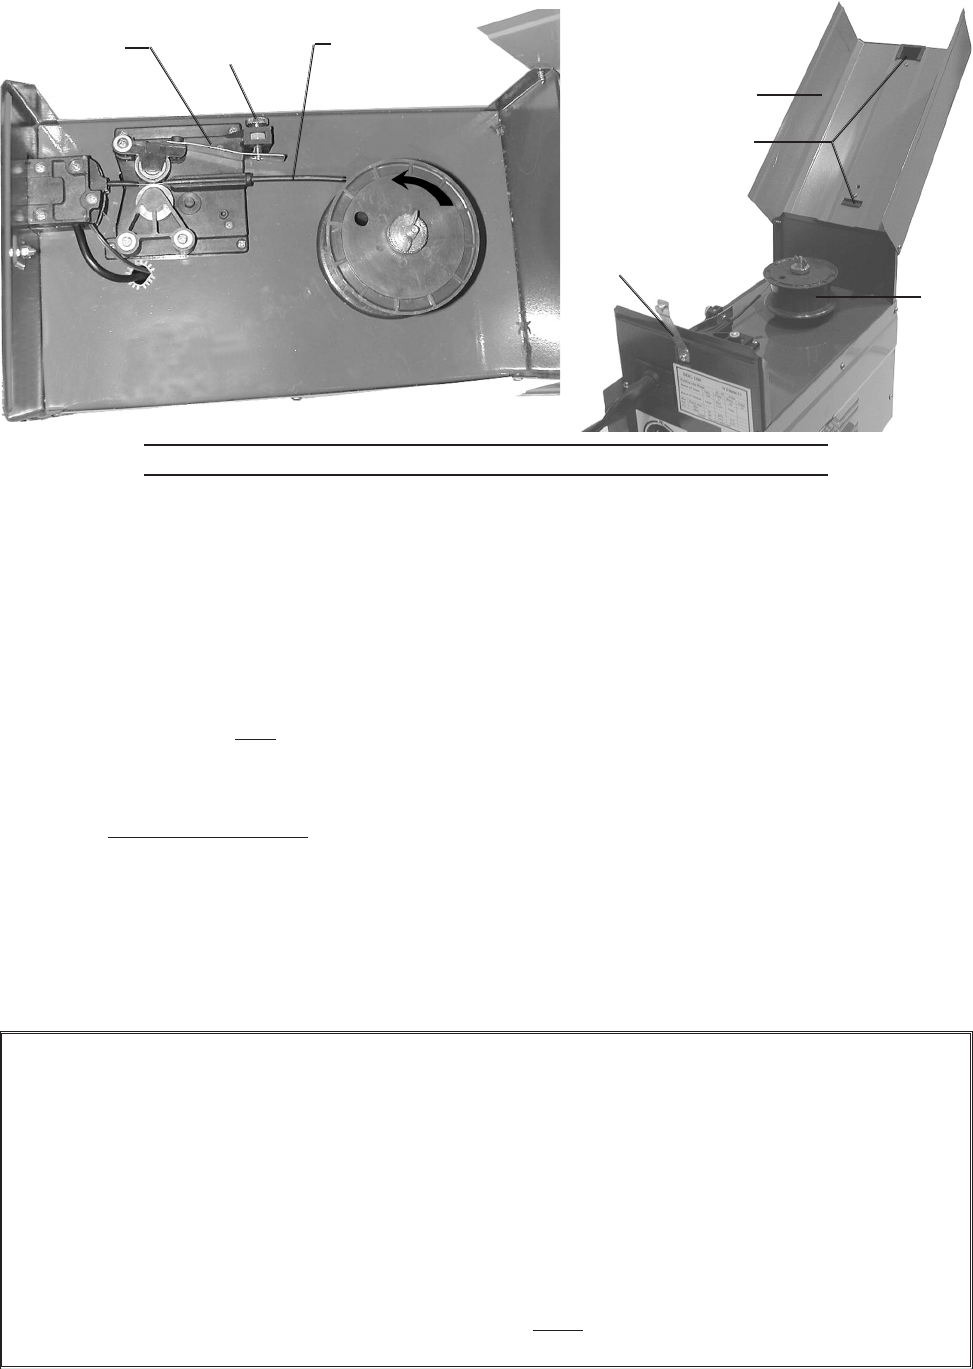
2. Press on the Cover Locking Spring (8), then lift the Cover (31) using Handle (30), to
expose the Wire Feed Unit (23).
3. Unscrew the Wing Nut (25) and remove the Reel Locking Knob (26). If replacing an old
Reel, remove the old Reel and all old wire from within the Torch (1) and Torch cable.
4. Place the new flux core* Wire Reel over the shaft and onto the Reel Spring (24).
*This welder can only weld using FLUX-CORED wire.
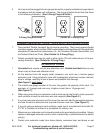
IMPORTANT:
To help avoid wire feed problems, the reel must be set so that it will unwind
counterclockwise (see photo above).
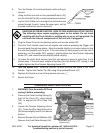
5. Replace the Reel Locking Knob and the Wing Nut. Tighten well.
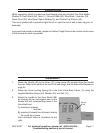
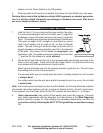
6. Loosen the Tension Adjusting Screw (37). Press the Wire Feed Swing Arm (36) forward
slightly and lift it to remove tension.
Wire Sheath
Wire Feed
Adjusting
Spring (36)
Tension Adjusting
Screw (37)
Cover
Locking
Spring (8)
Cover (31)
Handle (30)
Wire
Reel
(27)
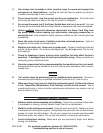
IMPORTANT:
Securely hold onto the
end of the welding wire
and keep tension on it
during these steps.
If this is not done, the
welding wire will spring
backwards and create
a tangled “bird’s nest”,
wasting wire.
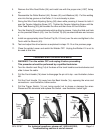
7. Hold the wire securely while you cut enough wire off the
end of the spool to remove all bent and crimped wire. Make
sure that the cut end has no burrs or sharp edges, cut again
if needed. Keep tension on the wire and guide at least 12
inches of wire into the Torch Sheath.
8. Swing the Wire Feed Swing Arm (36) down while pressing
it forward to latch it across the tip of the Tension Adjusting
Screw (37). Tighten the Tension Adjusting Screw until the
Wire Feed Bearing (35) just touches the wire and then three
full turns farther. After the wire is held by the Tensioner, you
may release it.